Toolpack:Creating an MTP2 Configuration D
From TBwiki
(Difference between revisions)
m |
|||
| Line 1: | Line 1: | ||
| − | === '''''Applies to version(s): v2.9, | + | === '''''Applies to version(s): v2.9, v2.10''''' === |
{{DISPLAYTITLE:Creating an MTP2 Configuration}} | {{DISPLAYTITLE:Creating an MTP2 Configuration}} | ||
Message Transfer Part Level 2 ([[MTP2_Layer|MTP2]]) provides the OSI data link layer functionality and is a service provider for the [[MTP3_Layer|MTP3 link layer]]. | Message Transfer Part Level 2 ([[MTP2_Layer|MTP2]]) provides the OSI data link layer functionality and is a service provider for the [[MTP3_Layer|MTP3 link layer]]. | ||
Revision as of 10:41, 3 February 2017
Applies to version(s): v2.9, v2.10
Message Transfer Part Level 2 (MTP2) provides the OSI data link layer functionality and is a service provider for the MTP3 link layer.
To create an MTP2 configuration:
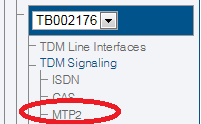
1- Click MTP2 in the navigation panel:
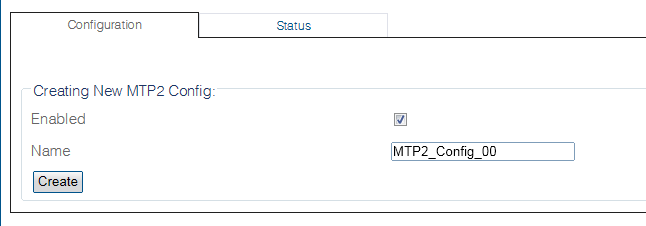
2- Create the new MTP2 configuration:
- Enter a name for the configuration
- Click Save
3- Verify that the "Mtp2Cfg was successfully updated" message appears, and that the Enabled box is checked
Path
/configurations/@[configuration_name]/hardware_units/@[hardware_name]/mtp2_stacks/@[mtp2_name]
Parameters (text)
/configurations/@[configuration_name]/hardware_units/@[hardware_name]/mtp2_stacks/@[mtp2_name]
enabled = true
name    = "@[mtp2_name]"

/configurations/@[configuration_name]/hardware_units/@[hardware_name]/mtp2_stacks/@[mtp2_name]/mtp2_links
Parameters (json)
{
  "enabled" : true,
  "name" : "@[mtp2_name]",
  "mtp2_links" : {
  }
}

