FreeSBC:Cloud:Azure Installation A
(→Create storage account) |
m (→Upload a Virtual Hard Disk (VHD) Image) |
||
| (29 intermediate revisions by 4 users not shown) | |||
| Line 1: | Line 1: | ||
| − | {{DISPLAYTITLE: | + | {{DISPLAYTITLE:ProSBC:Cloud:Azure Installation}} |
| − | + | This page provides installation and configuration information for people launching an instance of ''ProSBC'' on the Microsoft Azure infrastructure. | |
| − | + | ||
| − | + | ||
== Requirements == | == Requirements == | ||
| − | + | Minimum Azure cloud Requirements: | |
* 2 VCPUs | * 2 VCPUs | ||
* 4 GB RAM | * 4 GB RAM | ||
| − | * VM Size | + | * VM Size that has a Network interface with Advanced Network capability (Mellanox NIC interface) |
| − | Following | + | The Following table provides recommended VM sizes based on the number of sessions: |
{| cellpadding="5" border="1" class="wikitable" | {| cellpadding="5" border="1" class="wikitable" | ||
|- | |- | ||
| Line 66: | Line 64: | ||
<nowiki>*</nowiki>Preliminary estimated values | <nowiki>*</nowiki>Preliminary estimated values | ||
| − | == | + | == Retrieving the Image == |
| − | + | Order your ProSBC license and software at the [http://www2.telcobridges.com/ProSBCDownload ProSBC Download site] (upon completion of your order, a URL of the download image will be sent via email) | |
== Installation on Azure cloud == | == Installation on Azure cloud == | ||
| − | === | + | === ProSBC Azure Image === |
| − | A virtual machine image is a single file that contains a virtual disk that has a bootable operating system installed on it. Images are used to create virtual machine instances | + | A virtual machine image is a single file that contains a virtual disk that has a bootable operating system installed on it. Images are used to create virtual machine instances in the cloud. |
| − | + | The following sections describe how to upload the latest ProSBC image to your Microsoft Azure account and launch a virtual machine instance running the ProSBC software. | |
| − | === Get a | + | === Get a Storage Account === |
| − | + | You will need a blob container in your Azure storage account. This blob container is required to upload and store a ProSBC VM image. You can either use an existing storage account or create a new one, but make sure that the storage account location matches the location where you plan to create and run your VM. | |
| + | |||
| + | ==== Create Resource Group ==== | ||
| + | If you need to create a storage account to upload the VM image, then you will need a resource group that matches the location where you plan to create and run your VM. | ||
| + | If required, create a resource group as follows: | ||
| − | |||
| − | |||
*Log in to the dashboard. | *Log in to the dashboard. | ||
| − | *Select 'Resource groups' | + | *Select 'Resource groups'. |
| − | *From 'Resource groups' | + | *From 'Resource groups', click 'Add' item. |
*The 'Create a resource group' dialog box appears. | *The 'Create a resource group' dialog box appears. | ||
| − | *Provide a name | + | *Provide a name for the resource group. |
| − | *Select the appropriate resource group location | + | *Select the appropriate resource group location. This is where you will be creating the VM. |
| − | *Click | + | *Click 'Review + Create'. |
[[File:Az_resource_groups.png|850px]] | [[File:Az_resource_groups.png|850px]] | ||
| − | *Wait for completion of resource group creation before proceeding with | + | *Wait for completion of the resource group creation before proceeding with the next steps. |
| − | ==== Create | + | ==== Create Storage Account ==== |
| − | + | If you require a storage account, do the following: | |
*Log in to the dashboard. | *Log in to the dashboard. | ||
| − | *Select 'Storage accounts' | + | *Select 'Storage accounts'. |
| − | *From 'Storage accounts' | + | *From 'Storage accounts', click 'Add' item. |
*The 'Create a storage account' dialog box appears. | *The 'Create a storage account' dialog box appears. | ||
*Select the appropriate resource group. | *Select the appropriate resource group. | ||
| − | *Provide a name | + | *Provide a name for the storage account. |
| − | *Select the appropriate storage account location | + | *Select the appropriate storage account location. This is where you will be creating the VM. |
*For the other parameters, consult https://docs.microsoft.com/en-us/azure for more details. | *For the other parameters, consult https://docs.microsoft.com/en-us/azure for more details. | ||
| − | *Click | + | *Click 'Review + Create'. |
[[File:Az_storage_accounts.png|850px]] | [[File:Az_storage_accounts.png|850px]] | ||
| − | *Wait for completion of storage account creation before proceeding with | + | *Wait for completion of storage account creation before proceeding with the next steps. |
| − | ==== Create | + | ==== Create Storage Blob Container ==== |
| − | + | If you require a blob container, do the following: | |
*Log in to the dashboard. | *Log in to the dashboard. | ||
| − | * | + | *Click 'Storage accounts'. |
| − | * | + | *Select a storage account item to add the blob container. |
| − | *Click | + | *Click Blob Services button. |
| − | [[File:Az_storage_blob_container1.png| | + | [[File:Az_storage_blob_container1.png|850px]] |
*From 'Blobs' top menu, click 'Container' item. | *From 'Blobs' top menu, click 'Container' item. | ||
*The 'Blob container' dialog box appears. | *The 'Blob container' dialog box appears. | ||
| − | *Provide a name | + | *Provide a name for this blob container. |
*For the other parameters, consult https://docs.microsoft.com/en-us/azure for more details. | *For the other parameters, consult https://docs.microsoft.com/en-us/azure for more details. | ||
| − | *Click | + | *Click 'Ok'. |
| − | [[File:Az_storage_blob_container2.png| | + | [[File:Az_storage_blob_container2.png|850px]] |
| − | *Wait for completion of storage blob container before proceeding with | + | *Wait for completion of storage blob container before proceeding with the next steps. |
=== Upload a Virtual Hard Disk (VHD) Image === | === Upload a Virtual Hard Disk (VHD) Image === | ||
| − | Follow this procedure to upload the | + | Follow this procedure to upload the ProSBC image to a storage blob container: |
| − | *Before being able to upload the | + | *Before being able to upload the ProSbc image to the storage blob container, you must uncompress (tar.gz) the ProSBC image locally on your PC. You will require at least 40 GB of free space to uncompress the image. |
*Log in to the dashboard. | *Log in to the dashboard. | ||
| − | * | + | *Click'Storage accounts'. |
*Select the appropriate 'storage account' then 'Blobs' container. | *Select the appropriate 'storage account' then 'Blobs' container. | ||
| − | [[File:Az_upload_image1.png| | + | [[File:Az_upload_image1.png|850px]] |
*From the 'Blobs' container top menu, Click 'Upload' menu item. | *From the 'Blobs' container top menu, Click 'Upload' menu item. | ||
| Line 133: | Line 133: | ||
*Select the Virtual Hard Disk image (freesbc_azure.vhd) to upload from your local disk image location. | *Select the Virtual Hard Disk image (freesbc_azure.vhd) to upload from your local disk image location. | ||
*Click 'Upload' button. | *Click 'Upload' button. | ||
| − | [[File:Az_upload_image2.png| | + | [[File:Az_upload_image2.png|850px]] |
| − | *Wait until upload completion before proceeding with | + | *Wait until upload completion before proceeding with the next steps. This operation will take a long period of time (40GB to upload). |
| − | === Create a VM Image from the | + | === Create a VM Image from the ProSBC storage blob === |
Follow this procedure to create a VM image from a storage blob: | Follow this procedure to create a VM image from a storage blob: | ||
*Log in to the dashboard. | *Log in to the dashboard. | ||
| − | *Select | + | *Select 'Create a resource'. |
*The 'Create resource' dialog box appears. | *The 'Create resource' dialog box appears. | ||
*Type 'image' in the search text box. | *Type 'image' in the search text box. | ||
*A list of suggested items appears. | *A list of suggested items appears. | ||
| − | *Click ' | + | *Click 'Image' item. |
[[File:az_create_vm_image1.png]] | [[File:az_create_vm_image1.png]] | ||
*The 'Create image' dialog box appears. | *The 'Create image' dialog box appears. | ||
| − | *Click 'Create' | + | *Click 'Create'. |
[[File:az_create_vm_image2.png]] | [[File:az_create_vm_image2.png]] | ||
| Line 154: | Line 154: | ||
*Select the appropriate location. | *Select the appropriate location. | ||
*Click on 'Linux' button for the OS type. | *Click on 'Linux' button for the OS type. | ||
| − | *Browse through storage accounts to select the | + | *Browse through storage accounts to select the ProSBC blob. |
| − | *Click 'Select' button to complete | + | *Click 'Select' button to complete ProSBC blob selection. |
*For the other parameters, consult https://docs.microsoft.com/en-us/azure for more details. | *For the other parameters, consult https://docs.microsoft.com/en-us/azure for more details. | ||
*Click 'Create' button. | *Click 'Create' button. | ||
| − | [[File:az_create_vm_image3.png| | + | [[File:az_create_vm_image3.png|850px]] |
*Wait until create completion before proceeding with following steps. | *Wait until create completion before proceeding with following steps. | ||
=== Create a Virtual Network === | === Create a Virtual Network === | ||
| − | + | If not already available, follow this procedure to create a Virtual Network: | |
*Log in to the dashboard. | *Log in to the dashboard. | ||
| − | *Select | + | *Select 'Virtual networks'. |
*The 'Virtual networks' dialog box appears. | *The 'Virtual networks' dialog box appears. | ||
*From 'Virtual networks' top menu, click 'Add' item. | *From 'Virtual networks' top menu, click 'Add' item. | ||
*The 'Create a virtual network' dialog box appears. | *The 'Create a virtual network' dialog box appears. | ||
*Provide a virtual network name. | *Provide a virtual network name. | ||
| − | *Provide virtual network's address range in CIDR notation. | + | *Provide the virtual network's address range in CIDR notation. |
*Select appropriate resource group. | *Select appropriate resource group. | ||
*Select appropriate location. | *Select appropriate location. | ||
| Line 178: | Line 178: | ||
[[File:az_create_virtual_network.png|700px]] | [[File:az_create_virtual_network.png|700px]] | ||
| − | *Wait until create completion before proceeding with | + | *Wait until create completion before proceeding with the next steps. |
| − | === '''Instantiate a | + | === '''Instantiate a ProSBC''' === |
| − | Follow this procedure to create a | + | Follow this procedure to create a ProSBC instance: |
*Log in to the dashboard. | *Log in to the dashboard. | ||
| − | *Select | + | *Select 'Virtual machines'. |
| + | *The 'Virtual machines' dialog box appears. | ||
| + | *From 'Virtual machines' top menu, click 'Add' item. | ||
*The 'Create a virtual machine' dialog box appears. | *The 'Create a virtual machine' dialog box appears. | ||
*Select the appropriate resource group. | *Select the appropriate resource group. | ||
*Provide a virtual machine name. | *Provide a virtual machine name. | ||
| − | *Select the appropriate | + | *Select the appropriate region. This is where you will be creating the VM. |
| − | *Browse VM images to select appropriate | + | *Browse VM images to select the appropriate ProSBC VM image. |
*Select VM size according to expected performace. | *Select VM size according to expected performace. | ||
| − | *Select 'SSH public key' option as Authentification type. | + | *Select 'SSH public key' option as the Authentification type. |
*Type 'centos' as SSH Authentification Username. | *Type 'centos' as SSH Authentification Username. | ||
*Provide a SSH public key as SSH Authentification. | *Provide a SSH public key as SSH Authentification. | ||
| − | *Click | + | *Click 'Next:Disk>'. |
| − | [[File:az_create_vm1.png| | + | [[File:az_create_vm1.png|750px]] |
*The Disks dialog box appears. | *The Disks dialog box appears. | ||
*Select the appropriate 'OS disk type' to support your workload or scenario. | *Select the appropriate 'OS disk type' to support your workload or scenario. | ||
| − | *Click | + | *Click 'Next:Networking>'. |
[[File:az_create_vm2.png|700px]] | [[File:az_create_vm2.png|700px]] | ||
*Select the appropriate Virtual network. | *Select the appropriate Virtual network. | ||
| − | *For the other parameters of this page and following pages, consult https://docs.microsoft.com/en-us/azure for more details. | + | *For the other parameters of this page and the following pages, consult https://docs.microsoft.com/en-us/azure for more details. |
| − | *Click | + | *Click 'Next:Review + create>'. |
[[File:az_create_vm3.png|700px]] | [[File:az_create_vm3.png|700px]] | ||
| − | *Wait until create completes before proceeding with following steps. | + | *Wait until create completes before proceeding with the following steps. |
| − | ==== Add | + | ==== Add Inbound Security Rules ==== |
Follow this procedure to add inbound security rules: | Follow this procedure to add inbound security rules: | ||
*Log in to the dashboard. | *Log in to the dashboard. | ||
| − | *Select | + | *Select 'Virtual machines'. |
*The 'Virtual machines' list dialog box appears. | *The 'Virtual machines' list dialog box appears. | ||
*Select the appropriate virtual machine to add inbound security rules. | *Select the appropriate virtual machine to add inbound security rules. | ||
| Line 217: | Line 219: | ||
*Select 'Networking' item from the virtual machine 'Settings' section. | *Select 'Networking' item from the virtual machine 'Settings' section. | ||
*Click the 'Add inbound port rule' button. | *Click the 'Add inbound port rule' button. | ||
| − | [[File:az_add_inbound_port_rule1.png| | + | [[File:az_add_inbound_port_rule1.png|850px]] |
*The 'Add inbound security rule' dialog box appears. | *The 'Add inbound security rule' dialog box appears. | ||
| − | *Fill the different fields | + | *Fill the different fields in accordance with the expected VM accessibility from public network. |
| + | *The security rules must at least allow access to the VM through ports 22 and 12358 for SSH and Web Portal management access. | ||
| + | *The security rules must also allow access to the VM through other ports (i.e. 5060) for signaling and RTP access (ports depend on your system configuration). | ||
*Consult https://docs.microsoft.com/en-us/azure for more details. | *Consult https://docs.microsoft.com/en-us/azure for more details. | ||
| − | *Click | + | *Click 'Add' to create the inbound security rule. |
| − | [[File:az_add_inbound_port_rule2.png| | + | [[File:az_add_inbound_port_rule2.png|850px]] |
==== Advanced Networking ==== | ==== Advanced Networking ==== | ||
| − | The Azure GUI | + | The Azure GUI does not allow the enabling of the 'Advanced Networking' when creating the VM from a custom image. You must use Azure CLI to do so. Follow this procedure to enable 'Advanced Networking' on a networking interface: |
*Log in to the dashboard. | *Log in to the dashboard. | ||
| − | *Select | + | *Select 'Virtual machines'. |
*The 'Virtual machines' list dialog box appears. | *The 'Virtual machines' list dialog box appears. | ||
*Select the appropriate virtual machine. | *Select the appropriate virtual machine. | ||
*The 'Virtual machine' dialog box appears. | *The 'Virtual machine' dialog box appears. | ||
*Select 'Networking' item from the virtual machine 'Settings' section. | *Select 'Networking' item from the virtual machine 'Settings' section. | ||
| − | *Copy to clipboard the network interface name to modify ' | + | *Copy to the clipboard the network interface name to modify the 'Accelerated Networking' setting. |
| − | [[File:az_advanced_networking1.png| | + | [[File:az_advanced_networking1.png|850px]] |
| − | *Open a shell command prompt which is Azure CLI capable (consult https://docs.microsoft.com/en-us/azure to install the Azure CLI). | + | *Open a shell command prompt, which is Azure CLI capable (consult https://docs.microsoft.com/en-us/azure to install the Azure CLI). |
| − | *Enter following command using the | + | *Enter the following command, using the correct network interface name and resource group, and press enter: |
az network nic update --name azure-1if-2801 --resource-group sw_group --accelerated-networking true | az network nic update --name azure-1if-2801 --resource-group sw_group --accelerated-networking true | ||
| − | *The Azure CLI command output will look like following: | + | *The Azure CLI command output will look like the following: |
[[File:az_advanced_networking2.png|700px]] | [[File:az_advanced_networking2.png|700px]] | ||
| − | *It is required to | + | *Rebooting will NOT activate the 'Accelarated Networking' on the VM network interface. It is required to do the following operations to complete 'Accelarated Networking' activation: |
| + | **First, 'Stop' the virtual machine (This will take some time to stop the virtual machine). | ||
| + | **Then, 'Start' the virtual machine. | ||
| − | == Accessing the | + | == Accessing the ProSBC == |
| − | ==== | + | ==== ProSBC SSH Access ==== |
| − | + | By default, there is no root password. You will need to SSH on to the ProSBC using an SSH private key matching the public provided in the '''SSH public key''' when [[#Instantiate a FreeSBC]] instance. Log in using ''centos'' as username. | |
| − | For example, if your | + | For example, if your ProSBC management IP is 192.168.178.30: |
> ssh centos@192.168.178.30 | > ssh centos@192.168.178.30 | ||
ECDSA key fingerprint is 5d:94:a1:93:0f:a4:7a:5d:41:cc:29:49:79:5a:58:f3. | ECDSA key fingerprint is 5d:94:a1:93:0f:a4:7a:5d:41:cc:29:49:79:5a:58:f3. | ||
| Line 258: | Line 264: | ||
[centos@freesbc ~]$ | [centos@freesbc ~]$ | ||
| − | === Accessing the | + | === Accessing the ProSBC web portal === |
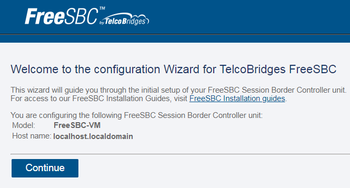
| − | * Open a web browser to the management IP of the | + | * Open a web browser to the management IP of the ProSBC, on port 12358. For example, if your server address is 192.168.178.30, the URL would be: <br/> http://192.168.178.30:12358 |
| − | * You should get to the | + | * You should get to the ProSBC Configuration Wizard <br/> [[File:FreeSBC_WebPortal_Configuration_wizard.png|350px]] |
| − | From | + | From this point, go to [[TSBC-SW:WebPortal:Initial Configuration|Web Portal Initial Configuration Guide]] to continue the installation. |
== Web Portal Initial Configuration == | == Web Portal Initial Configuration == | ||
| − | Click | + | Click the following link to pursue installation from the web portal: |
[[TSBC-SW:WebPortal:Initial Configuration]] | [[TSBC-SW:WebPortal:Initial Configuration]] | ||
Latest revision as of 15:33, 22 November 2019
This page provides installation and configuration information for people launching an instance of ProSBC on the Microsoft Azure infrastructure.
Contents
|
Requirements
Minimum Azure cloud Requirements:
- 2 VCPUs
- 4 GB RAM
- VM Size that has a Network interface with Advanced Network capability (Mellanox NIC interface)
The Following table provides recommended VM sizes based on the number of sessions:
| Sessions | VM Size | VCPUs | RAM | Advanced Networking Capable |
|---|---|---|---|---|
|
Up to 350* |
D2 v2, DS2_v2 |
2 |
7 Gb |
Yes |
|
350*-1000* |
D4 v3, D4s_v3 |
4 |
16 Gb |
Yes |
|
1000*-2000* |
D8 v3, D8s_v3 |
8 |
32 Gb |
Yes |
|
2000*-4000* |
D16 v3, D16s_v3 |
16 |
64 Gb |
Yes |
*Preliminary estimated values
Retrieving the Image
Order your ProSBC license and software at the ProSBC Download site (upon completion of your order, a URL of the download image will be sent via email)
Installation on Azure cloud
ProSBC Azure Image
A virtual machine image is a single file that contains a virtual disk that has a bootable operating system installed on it. Images are used to create virtual machine instances in the cloud.
The following sections describe how to upload the latest ProSBC image to your Microsoft Azure account and launch a virtual machine instance running the ProSBC software.
Get a Storage Account
You will need a blob container in your Azure storage account. This blob container is required to upload and store a ProSBC VM image. You can either use an existing storage account or create a new one, but make sure that the storage account location matches the location where you plan to create and run your VM.
Create Resource Group
If you need to create a storage account to upload the VM image, then you will need a resource group that matches the location where you plan to create and run your VM. If required, create a resource group as follows:
- Log in to the dashboard.
- Select 'Resource groups'.
- From 'Resource groups', click 'Add' item.
- The 'Create a resource group' dialog box appears.
- Provide a name for the resource group.
- Select the appropriate resource group location. This is where you will be creating the VM.
- Click 'Review + Create'.

- Wait for completion of the resource group creation before proceeding with the next steps.
Create Storage Account
If you require a storage account, do the following:
- Log in to the dashboard.
- Select 'Storage accounts'.
- From 'Storage accounts', click 'Add' item.
- The 'Create a storage account' dialog box appears.
- Select the appropriate resource group.
- Provide a name for the storage account.
- Select the appropriate storage account location. This is where you will be creating the VM.
- For the other parameters, consult https://docs.microsoft.com/en-us/azure for more details.
- Click 'Review + Create'.

- Wait for completion of storage account creation before proceeding with the next steps.
Create Storage Blob Container
If you require a blob container, do the following:
- Log in to the dashboard.
- Click 'Storage accounts'.
- Select a storage account item to add the blob container.
- Click Blob Services button.

- From 'Blobs' top menu, click 'Container' item.
- The 'Blob container' dialog box appears.
- Provide a name for this blob container.
- For the other parameters, consult https://docs.microsoft.com/en-us/azure for more details.
- Click 'Ok'.

- Wait for completion of storage blob container before proceeding with the next steps.
Upload a Virtual Hard Disk (VHD) Image
Follow this procedure to upload the ProSBC image to a storage blob container:
- Before being able to upload the ProSbc image to the storage blob container, you must uncompress (tar.gz) the ProSBC image locally on your PC. You will require at least 40 GB of free space to uncompress the image.
- Log in to the dashboard.
- Click'Storage accounts'.
- Select the appropriate 'storage account' then 'Blobs' container.

- From the 'Blobs' container top menu, Click 'Upload' menu item.
- The 'Upload blob' dialog box appears.
- Select the Virtual Hard Disk image (freesbc_azure.vhd) to upload from your local disk image location.
- Click 'Upload' button.

- Wait until upload completion before proceeding with the next steps. This operation will take a long period of time (40GB to upload).
Create a VM Image from the ProSBC storage blob
Follow this procedure to create a VM image from a storage blob:
- Log in to the dashboard.
- Select 'Create a resource'.
- The 'Create resource' dialog box appears.
- Type 'image' in the search text box.
- A list of suggested items appears.
- Click 'Image' item.

- The 'Create image' dialog box appears.
- Click 'Create'.

- Provide an image name.
- Select the appropriate resource group.
- Select the appropriate location.
- Click on 'Linux' button for the OS type.
- Browse through storage accounts to select the ProSBC blob.
- Click 'Select' button to complete ProSBC blob selection.
- For the other parameters, consult https://docs.microsoft.com/en-us/azure for more details.
- Click 'Create' button.

- Wait until create completion before proceeding with following steps.
Create a Virtual Network
If not already available, follow this procedure to create a Virtual Network:
- Log in to the dashboard.
- Select 'Virtual networks'.
- The 'Virtual networks' dialog box appears.
- From 'Virtual networks' top menu, click 'Add' item.
- The 'Create a virtual network' dialog box appears.
- Provide a virtual network name.
- Provide the virtual network's address range in CIDR notation.
- Select appropriate resource group.
- Select appropriate location.
- Provide subnet name and address range.
- For the other parameters, consult https://docs.microsoft.com/en-us/azure for more details.
- Click 'Create' button.

- Wait until create completion before proceeding with the next steps.
Instantiate a ProSBC
Follow this procedure to create a ProSBC instance:
- Log in to the dashboard.
- Select 'Virtual machines'.
- The 'Virtual machines' dialog box appears.
- From 'Virtual machines' top menu, click 'Add' item.
- The 'Create a virtual machine' dialog box appears.
- Select the appropriate resource group.
- Provide a virtual machine name.
- Select the appropriate region. This is where you will be creating the VM.
- Browse VM images to select the appropriate ProSBC VM image.
- Select VM size according to expected performace.
- Select 'SSH public key' option as the Authentification type.
- Type 'centos' as SSH Authentification Username.
- Provide a SSH public key as SSH Authentification.
- Click 'Next:Disk>'.

- The Disks dialog box appears.
- Select the appropriate 'OS disk type' to support your workload or scenario.
- Click 'Next:Networking>'.

- Select the appropriate Virtual network.
- For the other parameters of this page and the following pages, consult https://docs.microsoft.com/en-us/azure for more details.
- Click 'Next:Review + create>'.

- Wait until create completes before proceeding with the following steps.
Add Inbound Security Rules
Follow this procedure to add inbound security rules:
- Log in to the dashboard.
- Select 'Virtual machines'.
- The 'Virtual machines' list dialog box appears.
- Select the appropriate virtual machine to add inbound security rules.
- The virtual machine overview dialog box appears.
- Select 'Networking' item from the virtual machine 'Settings' section.
- Click the 'Add inbound port rule' button.

- The 'Add inbound security rule' dialog box appears.
- Fill the different fields in accordance with the expected VM accessibility from public network.
- The security rules must at least allow access to the VM through ports 22 and 12358 for SSH and Web Portal management access.
- The security rules must also allow access to the VM through other ports (i.e. 5060) for signaling and RTP access (ports depend on your system configuration).
- Consult https://docs.microsoft.com/en-us/azure for more details.
- Click 'Add' to create the inbound security rule.

Advanced Networking
The Azure GUI does not allow the enabling of the 'Advanced Networking' when creating the VM from a custom image. You must use Azure CLI to do so. Follow this procedure to enable 'Advanced Networking' on a networking interface:
- Log in to the dashboard.
- Select 'Virtual machines'.
- The 'Virtual machines' list dialog box appears.
- Select the appropriate virtual machine.
- The 'Virtual machine' dialog box appears.
- Select 'Networking' item from the virtual machine 'Settings' section.
- Copy to the clipboard the network interface name to modify the 'Accelerated Networking' setting.

- Open a shell command prompt, which is Azure CLI capable (consult https://docs.microsoft.com/en-us/azure to install the Azure CLI).
- Enter the following command, using the correct network interface name and resource group, and press enter:
az network nic update --name azure-1if-2801 --resource-group sw_group --accelerated-networking true
- The Azure CLI command output will look like the following:

- Rebooting will NOT activate the 'Accelarated Networking' on the VM network interface. It is required to do the following operations to complete 'Accelarated Networking' activation:
- First, 'Stop' the virtual machine (This will take some time to stop the virtual machine).
- Then, 'Start' the virtual machine.
Accessing the ProSBC
ProSBC SSH Access
By default, there is no root password. You will need to SSH on to the ProSBC using an SSH private key matching the public provided in the SSH public key when #Instantiate a FreeSBC instance. Log in using centos as username.
For example, if your ProSBC management IP is 192.168.178.30:
 > ssh centos@192.168.178.30
   ECDSA key fingerprint is 5d:94:a1:93:0f:a4:7a:5d:41:cc:29:49:79:5a:58:f3.
   Are you sure you want to continue connecting (yes/no)? yes
   Warning: Permanently added '192.168.178.30' (ECDSA) to the list of known hosts.

   CentOS-7-x86_64-Minimal-1511/112/190195:197392, Fri  7 Apr 17:41:46 EDT 2017
   [centos@freesbc ~]$
Accessing the ProSBC web portal
- Open a web browser to the management IP of the ProSBC, on port 12358. For example, if your server address is 192.168.178.30, the URL would be:
http://192.168.178.30:12358 - You should get to the ProSBC Configuration Wizard

From this point, go to Web Portal Initial Configuration Guide to continue the installation.
Web Portal Initial Configuration
Click the following link to pursue installation from the web portal: TSBC-SW:WebPortal:Initial Configuration