Toolpack:Adding M2PA Links A
From TBwiki
(Difference between revisions)
| Line 5: | Line 5: | ||
[[Image:Toolpack_v2.5_Create_M2PA_Link.png]] | [[Image:Toolpack_v2.5_Create_M2PA_Link.png]] | ||
| + | |||
2- Configure the new link: | 2- Configure the new link: | ||
| Line 27: | Line 28: | ||
[[Image:Toolpack_v2.5_M2PA_Link_Address.png]] | [[Image:Toolpack_v2.5_M2PA_Link_Address.png]] | ||
| + | |||
4- Verify that the address has been added to the list, and that the '''<i>(your address)</i> was successfully added''' message appears (ex.: here the address is 190.0.0.0) | 4- Verify that the address has been added to the list, and that the '''<i>(your address)</i> was successfully added''' message appears (ex.: here the address is 190.0.0.0) | ||
[[Image:Toolpack_v2.5_M2PA_Link_Address_2.png]] | [[Image:Toolpack_v2.5_M2PA_Link_Address_2.png]] | ||
Revision as of 14:10, 30 June 2010
Now that you have created an M2PA service access point (SAP), you must create a new M2PA link. This can be done from the M2PA SAP configuration window. To create an M2PA link:
1- Click Create new M2pa link in the M2PA SAP configuration window:
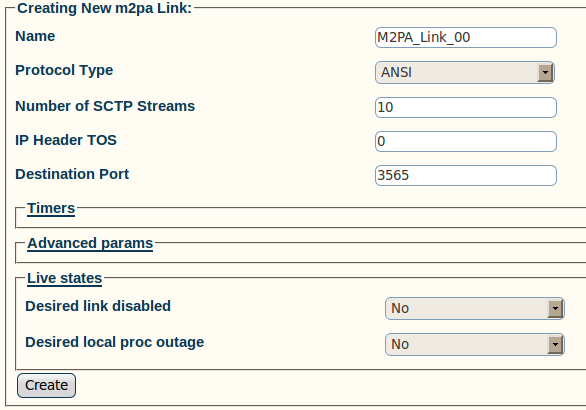
2- Configure the new link:
- Enter a name for the link
- Select a protocol type:
- Set other features, as needed:
- Number of SCTP Streams
- IP Header TOS
- Destination port (same value as the one configured on the destination side)
- Click Create
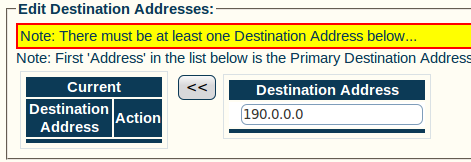
3- Enter a destination address in the appropriate box in the information panel:
- Click the "<<" button to add the destination address to the address list
4- Verify that the address has been added to the list, and that the (your address) was successfully added message appears (ex.: here the address is 190.0.0.0)


