Toolpack:Creating a N+1 Group A
From TBwiki
(Difference between revisions)
(→Applies to version v2.7) |
|||
| (4 intermediate revisions by 2 users not shown) | |||
| Line 2: | Line 2: | ||
{{DISPLAYTITLE:Creating an N+1 Group}} | {{DISPLAYTITLE:Creating an N+1 Group}} | ||
| − | + | Once the N+1 patch panel is created, you must create an N+1 group to assign each hardware unit to their correct position. | |
'''To create an N+1 Patch Panel:''' | '''To create an N+1 Patch Panel:''' | ||
| Line 9: | Line 9: | ||
| − | [[Image: | + | [[Image:N_Plus_One_0.png]] |
| Line 15: | Line 15: | ||
| − | [[Image: | + | [[Image:N_Plus_One_1.png]] |
| − | 3- | + | 3- Set the correct serial number of a unit to the correct patch panel port. |
| − | + | ||
| − | + | ||
| − | + | ||
| − | + | ||
* Click '''Create''' | * Click '''Create''' | ||
| − | [[Image: | + | [[Image:N_Plus_One_2.png]] |
| − | 4- Verify that the newly added N+1 patch panel appears in the '''N+1 | + | 4- Verify that the newly added N+1 patch panel appears in the '''N+1 Groups''' list. |
| − | [[Image: | + | [[Image:N_Plus_One_4.png]] |
Latest revision as of 09:18, 31 July 2013
Applies to version v2.7
Once the N+1 patch panel is created, you must create an N+1 group to assign each hardware unit to their correct position.
To create an N+1 Patch Panel:
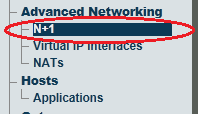
1- Click N+1 in the navigation panel
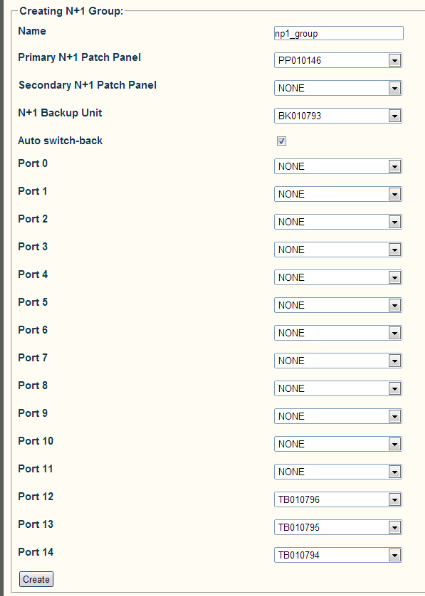
2- Click Create New N+1 Group
3- Set the correct serial number of a unit to the correct patch panel port.
- Click Create
4- Verify that the newly added N+1 patch panel appears in the N+1 Groups list.


