Toolpack:Restoring a Database Backup C
From TBwiki
(Difference between revisions)
| (13 intermediate revisions by 3 users not shown) | |||
| Line 1: | Line 1: | ||
| − | |||
{{DISPLAYTITLE:Restoring a Database}} | {{DISPLAYTITLE:Restoring a Database}} | ||
| + | {| class="wikitable" | ||
| + | |- | ||
| + | |rowspan="3"|This article applies to: | ||
| + | |'''Product''' | ||
| + | |'''Version''' | ||
| + | |- | ||
| + | |Tmedia | ||
| + | |2.8, 2.9, 2.10, 3.0, 3.2 | ||
| + | |- | ||
| + | |SBC | ||
| + | |3.0, 3.1 | ||
| + | |} | ||
The system configuration settings can be restored from a local or remote copy of a database. | The system configuration settings can be restored from a local or remote copy of a database. | ||
| + | |||
| + | '''Important Note''': A database backup from a newer major version should NEVER be imported to an older major version. | ||
| + | If you have done this, please refer to: | ||
| + | ** [[FN:19497|Procedure to recover a major upgrade after recovering database from newer version to an older version]] | ||
| + | |||
1- Click '''Backups''' in the navigation panel | 1- Click '''Backups''' in the navigation panel | ||
| Line 12: | Line 28: | ||
* Click '''Validate''' | * Click '''Validate''' | ||
| − | [[Image: | + | [[Image:DB_Recovery_Rel2.9_Validate.JPG]] |
| Line 18: | Line 34: | ||
* Click the '''Recover''' link to overwrite the current database and restore the backup file | * Click the '''Recover''' link to overwrite the current database and restore the backup file | ||
| − | [[Image: | + | [[Image:DB_Recovery_Rel2.9.JPG]] |
Latest revision as of 13:37, 13 November 2020
| This article applies to: | Product | Version |
| Tmedia | 2.8, 2.9, 2.10, 3.0, 3.2 | |
| SBC | 3.0, 3.1 |
The system configuration settings can be restored from a local or remote copy of a database.
 Important Note: A database backup from a newer major version should NEVER be imported to an older major version.
 If you have done this, please refer to:
 ** Procedure to recover a major upgrade after recovering database from newer version to an older version
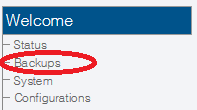
1- Click Backups in the navigation panel
2- Initially the Recover feature is disabled. The database must first be validated before it can be restored.
- Click Validate
3- After a few minutes, the web portal will return to an online status and if the backup validates successfully, the Recover link becomes active.
- Click the Recover link to overwrite the current database and restore the backup file
Note: You must activate the configuration to apply the changes.
The database files backups are stored here:
/lib/tb/toolpack/pkg/database_backups


