Toolpack:Host 1Plus1 Secondary A
m |
|||
| (13 intermediate revisions by one user not shown) | |||
| Line 1: | Line 1: | ||
| − | |||
{{DISPLAYTITLE:Setting the Role to a Secondary Unit in a 1+1 System}} | {{DISPLAYTITLE:Setting the Role to a Secondary Unit in a 1+1 System}} | ||
| − | + | {| class="wikitable" | |
| − | The first time that you connect to a gateway, the web portal will | + | |- |
| − | web portal configuration management tool. | + | |rowspan="2"|This article applies to: |
| + | |'''Product''' | ||
| + | |'''Version''' | ||
| + | |- | ||
| + | |Tmedia | ||
| + | |2.8, 2.9, 2.10, 3.0, 3.2 | ||
| + | |} | ||
| + | The first time that you connect to a gateway, the web portal setup wizard will be displayed and you will be asked to select how you would like to configure the role of the gateway. Your choices are standalone, primary, or secondary. Once the role configuration settings are applied, the gateway will start up and display the web portal configuration management tool. | ||
'''To configure the host role of the gateway as the secondary unit in a 1+1 system, do the following:''' | '''To configure the host role of the gateway as the secondary unit in a 1+1 system, do the following:''' | ||
| Line 18: | Line 24: | ||
| − | + | 3- Select '''The secondary unit''' and click '''Continue'''. | |
[[Image:HostRoleSecondary_2_A.png]] | [[Image:HostRoleSecondary_2_A.png]] | ||
| − | + | 4- If you need to change the default subnet address or subnet mask, click '''change internal subnets''' and proceed to step 4a, otherwise click '''Continue''' and go to step 5. | |
| + | |||
| + | [[Image:HostRoleSecondary_3_A.png]] | ||
| + | |||
| + | |||
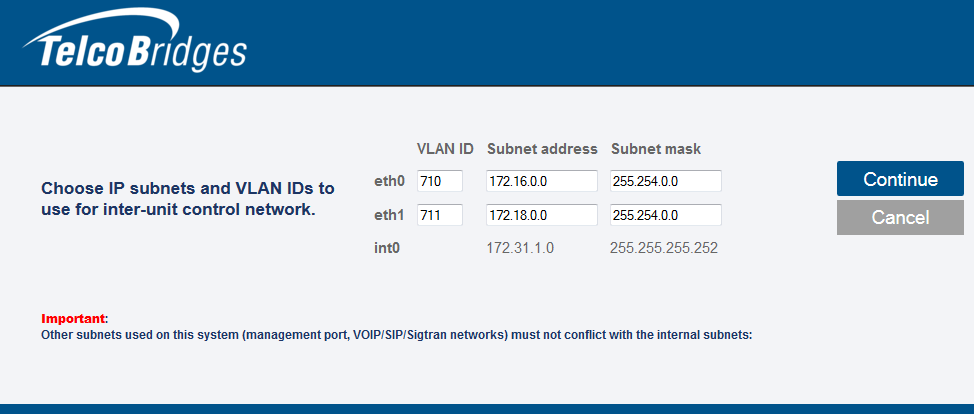
| + | 4a- Enter the subnet address and subnet mask for each VLAN ID and click '''Continue'''. | ||
| + | |||
| + | [[Image:HostRoleSecondary_4_A.png]] | ||
| + | |||
| + | |||
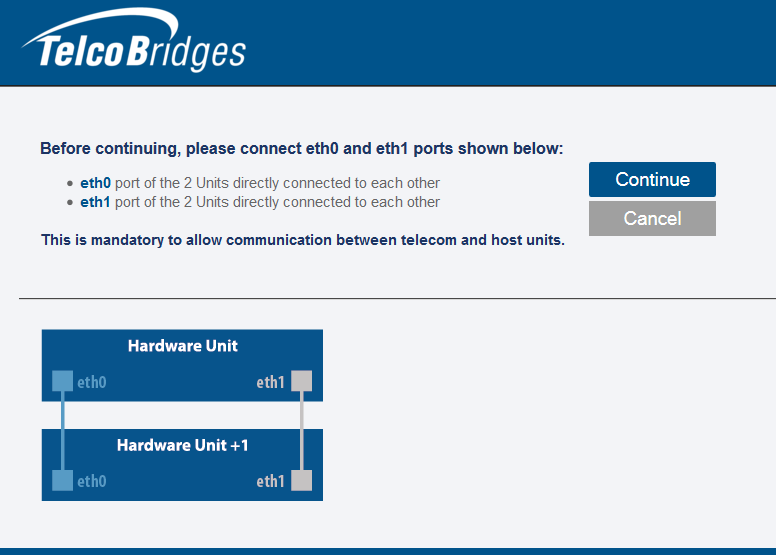
| + | 5- Follow the onscreen instructions and connect the two units together. When you have completed the connections, click '''Continue'''. | ||
| + | |||
| + | [[Image:HostRoleSecondary_5_A.png]] | ||
| + | |||
| + | |||
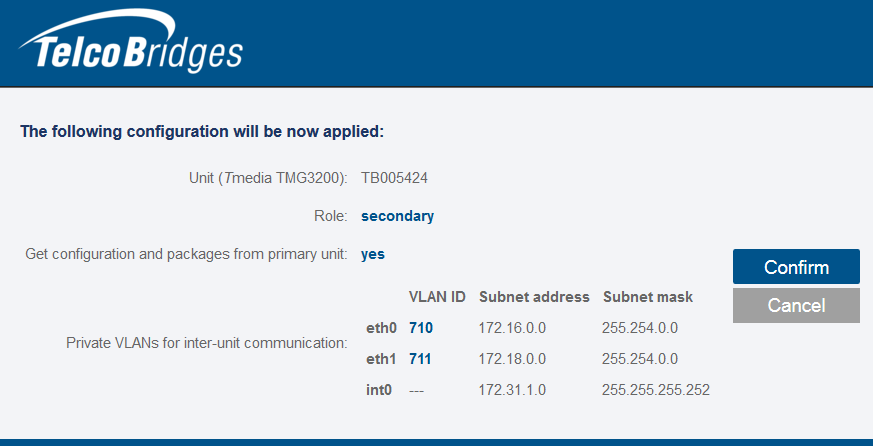
| + | 6- Once you are satisfied with your settings, click '''Confirm'''. | ||
| + | |||
| + | [[Image:HostRoleSecondary_6_A.png]] | ||
| + | |||
| + | |||
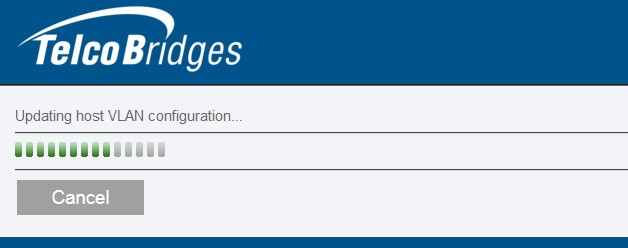
| + | Allow for the host role changes to take effect. | ||
| + | |||
| + | [[Image:HostRoleSecondary_7_A.png]] | ||
| + | |||
| + | |||
| + | 7- The Web Portal Log On page is displayed. | ||
* Enter the '''user name''' and '''password'''. | * Enter the '''user name''' and '''password'''. | ||
| − | [[Image: | + | [[Image:HostRoleSecondary_8_A.png]] |
Latest revision as of 09:05, 11 November 2020
| This article applies to: | Product | Version |
| Tmedia | 2.8, 2.9, 2.10, 3.0, 3.2 |
The first time that you connect to a gateway, the web portal setup wizard will be displayed and you will be asked to select how you would like to configure the role of the gateway. Your choices are standalone, primary, or secondary. Once the role configuration settings are applied, the gateway will start up and display the web portal configuration management tool.
To configure the host role of the gateway as the secondary unit in a 1+1 system, do the following:
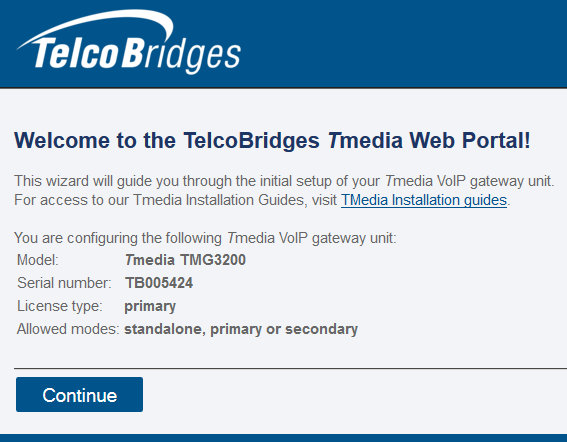
1- When the setup wizard is displayed, click Continue
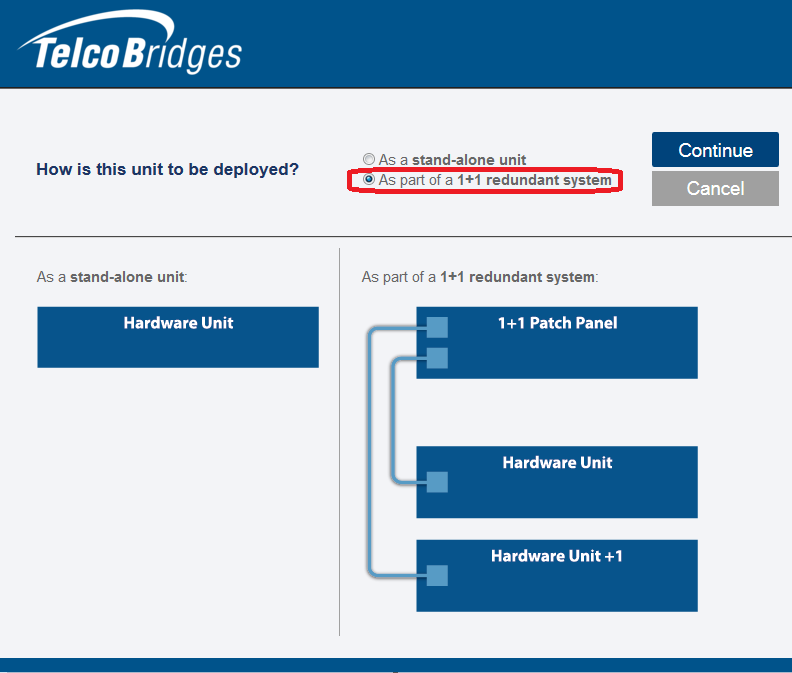
2- Select As part of a 1+1 redundant system and click Continue.
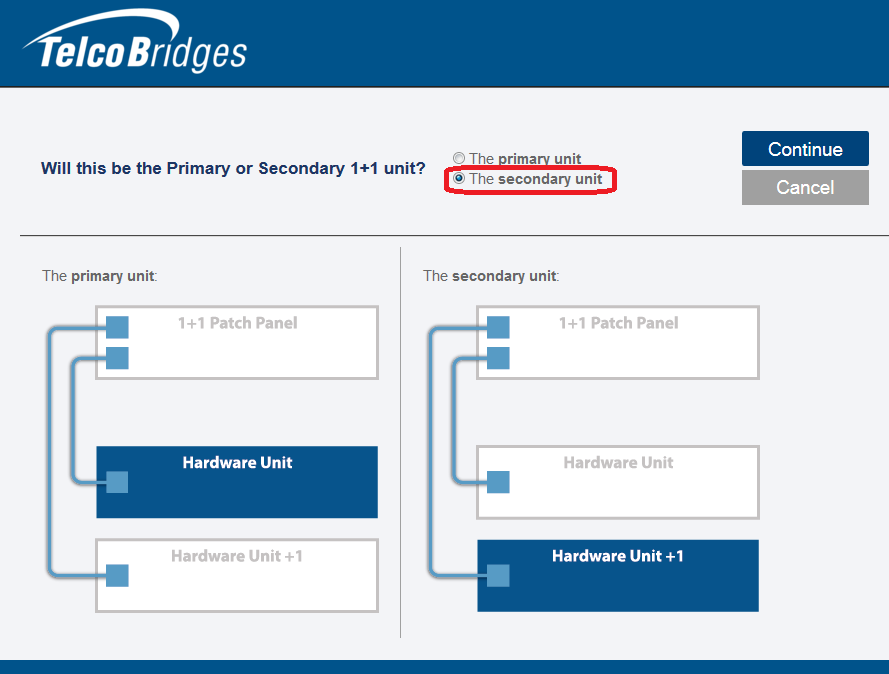
3- Select The secondary unit and click Continue.
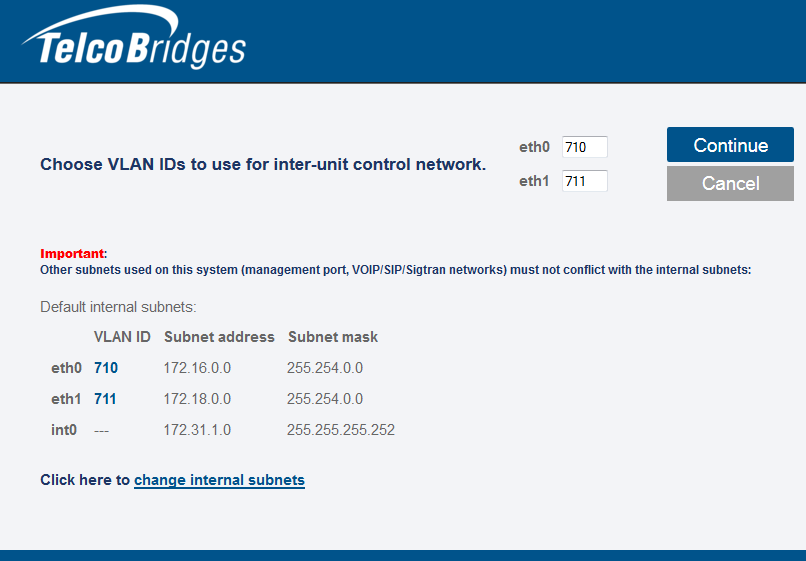
4- If you need to change the default subnet address or subnet mask, click change internal subnets and proceed to step 4a, otherwise click Continue and go to step 5.
4a- Enter the subnet address and subnet mask for each VLAN ID and click Continue.
5- Follow the onscreen instructions and connect the two units together. When you have completed the connections, click Continue.
6- Once you are satisfied with your settings, click Confirm.
Allow for the host role changes to take effect.
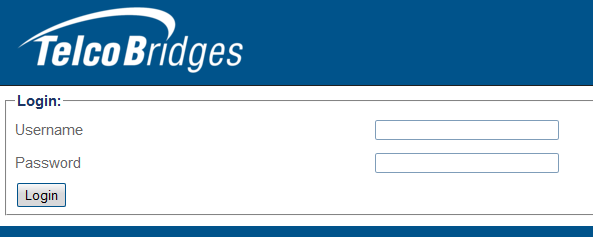
7- The Web Portal Log On page is displayed.
- Enter the user name and password.
