Toolpack:Add Digitmap Files C
From TBwiki
(Difference between revisions)
William Wong (Talk | contribs) (→Applies to version v2.8, v2.9, v2.10, v3.0) |
|||
| (2 intermediate revisions by one user not shown) | |||
| Line 1: | Line 1: | ||
| − | |||
{{DISPLAYTITLE:Add Digitmap Files to the System}} | {{DISPLAYTITLE:Add Digitmap Files to the System}} | ||
| + | {| class="wikitable" | ||
| + | |- | ||
| + | |rowspan="3"|This article applies to: | ||
| + | |'''Product''' | ||
| + | |'''Version''' | ||
| + | |- | ||
| + | |Tmedia | ||
| + | |2.8, 2.9, 2.10, 3.0, 3.2 | ||
| + | |- | ||
| + | |SBC | ||
| + | |3.0, 3.1 | ||
| + | |} | ||
| − | A Digitmap file | + | A Digitmap file is created using a comma separated value (CSV) format. Create a file with the desired Direct Inward Dialling (DID) numbers for the system. '''DO NOT''' put any spaces between commas and column names.<br> |
For example: | For example: | ||
<pre>called,calling,routeset_name | <pre>called,calling,routeset_name | ||
Latest revision as of 14:10, 10 December 2020
| This article applies to: | Product | Version |
| Tmedia | 2.8, 2.9, 2.10, 3.0, 3.2 | |
| SBC | 3.0, 3.1 |
A Digitmap file is created using a comma separated value (CSV) format. Create a file with the desired Direct Inward Dialling (DID) numbers for the system. DO NOT put any spaces between commas and column names.
For example:
called,calling,routeset_name
403200,,Calgary_AB
514201,,Montreal_Qc
514202,,Montreal_Qc
514203,,Montreal_Qc
To add Digitmap files to the system:
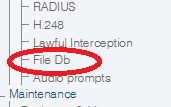
1- Click FileDB in the navigation panel
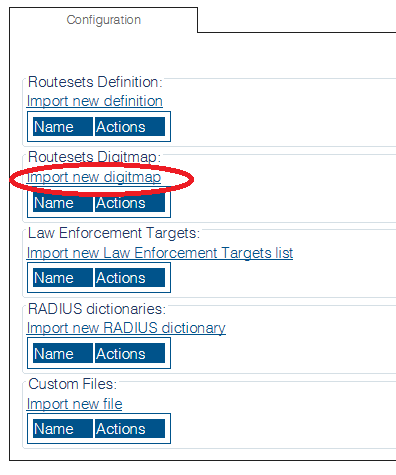
2- Click Import new digitmap
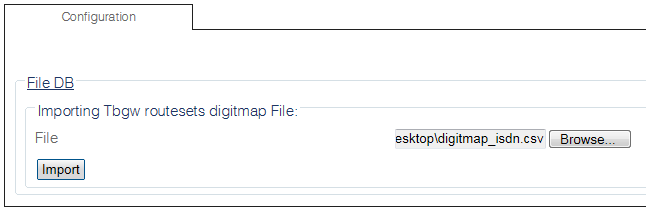
3- Click Browse and select the Digitmap that you wish to import.
- Click Import
4- The Digitmap files are displayed in the Routesets digitmap table.


