FreeSBC:3CX T38 Fax Configuration A
From TBwiki
(Difference between revisions)
(→3CX PBX Fax Server Configuration) |
(→ProSBC T38 Configuration) |
||
| (9 intermediate revisions by one user not shown) | |||
| Line 1: | Line 1: | ||
| − | {{DISPLAYTITLE:ProSBC | + | {{DISPLAYTITLE:ProSBC T38 Fax Configuration with 3CX}} |
| − | =Introduction= | + | ==Introduction== |
This document provides instructions on how to configure 3CX PBX Server with the ProSBC to receive T38 Faxes. | This document provides instructions on how to configure 3CX PBX Server with the ProSBC to receive T38 Faxes. | ||
Please visit the following link for more details about [https://www.3cx.com/docs/manual/fax-server/ Configuring Fax Server in 3CX PBX Server] | Please visit the following link for more details about [https://www.3cx.com/docs/manual/fax-server/ Configuring Fax Server in 3CX PBX Server] | ||
| − | =3CX PBX Fax Server Configuration= | + | ==3CX PBX Fax Server Configuration== |
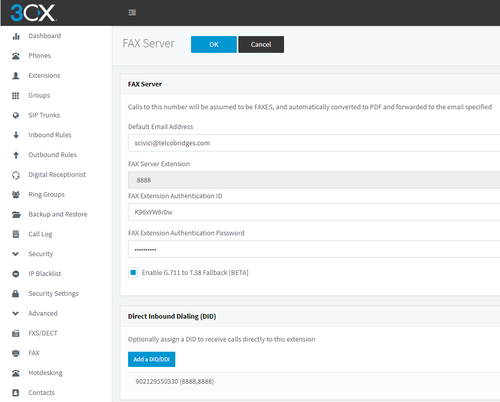
| − | + | 3CX Phone System includes a pre-configured fax extension (ext: 8888). This extension is used by the 3CX Fax Server for incoming fax calls, which will then be routed to an email address. | |
[[Image:3CX_FAX.png|500px]] | [[Image:3CX_FAX.png|500px]] | ||
| + | |||
| + | *In the 3CX Management Console, go to '''Settings > FAX Server'''. | ||
| + | *Enter an email address to forward the faxes received on this number. | ||
| + | *Select the fax extension that should receive incoming faxes. You can use the default built-in ‘8888’ extension. | ||
| + | *Assign one or more available DIDs to the fax server. | ||
| + | *Click '''OK''' to save. | ||
| + | |||
| + | ==ProSBC T38 Configuration== | ||
| + | '''To enable T.38:''' | ||
| + | |||
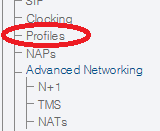
| + | 1. Select '''Profiles''' from the navigation menu. | ||
| + | |||
| + | [[Image:ConfigureFaxPassthrough_0.png]] | ||
| + | |||
| + | |||
| + | 2. Click '''Create New Profile''' | ||
| + | |||
| + | [[Image:ConfigureFaxPassthrough_1.png]] | ||
| + | |||
| + | |||
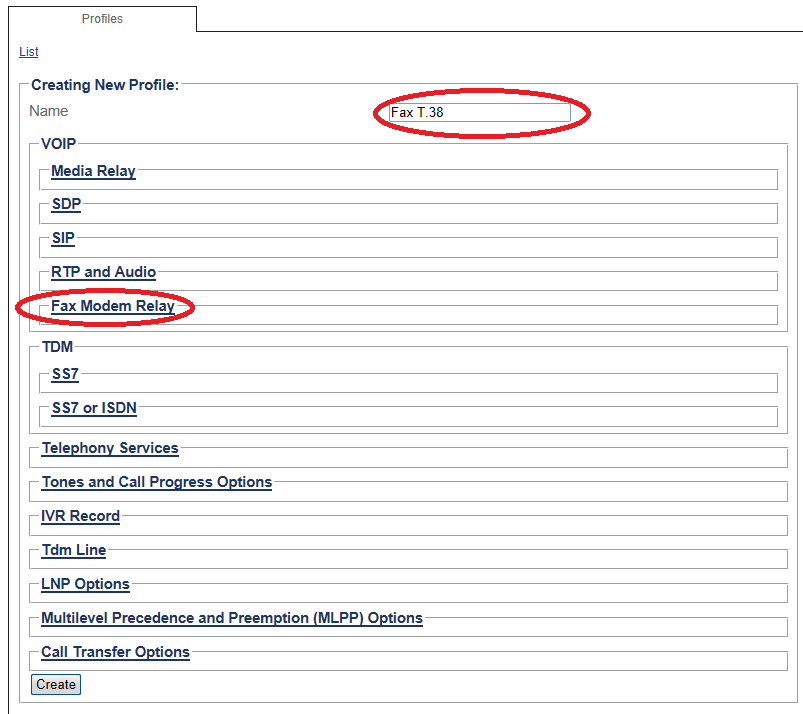
| + | 3. Enter a name for the Fax Profile. | ||
| + | * Click '''Fax/Modem Relay''' to expand the view. | ||
| + | |||
| + | [[Image:ConfigureFaxT38_0_A.png]] | ||
| + | |||
| + | 4. Configure the settings: | ||
| + | * Set '''Enable Fax/Modem Relay''' to enabled. | ||
| + | * Set '''Detection Mode''' to Standard. | ||
| + | * Set '''Relay Mode''' to T.38. | ||
| + | |||
| + | [[Image:ConfigureProSBCFaxT38_0_A.png]] | ||
| + | |||
| + | |||
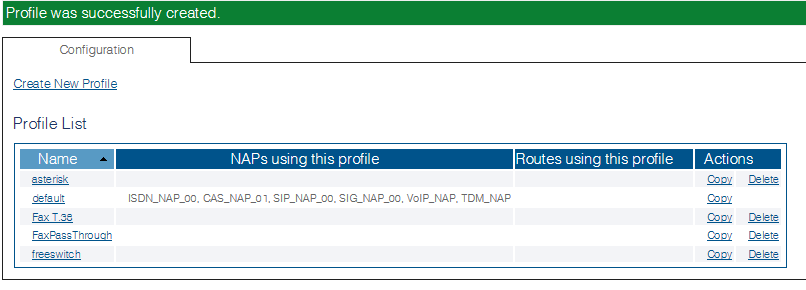
| + | 5. Verify that the '''Profile was successfully created''' message is displayed. | ||
| + | |||
| + | [[Image:ConfigureFaxT38_2.png]] | ||
Latest revision as of 08:02, 14 April 2020
Introduction
This document provides instructions on how to configure 3CX PBX Server with the ProSBC to receive T38 Faxes. Please visit the following link for more details about Configuring Fax Server in 3CX PBX Server
3CX PBX Fax Server Configuration
3CX Phone System includes a pre-configured fax extension (ext: 8888). This extension is used by the 3CX Fax Server for incoming fax calls, which will then be routed to an email address.
- In the 3CX Management Console, go to Settings > FAX Server.
- Enter an email address to forward the faxes received on this number.
- Select the fax extension that should receive incoming faxes. You can use the default built-in ‘8888’ extension.
- Assign one or more available DIDs to the fax server.
- Click OK to save.
ProSBC T38 Configuration
To enable T.38:
1. Select Profiles from the navigation menu.
2. Click Create New Profile
3. Enter a name for the Fax Profile.
- Click Fax/Modem Relay to expand the view.
4. Configure the settings:
- Set Enable Fax/Modem Relay to enabled.
- Set Detection Mode to Standard.
- Set Relay Mode to T.38.
5. Verify that the Profile was successfully created message is displayed.


