Toolpack:Configure TMG7800 Ethernet Bonding A
From TBwiki
(Difference between revisions)
(→Applies to version(s): v3.2) |
|||
| (2 intermediate revisions by one user not shown) | |||
| Line 1: | Line 1: | ||
| − | |||
{{DISPLAYTITLE:Configuring Ethernet Bonding}} | {{DISPLAYTITLE:Configuring Ethernet Bonding}} | ||
| + | {| class="wikitable" | ||
| + | |- | ||
| + | |rowspan="2"|This article applies to: | ||
| + | |'''Product''' | ||
| + | |'''Version''' | ||
| + | |- | ||
| + | |Tmedia | ||
| + | |3.2 | ||
| + | |} | ||
Ethernet Bonding enables two Ethernet ports to be used as bonding pair. This ensures for a reliability of service. If the active port becomes unusable the other port in the bonding pair is used to transport traffic. | Ethernet Bonding enables two Ethernet ports to be used as bonding pair. This ensures for a reliability of service. If the active port becomes unusable the other port in the bonding pair is used to transport traffic. | ||
| Line 7: | Line 15: | ||
1. Select '''Hosts''' from the navigation panel. <br> | 1. Select '''Hosts''' from the navigation panel. <br> | ||
| − | [[Image:ConfigureEthernetBonding_0.png]] <br> | + | [[Image:ConfigureEthernetBonding_0.png]] <br><br> |
2. Select a Host from the Hosts Configuration list.<br> | 2. Select a Host from the Hosts Configuration list.<br> | ||
| − | [[Image:ConfigureEthernetBonding_1.png]] <br> | + | [[Image:ConfigureEthernetBonding_1.png]] <br><br> |
3. Click the Status tab.<br> | 3. Click the Status tab.<br> | ||
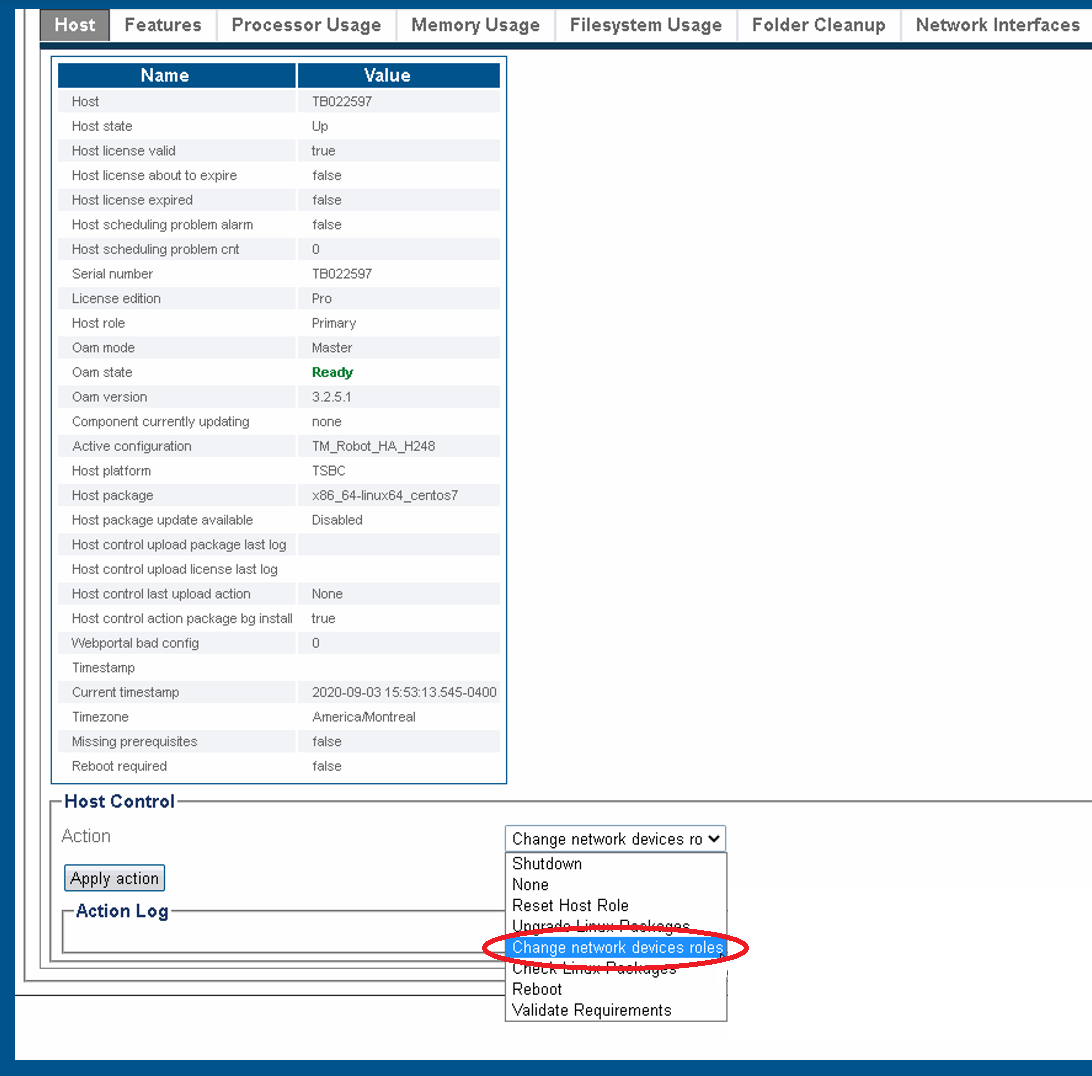
*Select '''Change Network Devices Role'''.<br> | *Select '''Change Network Devices Role'''.<br> | ||
| − | [[Image:ConfigureEthernetBonding_2.png]] <br> | + | [[Image:ConfigureEthernetBonding_2.png]] <br><br> |
4. Select '''Reset Host Role'''.<br> | 4. Select '''Reset Host Role'''.<br> | ||
| − | [[Image:ConfigureEthernetBonding_3.png]] <br> | + | [[Image:ConfigureEthernetBonding_3.png]] <br><br> |
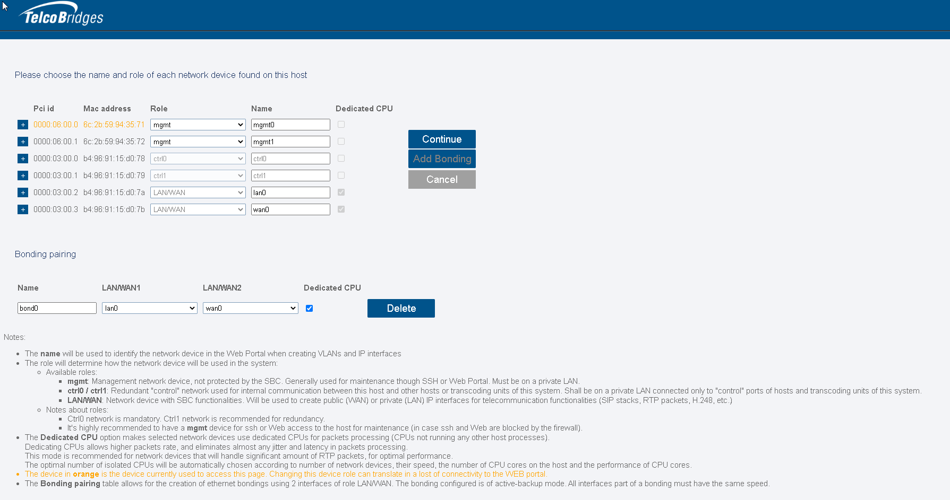
5. A Role Configuration window is displayed.<br> | 5. A Role Configuration window is displayed.<br> | ||
| Line 26: | Line 34: | ||
*For each LAN/WAN select the associated interface for the bond | *For each LAN/WAN select the associated interface for the bond | ||
*Click continue<br> | *Click continue<br> | ||
| − | [[Image:ConfigureEthernetBonding_4.png]] <br> | + | [[Image:ConfigureEthernetBonding_4.png]] <br><br> |
| + | |||
| + | To verify the Ethernet Bond:<br> | ||
| − | |||
1. Select '''IP Interfaces''' from the navigation panel. <br> | 1. Select '''IP Interfaces''' from the navigation panel. <br> | ||
| − | [[Image:ConfigureEthernetBonding_5.png]] <br> | + | [[Image:ConfigureEthernetBonding_5.png]] <br><br> |
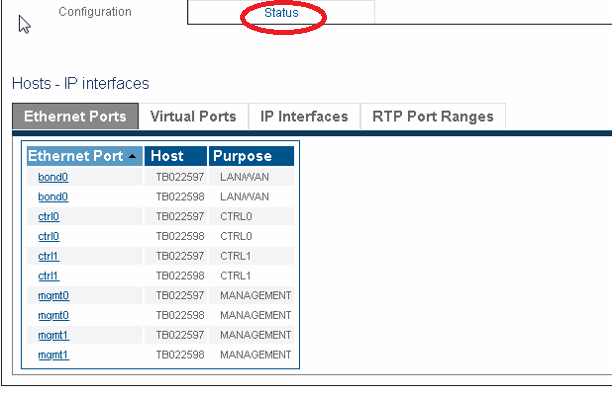
2.The bond0 ports are shown. | 2.The bond0 ports are shown. | ||
*Click the '''Status''' tab. | *Click the '''Status''' tab. | ||
| − | [[Image:ConfigureEthernetBonding_6.png]] <br> | + | [[Image:ConfigureEthernetBonding_6.png]] <br><br> |
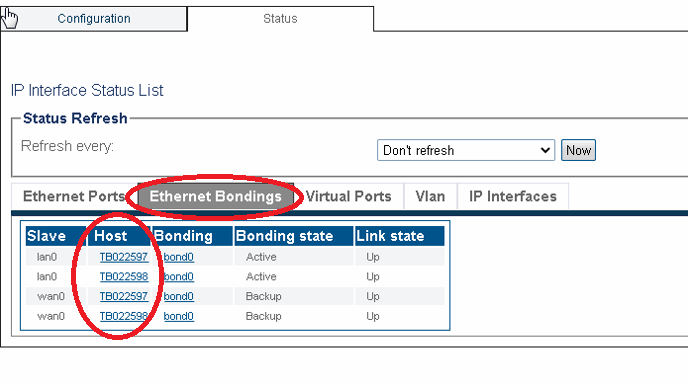
| − | 3. Click the '''Ethernet Bondings''' Tab. | + | 3. Click the '''Ethernet Bondings''' Tab. |
*Select a Host to view more details. | *Select a Host to view more details. | ||
| − | [[Image:ConfigureEthernetBonding_7.png]] <br> | + | [[Image:ConfigureEthernetBonding_7.png]] <br><br> |
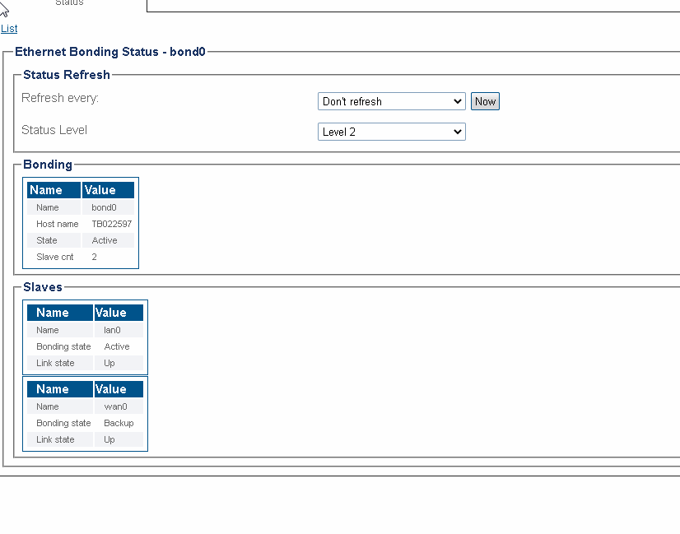
*An Ethernet bonding status window is displayed | *An Ethernet bonding status window is displayed | ||
[[Image:ConfigureEthernetBonding_8.png]] <br> | [[Image:ConfigureEthernetBonding_8.png]] <br> | ||
| − | |||
| − | |||
| − | |||
| − | |||
| − | |||
| − | |||
| − | |||
| − | |||
| − | |||
| − | |||
| − | |||
| − | |||
| − | |||
| − | |||
| − | |||
Latest revision as of 15:27, 24 November 2020
| This article applies to: | Product | Version |
| Tmedia | 3.2 |
Ethernet Bonding enables two Ethernet ports to be used as bonding pair. This ensures for a reliability of service. If the active port becomes unusable the other port in the bonding pair is used to transport traffic.
To configure Ethernet Bonding:
1. Select Hosts from the navigation panel.
2. Select a Host from the Hosts Configuration list.

3. Click the Status tab.
- Select Change Network Devices Role.
5. A Role Configuration window is displayed.
- Set LAN/WAN role to the 2 Ethernet interfaces you want to bond.
- Click add bonding
- The bonding pair is displayed below.
- Give a name to the bond.
- For each LAN/WAN select the associated interface for the bond
- Click continue
To verify the Ethernet Bond:
1. Select IP Interfaces from the navigation panel.
2.The bond0 ports are shown.
- Click the Status tab.
3. Click the Ethernet Bondings Tab.
- Select a Host to view more details.
- An Ethernet bonding status window is displayed

