Toolpack v2.3:Graphical conventions
From TBwiki
(Difference between revisions)
| (4 intermediate revisions by one user not shown) | |||
| Line 9: | Line 9: | ||
| − | [[Image:Navigation_Panel_SIP.png | + | [[Image:Navigation_Panel_SIP.png]] |
| Line 19: | Line 19: | ||
*Enter a name for the SIP Transport Server | *Enter a name for the SIP Transport Server | ||
| − | *Select | + | *Select a port type |
| − | *Select the | + | *Enter a port number |
| + | |||
| + | *Select the adapter that will host the SIP Transport server | ||
| + | |||
| + | *Enter the IP Interface | ||
*Click 'Create' to save the changes | *Click 'Create' to save the changes | ||
| − | [[Image:New_SIP_Transport_Server_v2.3.png | + | [[Image:New_SIP_Transport_Server_v2.3.png]] |
Latest revision as of 17:34, 18 October 2009
The tutorial procedures in this guide use the following graphical conventions:
Navigation Panel launching point. The first step of each procedure presents a view of the navigation panel and highlights the required link to access a specific information panel. For example:
To configure a SIP stack, do the following:
1. Select SIP from the navigation panel.
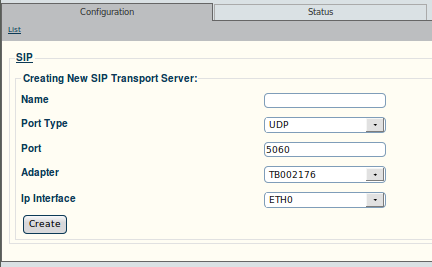
Information Panel. All steps following the initial step of a procedure display graphics of the Web Portal by focusing specifically on the information panel. From another example:
2. Enter a name for the new SIP Transport Server
- Enter a name for the SIP Transport Server
- Select a port type
- Enter a port number
- Select the adapter that will host the SIP Transport server
- Enter the IP Interface
- Click 'Create' to save the changes

