Toolpack v2.4:Add M2PA Links
From TBwiki
(Difference between revisions)
(Created page with '==To create an M2PA link:== '''1. Click "Create new M2pa link" in the M2PA SAP configuration window:''' 700px '''2. Configure th…') |
(→To create an M2PA link:) |
||
| (4 intermediate revisions by one user not shown) | |||
| Line 7: | Line 7: | ||
'''2. Configure the new link:''' | '''2. Configure the new link:''' | ||
| − | *Enter a name for the link | + | * Enter a name for the link |
| − | *Select a protocol type | + | * Select a protocol type: |
| − | *Set other features, as needed | + | ** [[ITU]] |
| − | *Click "Create" to | + | ** [[ANSI]] |
| + | ** [[TTC]] | ||
| + | * Set other features, as needed | ||
| + | ** Number of SCTP Streams: | ||
| + | ** IP Header [[TOS]] | ||
| + | ** Destination port (same value as the one configured on the destination side) | ||
| + | * Click "Create" to finalize the M2PA link | ||
[[Image:Web_Portal_v2.4_Creating_M2PA_Link.png|700px]] | [[Image:Web_Portal_v2.4_Creating_M2PA_Link.png|700px]] | ||
| Line 24: | Line 30: | ||
[[Image:Web_Portal_v2.4_M2PA_Link_Address.png|700px]] | [[Image:Web_Portal_v2.4_M2PA_Link_Address.png|700px]] | ||
| − | '''5. Verify that the address has been added to the list, and that the "(address) was successfully added" message appears:''' | + | '''5. Verify that the address has been added to the list, and that the "(your address) was successfully added" message appears:''' |
[[Image:Web_Portal_v2.4_M2PA_Link_Address_2.png|700px]] | [[Image:Web_Portal_v2.4_M2PA_Link_Address_2.png|700px]] | ||
Latest revision as of 09:23, 16 January 2010
To create an M2PA link:
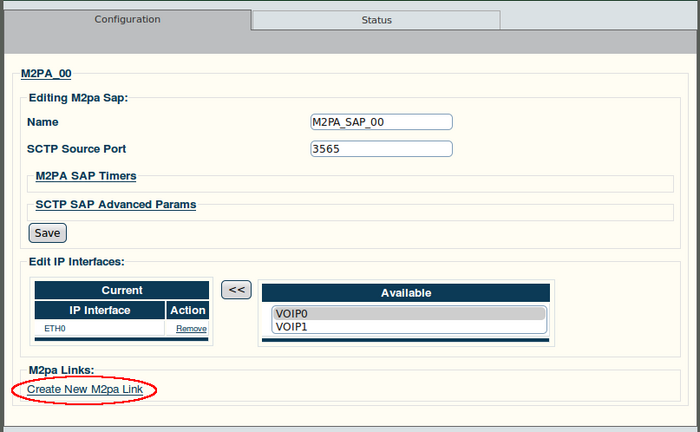
1. Click "Create new M2pa link" in the M2PA SAP configuration window:
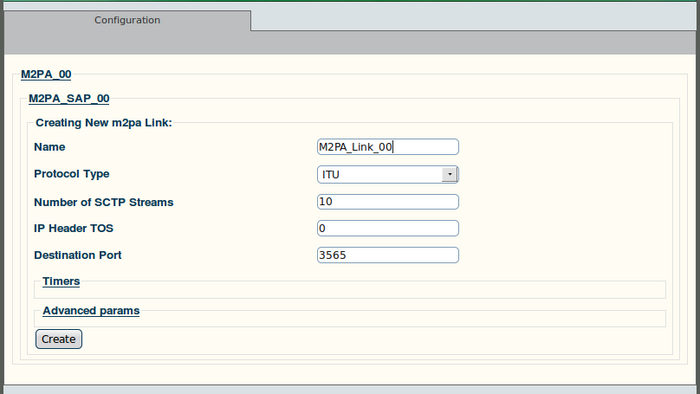
2. Configure the new link:
- Enter a name for the link
- Select a protocol type:
- Set other features, as needed
- Number of SCTP Streams:
- IP Header TOS
- Destination port (same value as the one configured on the destination side)
- Click "Create" to finalize the M2PA link
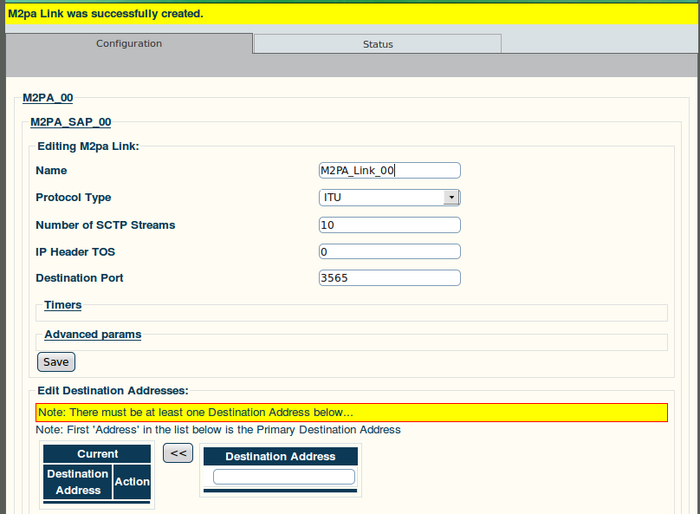
3. Verify that the "M2pa Link was successfully created" message is displayed:
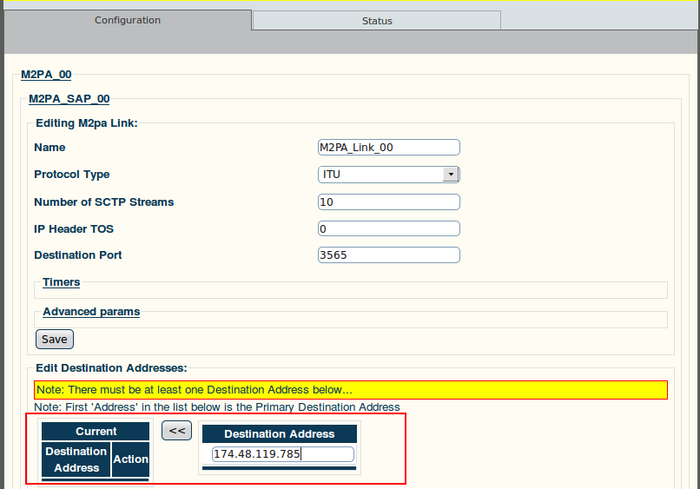
4. Enter a destination address in the appropriate box in the information panel:
- Click the "<<" button to add the destination address to the address list
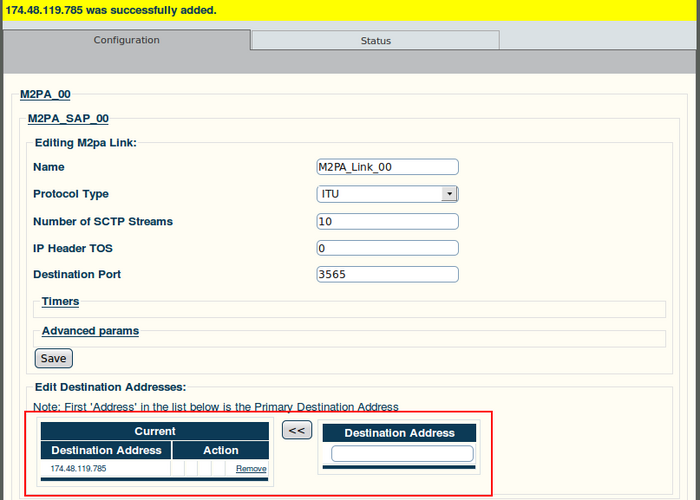
5. Verify that the address has been added to the list, and that the "(your address) was successfully added" message appears:
