Toolpack v2.4:Create a NAP
From TBwiki
(Difference between revisions)
(→To create a network access point (NAP):) |
(Added link to chann) |
||
| (4 intermediate revisions by one user not shown) | |||
| Line 1: | Line 1: | ||
| − | A Network Access Point (NAP) represents the entry point to another network or destination peer. | + | A Network Access Point (NAP) represents the entry point to another network or destination peer. |
| − | ==To create a network access point (NAP):== | + | == To create a network access point (NAP): == |
| − | '''1. Click "NAP" in the navigation panel:''' | + | '''1. Click "NAP" in the navigation panel:''' |
| − | [[Image: | + | [[Image:Web Portal v2.4 Navigation Panel NAP.png]] |
| − | '''2. Click "Create New NAP" in the NAP information panel:''' | + | '''2. Click "Create New NAP" in the NAP information panel:''' |
| − | [[Image: | + | [[Image:Web Portal v2.4 Create NAP.png|700px]] |
| − | '''3. Configure the new NAP:''' | + | '''3. Configure the new NAP:''' |
| − | *Enter a name for the NAP | + | |
| + | *Enter a name for the NAP | ||
| + | *Select a user-created profile, if not, select "default" | ||
*Click "Create" to finalize the configuration | *Click "Create" to finalize the configuration | ||
| − | [[Image: | + | [[Image:Web Portal v2.4 Creating NAP.png|700px]] |
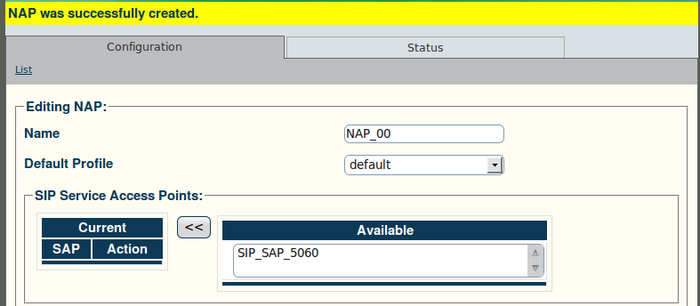
| − | '''4. Verify that the "NAP was successfully created" message appears:''' | + | '''4. Verify that the "NAP was successfully created" message appears:''' |
| − | [[Image: | + | [[Image:Web Portal v2.4 NAP Created.png|700px]] |
| + | <br> | ||
| + | '''5. Associate an ISUP interface with the NAP:''' | ||
| − | + | *Select an interface | |
| − | *Select an interface | + | *Click the "<<" button to add the interface to the list |
| − | *Click the " | + | |
| − | [[Image: | + | [[Image:Web Portal v2.4 NAP ISUP.png|700px]] |
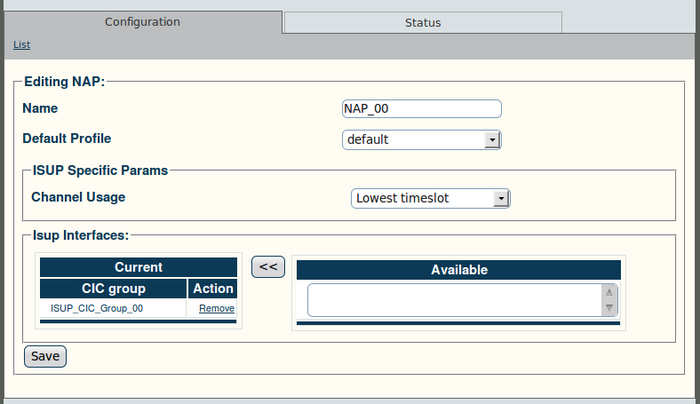
| + | <br> '''The following screen is displayed:''' | ||
| − | + | [[Image:Web Portal v2.4 NAP ISUP Params.png|700px]] | |
| − | + | ||
| − | [[Image: | + | |
| + | *Select a value for [[Parameter:_Channel_Usage|Channel Usage]], to avoid call collision | ||
*Click "Save" to finalize the configuration | *Click "Save" to finalize the configuration | ||
| + | <br> '''Verify that the "NAP was successfully update" message appears:''' | ||
| − | + | [[Image:Web Portal v2.4 NAP ISUP Created.png|700px]] | |
| − | + | ||
| − | [[Image: | + | |
Latest revision as of 07:23, 13 May 2011
A Network Access Point (NAP) represents the entry point to another network or destination peer.
To create a network access point (NAP):
1. Click "NAP" in the navigation panel:
2. Click "Create New NAP" in the NAP information panel:
3. Configure the new NAP:
- Enter a name for the NAP
- Select a user-created profile, if not, select "default"
- Click "Create" to finalize the configuration
4. Verify that the "NAP was successfully created" message appears:
5. Associate an ISUP interface with the NAP:
- Select an interface
- Click the "<<" button to add the interface to the list
The following screen is displayed:
- Select a value for Channel Usage, to avoid call collision
- Click "Save" to finalize the configuration
Verify that the "NAP was successfully update" message appears:


