Toolpack:Uploading a Release A
From TBwiki
(Difference between revisions)
m |
m (→Applies to versions: v2.6, v2.7) |
||
| Line 13: | Line 13: | ||
2- Click '''Packages & Licenses''' in the navigation menu. | 2- Click '''Packages & Licenses''' in the navigation menu. | ||
| + | |||
| + | [[Image:PackagesAndLicences_0.png]] | ||
| + | |||
| + | 3- Select a system to which the package will be uploaded, from the system list | ||
[[Image:PackagesAndLicences_0.png]] | [[Image:PackagesAndLicences_0.png]] | ||
Revision as of 10:30, 1 August 2014
Applies to versions: v2.6, v2.7
Note: This procedure does NOT affect service.
New files are installed for the new release on the server's hard drive in a separate folder from the current active release.
To upload a new release:
1- Log on to the web portal (Of your primary host if system has redundant hosts).
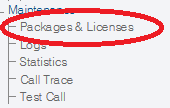
2- Click Packages & Licenses in the navigation menu.
3- Select a system to which the package will be uploaded, from the system list
3- Click Browse... and select the Toolpack installer (TBToolpack-...).
4- Once the file is selected, click Apply action.
This process will take a while, depending on the speed of the connection to the Web Portal. When the installation of the software is completed, the following should appear.

