Toolpack:Creating an ISUP User Part B
(→Applies to version(s): v2.8.) |
m |
||
| Line 10: | Line 10: | ||
To create an ISUP user part: | To create an ISUP user part: | ||
| − | 1- Click '''ISUP''' in the navigation | + | 1- Click '''ISUP''' in the navigation panel. |
[[Image:CreateIsupStack_0.png]] | [[Image:CreateIsupStack_0.png]] | ||
Revision as of 09:00, 18 September 2014
Applies to version(s): v2.8.
Once you have created your ISUP network, you must create a new ISUP user part.
The user part is the container for the multiple ISUP interfaces. One user part is required for each protocol variant. A user part can be seen as a protocol variant that a host application wants to use on the SS7 network.
Multiple ISUP user parts can be instantiated within a single ISUP protocol layer. This allows a user application to interface with multiple SS7 ISUP protocol variants at the same time. In addition, only one ISUP user part is required for a specific variant as it can be assigned to multiple ISUP networks.
To create an ISUP user part:
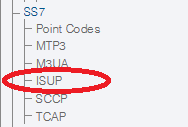
1- Click ISUP in the navigation panel.
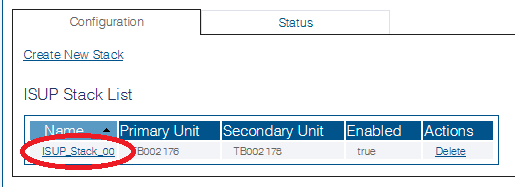
2- Select the ISUP stack
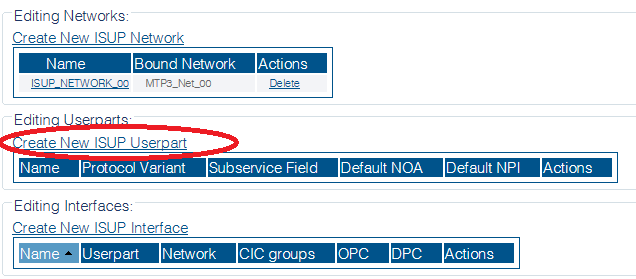
3- Click Create New Isup Userpart in the ISUP stack configuration window:
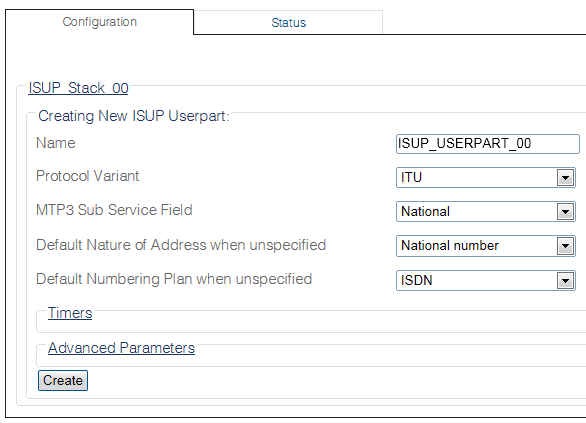
4- Configure the new ISUP user part:
- Enter a name for the user part
- Select a protocol variant (depending on location)
- Select an MTP3 sub service field (the same that was previously set for MTP3)
- Select an address indicator type
- Select a Numbering Plan
- Click Create
5- Verify that the "IsupUserpart was successfully created" message appears


