Toolpack:Creating M2UA Peers B
From TBwiki
(Difference between revisions)
(new 2.8 article) |
m |
||
| Line 21: | Line 21: | ||
4- Click '''Create New M2ua Peer''' in the M2UA cluster configuration window: | 4- Click '''Create New M2ua Peer''' in the M2UA cluster configuration window: | ||
| − | [[Image: | + | [[Image:Create_M2UA_Peer_0.png]] |
| Line 30: | Line 30: | ||
* Click '''Create''' | * Click '''Create''' | ||
| − | [[Image: | + | [[Image:Create_M2UA_Peer_1.png]] |
6- Verify that the '''"M2ua Peer was successfully created"''' message appears | 6- Verify that the '''"M2ua Peer was successfully created"''' message appears | ||
| − | [[Image: | + | [[Image:Create_M2UA_Peer_2.png]] |
| Line 44: | Line 44: | ||
* Verify that the '''<i>(your address)</i> was successfully added''' message appears | * Verify that the '''<i>(your address)</i> was successfully added''' message appears | ||
| − | [[Image: | + | [[Image:Create_M2UA_Peer_3.png]] |
Revision as of 09:34, 1 October 2014
Applies to version(s): v2.8
After you create your M2UA links, you must define M2UA peers for your system.
To create an M2UA peer:
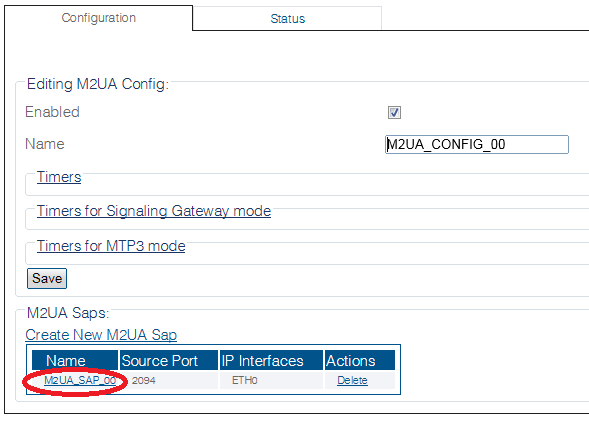
1- Click M2UA in the navigation panel
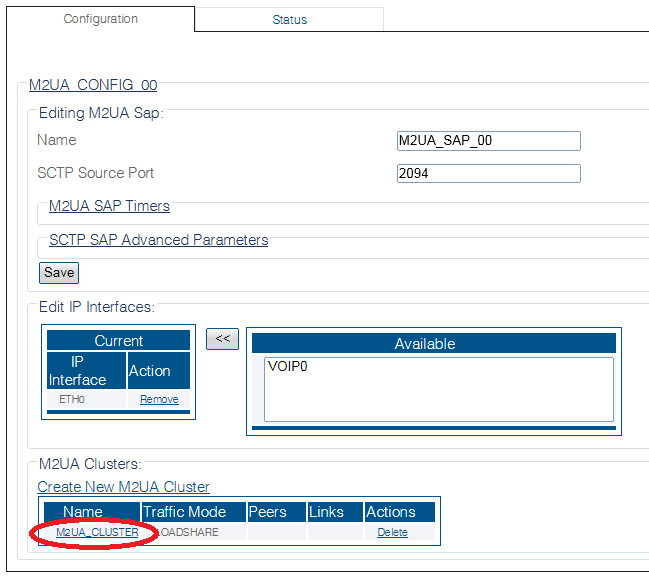
2- Select an M2UA SAP
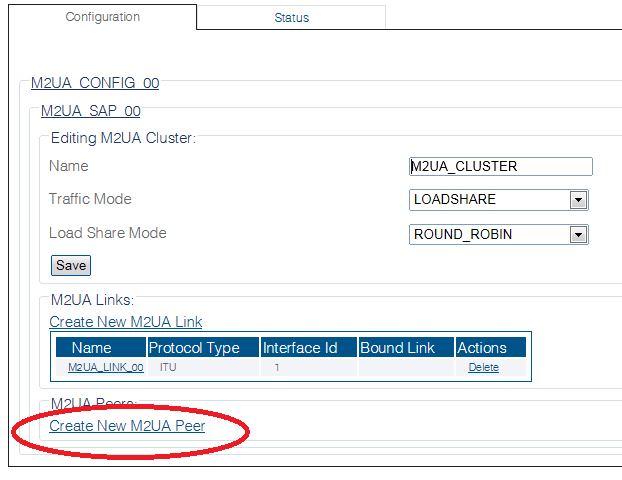
3- Select an M2UA Cluster
4- Click Create New M2ua Peer in the M2UA cluster configuration window:
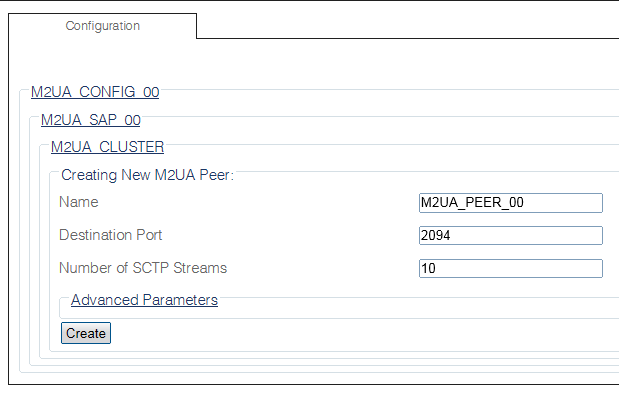
5- Configure the new M2UA peer:
- Enter a name for the peer
- Enter a destination port (as configured in the destination element)
- Click Create
6- Verify that the "M2ua Peer was successfully created" message appears
7- Enter a destination address for the peer:
- Enter a destination address
- Click the "<<" button to add it to the list of destination addresses
- Verify that the (your address) was successfully added message appears


