Toolpack:Enabling RADIUS C
From TBwiki
(Difference between revisions)
m |
(→Applies to version(s): v2.8: Added miisng links to previously defined parameters) |
||
| Line 29: | Line 29: | ||
[[Image:EnableCdr_3.png|border]] | [[Image:EnableCdr_3.png|border]] | ||
| + | |||
| + | ==List of Parameters== | ||
| + | |||
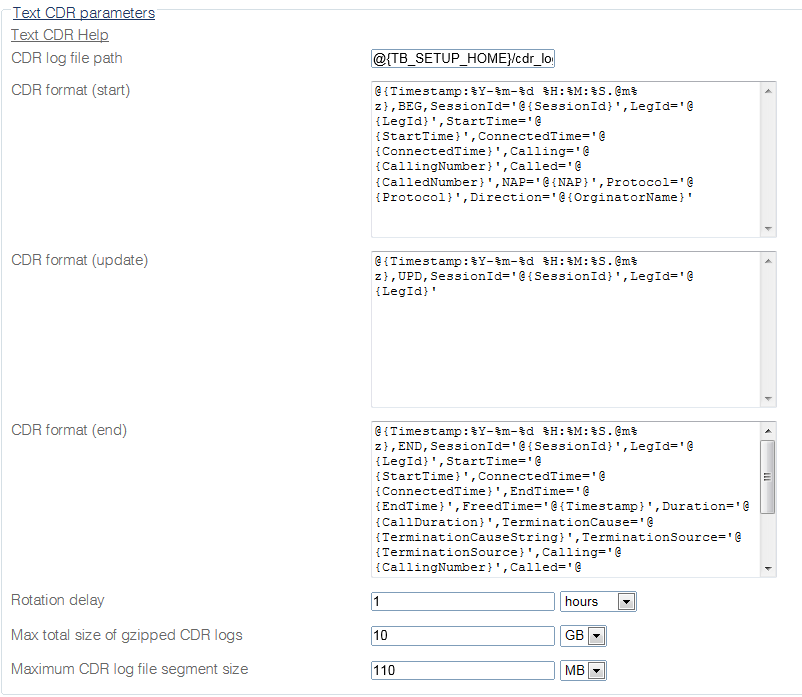
| + | * [[Parameter: CDR log file path|CDR log file path]] | ||
| + | * [[Parameter: CDR format (start)|CDR format (start)]] | ||
| + | * [[Parameter: CDR format (update)|CDR format (update)]] | ||
| + | * [[Parameter: CDR format (end)|CDR format (end)]] | ||
| + | * [[Parameter: Rotation delay in seconds|Rotation Delay]] | ||
| + | * [[Parameter: Max total size of gzipped CDR logs|Max total size of gzipped CDR logs]] | ||
| + | * [[Parameter: Maximum CDR log file segment size|Maximum CDR log file segment size]] | ||
Revision as of 09:57, 22 May 2015
Applies to version(s): v2.8
This article describes how to enable and configure a TMG system to capture CDRs, using a RADIUS server.
Enabling RADIUS
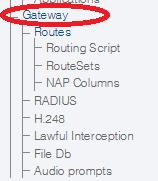
1- Select Gateway from the navigation panel.
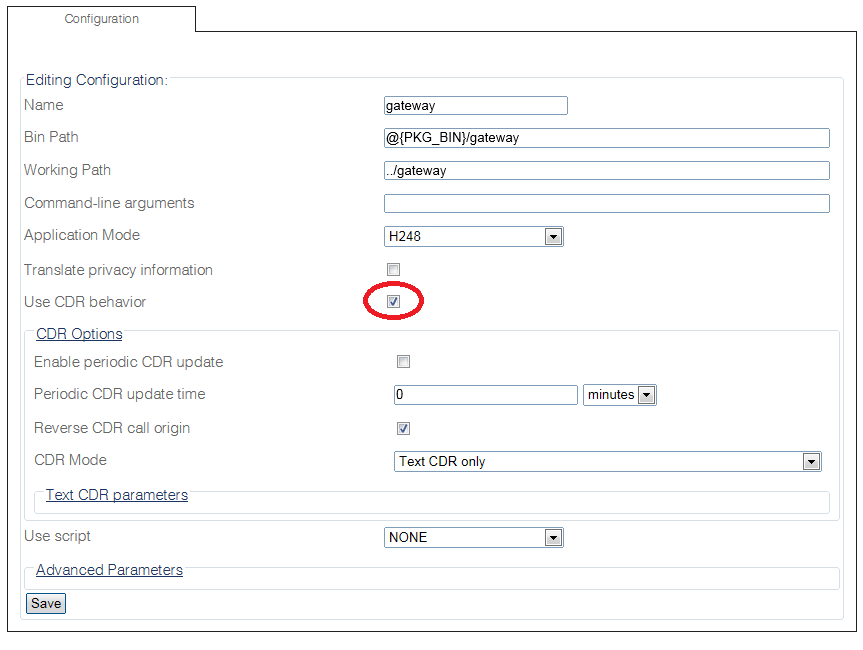
2- Verify that the box Use CDR behavior is checked.
3- Configure the CDR behavior in the CDR Options section:
- Enable periodic CDR update will add one entry in the CDR per Periodic CDR update time, in minutes.
- Select the CDR Mode:
- Text CDR only: Will store the CDRs in a flat file. See Text CDR
- RADIUS CDR only: Will send the CDR to an external RADIUS Server. See Radius CDR
- Text and RADIUS CDR: Will store the CDRs in a flat file and send the CDR to an external RADIUS Server.
- RADIUS CDR with Text CDR Fallback: Will send the CDR to an external RADIUS Server and if the RADIUS server cannot handle the load of CDRs, they will be stored in a flat file.
- Click Save to save your changes.
4- Verify that the Gateway configuration was successfully updated. message appears.


