FreeSBC:Cloud:AWS Installation A
From TBwiki
(Difference between revisions)
Lucas Joyal (Talk | contribs) (Update text copied from old system) |
Lucas Joyal (Talk | contribs) (Add region explaination) |
||
| Line 6: | Line 6: | ||
* After logging in your Amazon account, click on “EC2” in the main AWS console: | * After logging in your Amazon account, click on “EC2” in the main AWS console: | ||
[[File:ConsoleEC2.png| 600px]] | [[File:ConsoleEC2.png| 600px]] | ||
| − | |||
* On the left menu, click on “AMIs”: | * On the left menu, click on “AMIs”: | ||
[[File:AMIs.png| 100px]] | [[File:AMIs.png| 100px]] | ||
| − | |||
* Click on the filter drop list and select “Private image” to locate FreeSBC AMI: | * Click on the filter drop list and select “Private image” to locate FreeSBC AMI: | ||
[[File:PrivateImages.png| 500px]] | [[File:PrivateImages.png| 500px]] | ||
| + | * Select the region matching the region of the FreeSBC AMI you want to test. If you don't know it, try "Canada (Central)". | ||
| + | |||
| + | [[File:RegionAMI.png| 700px]] | ||
* Select the image and click “Launch”: | * Select the image and click “Launch”: | ||
Revision as of 07:39, 13 April 2018
This page is intended to give assistance to people launching an instance of FreeSBC using an Amazon Machine Image (AMI) on Amazon Web Service (AWS).
Instantiate a FreeSBC
- After logging in your Amazon account, click on “EC2” in the main AWS console:
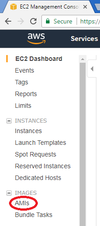
- On the left menu, click on “AMIs”:
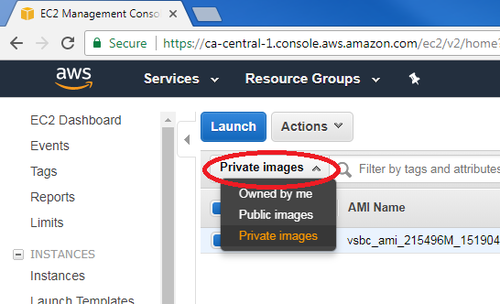
- Click on the filter drop list and select “Private image” to locate FreeSBC AMI:
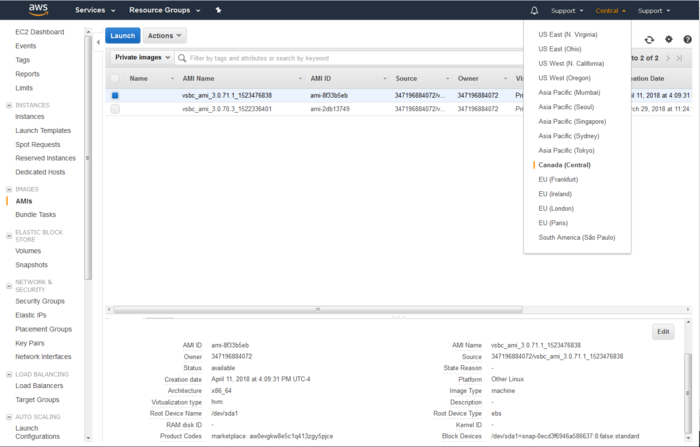
- Select the region matching the region of the FreeSBC AMI you want to test. If you don't know it, try "Canada (Central)".
- Select the image and click “Launch”:
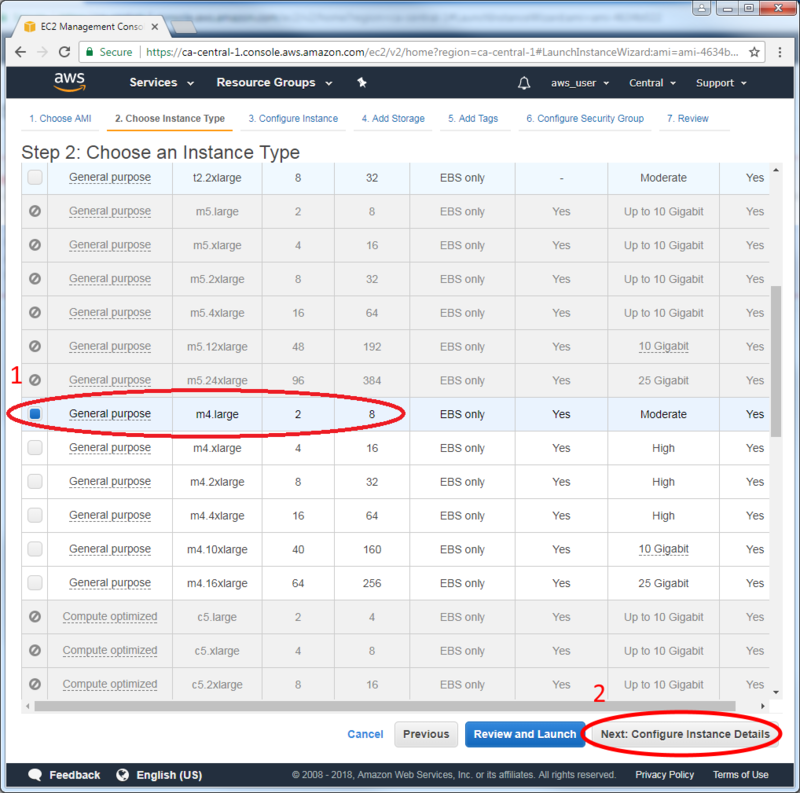
- Select the instance type and its resources. The recommended instance type is:
- m4.large (2 vCPU, 8 GiB)
- Supported instance type are:
- C3, C4, D2, I2, M4 (excluding m4.16xlarge), and R3 instances (Supported instances from Amazon documentation)
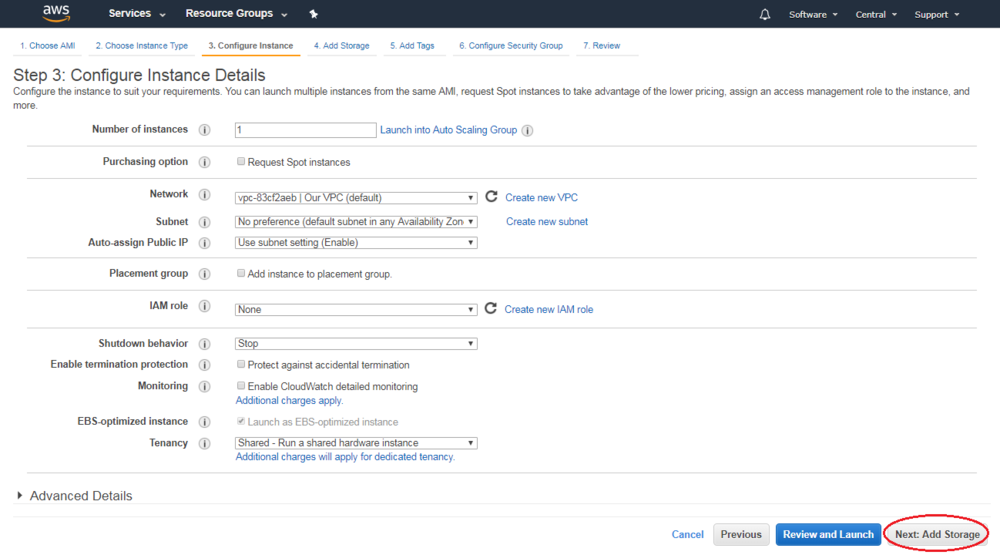
- Choose an existing subnet from the list (Do not leave it to default, to allow for multiple network interfaces):
- Click "Add Device" under Network Interface section to add a second IP interface (as FreeSBC requires 2 network interfaces)
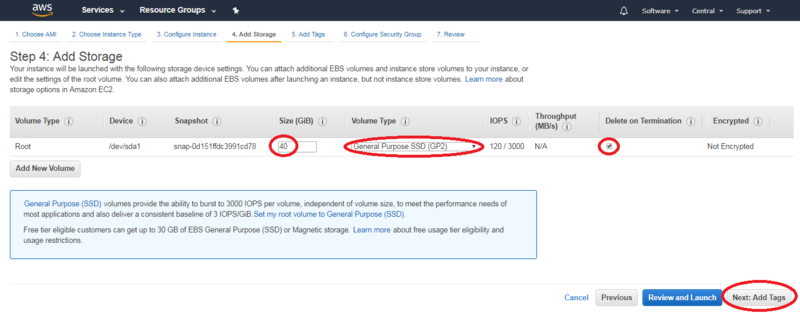
- Click “Add Storage” to proceed to the next page:
- Change the Volume Size to 40Gb.
- Select "Volume Type": gp2
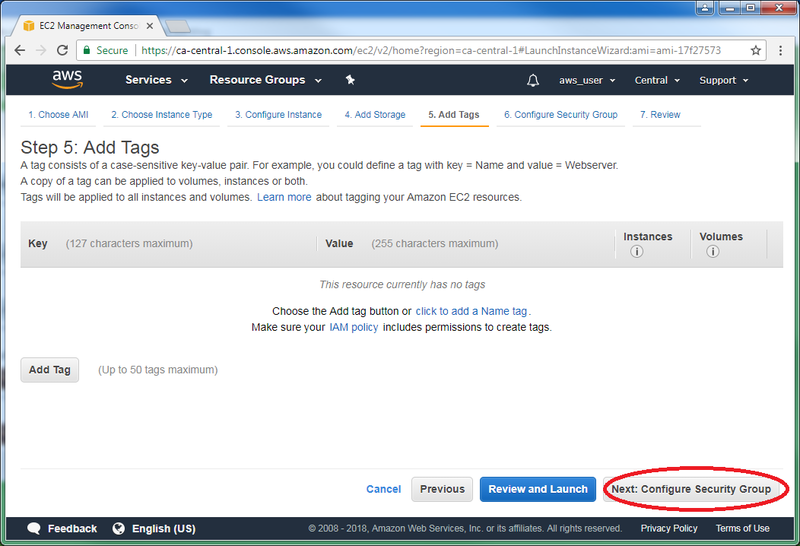
- Click “Add Tags” to proceed to the next page.
- You can leave the default parameters as they are.
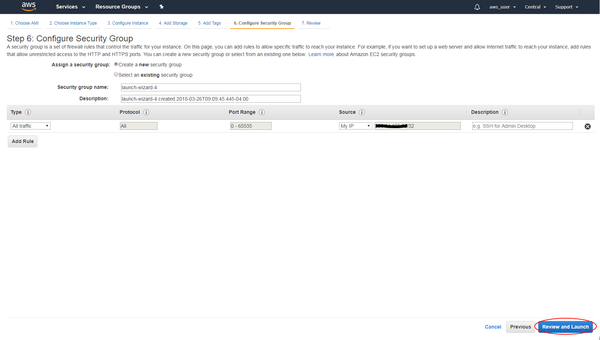
- Click “Configure Security Group” to proceed to the next page:
- Select "Create a new security group". We recommend that you simply open all ports on your own IP address, since the SBC contains its own internal firewall:
| Rule | Type | Port Range | Source IP |
|---|---|---|---|
| All traffic | All traffic | 0 - 65535 | (Use your own public IP) |
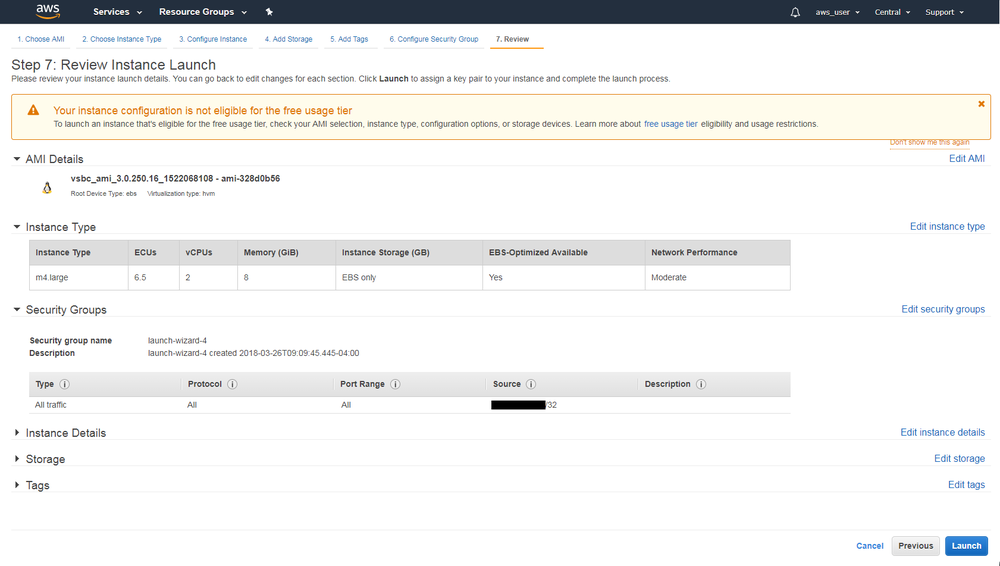
- Click “Launch”. Please note that FreeSBC is free of charges. However, you will still be billed by Amazon for the instance resources:
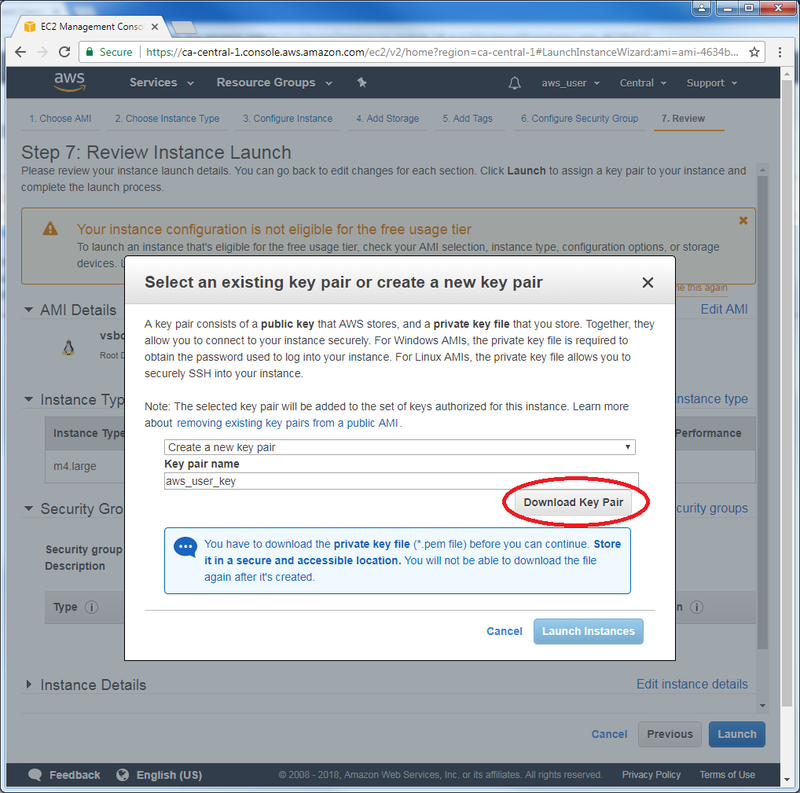
- You will be prompted to create a key pair, allowing you to securely connect to your instance. Select “Create a new key pair” if you do not own one, and give it a name. Then, click on “Download Key Pair” to download a .pem file since it is needed for a SSH connection. (Note: Make sure to not lose it, since you would then lose access the the SSH connection for the instance):
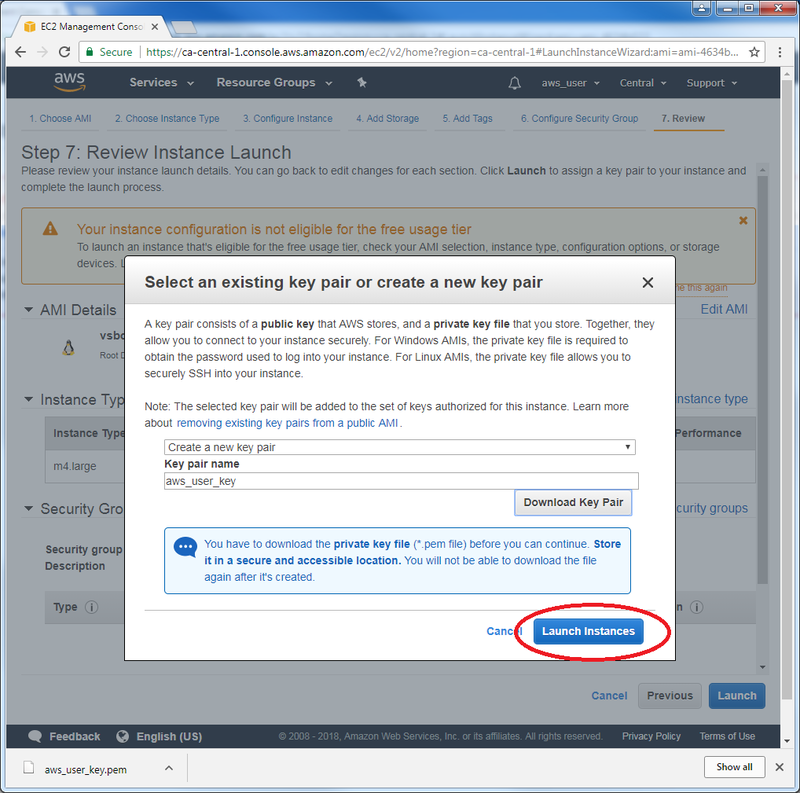
- Click on “Launch Instances”:
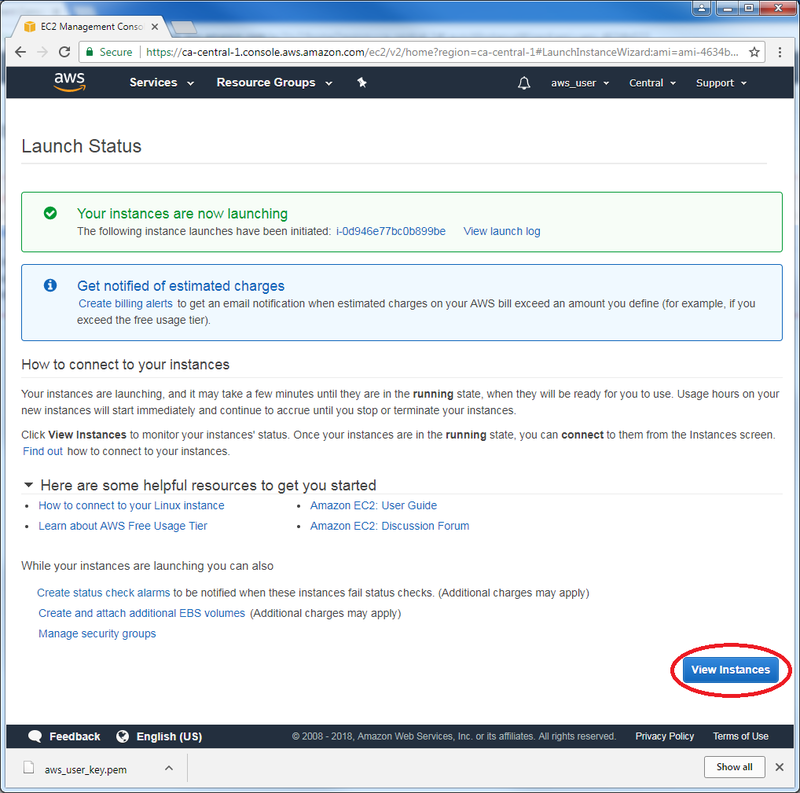
- You can view your instance by clicking on “View Instances”:
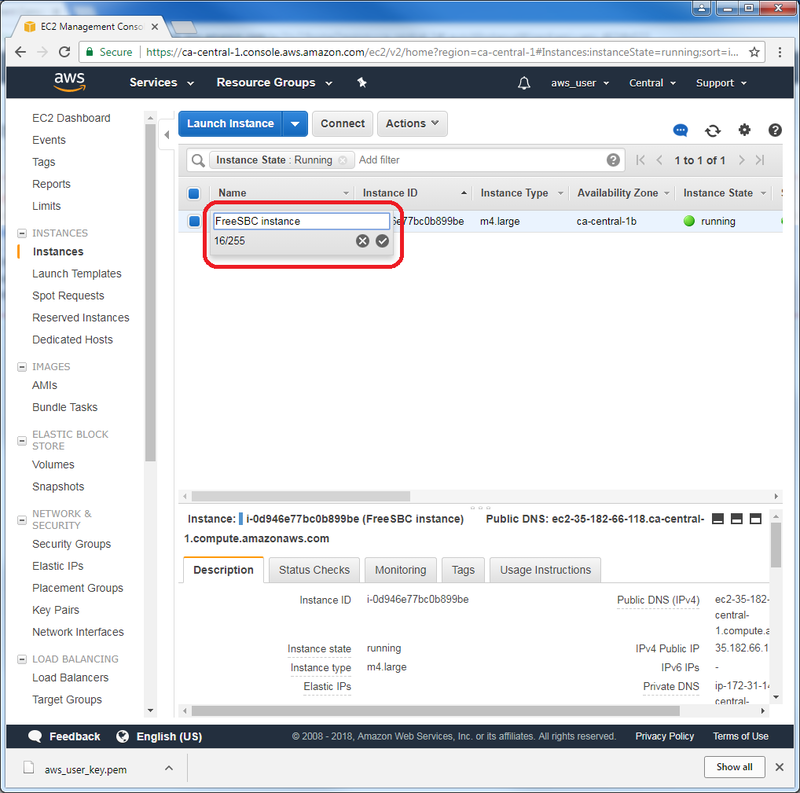
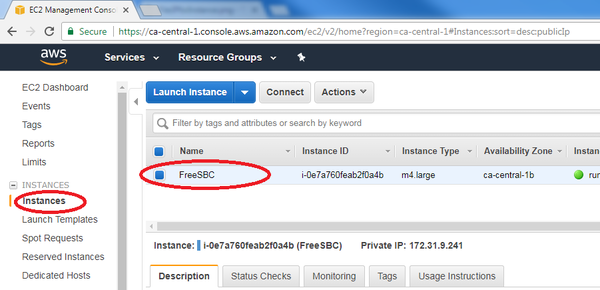
- Select the instance you just created and feel free to give it a name:
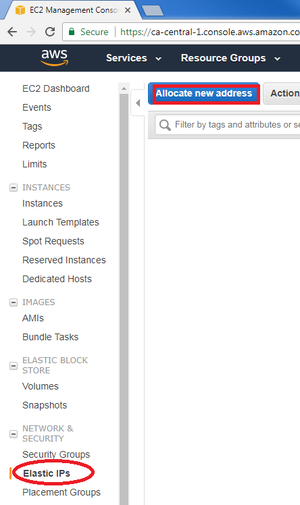
- For your instance to become accessible, you need to associate a public IP generated by Amazon (called "Elastic IP"). Click on "Elastic IP" on the left, then click on "Allocate new address":
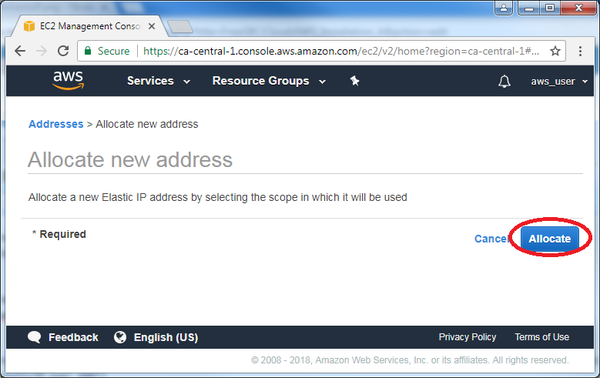
- Click on "Allocate IP". A new public IP will be generated by Amazon:
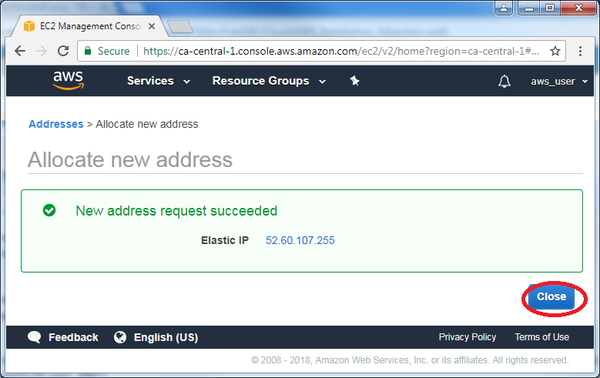
- Click on "Close":
- Go to the left pane and click on "Instance". Then select the instance "FreeSBC" to display its description:
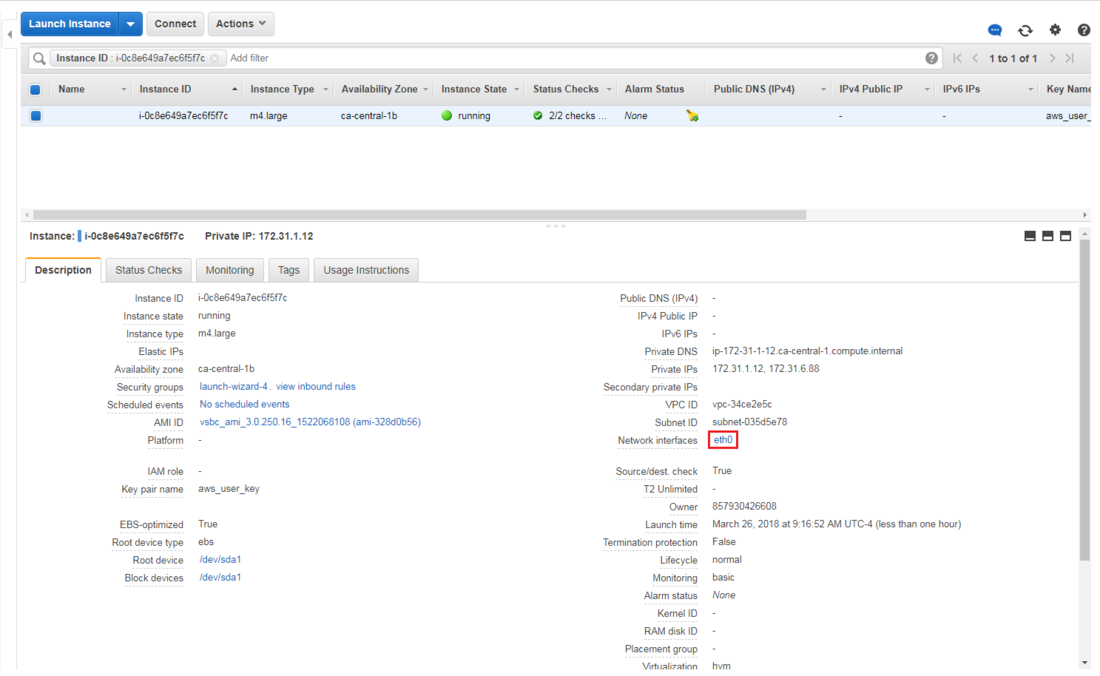
- Find the eth1 network interface in the instance description:
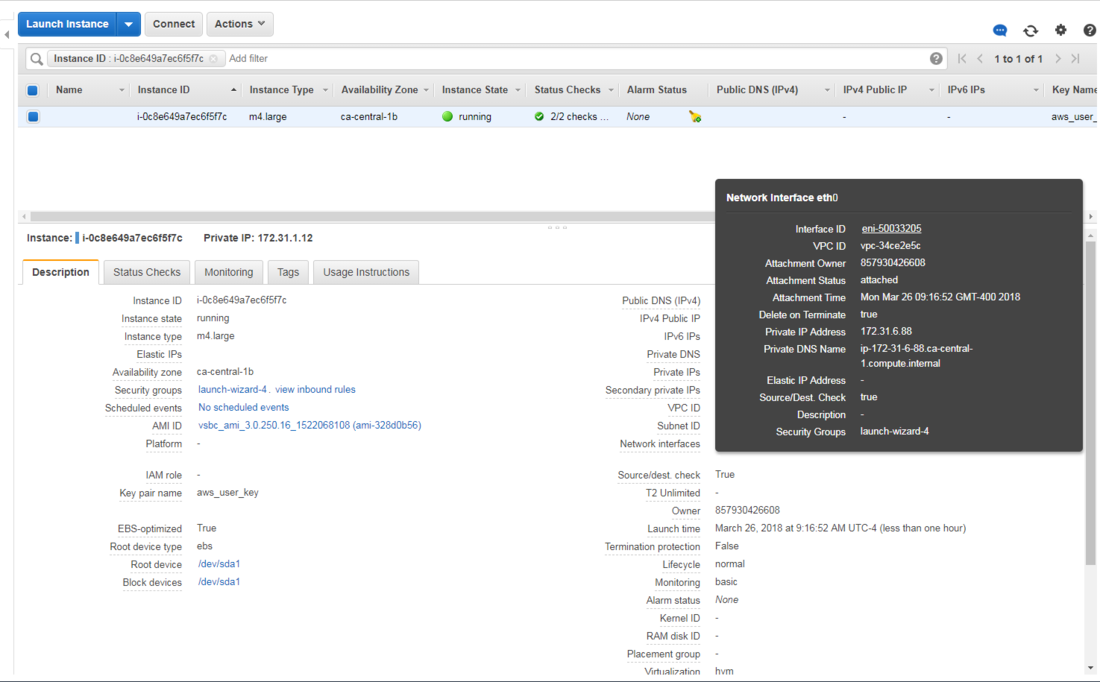
- Click on the eth1 Network Interface, then click on the "Interface ID" link:
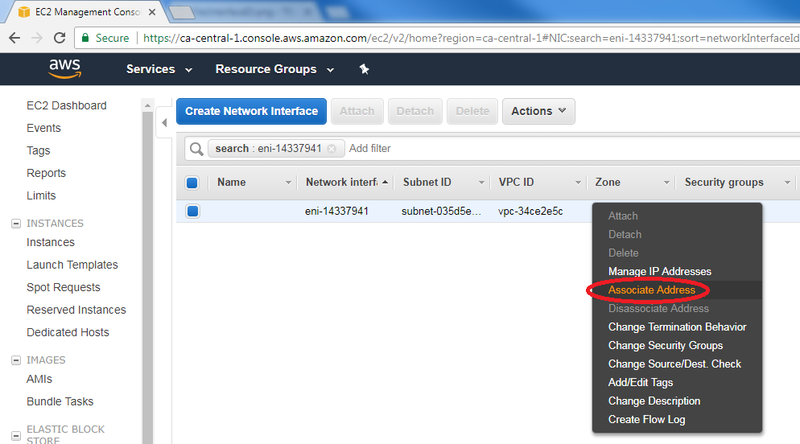
- Right-click on the selected Network Interface, then click "Associate Address":
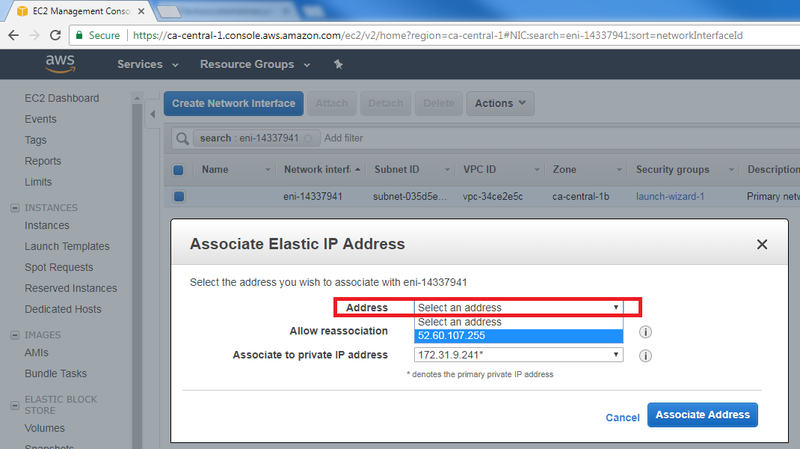
- In the Address list, select the public IP to associate with the main Network Interface. Then, click on "Associate Address":
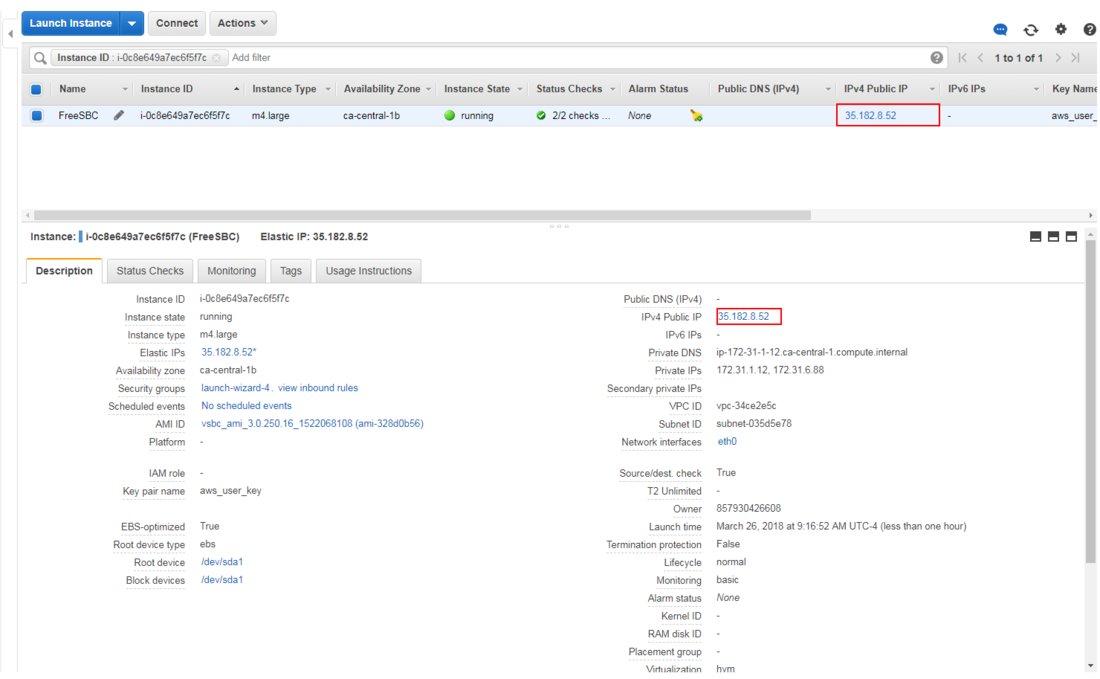
- Click on "Instances" on the left pane and select "FreeSBC" instance. Check if your instance is associated with a public IP:
You are ready to connect to FreeSBC instance on AWS through the Web Portal. To connect to the Web Portal, use the public IP address with the port
like this: <Public IP>:12358/
- Username:
- root
- Password:
- <The ID of the instance on which the web portal is running.>
Take note that it may take a while for the FreeSBC system to make the Web Portal available (around 3-5 minutes).
Validating the installation
To test that the FreeSBC was correctly installed, you can call a special number via any SIP phone to get an automated message from the FreeSBC
- Call the number 5551234@<FreeSBC's public IP address>
You should get a message from the FreeSBC along with a "special treat" :).

