TSBC-SW:WebPortal:Initial Configuration
(→Initial configuration of the SBC) |
(→Initial configuration of the SBC) |
||
| Line 37: | Line 37: | ||
You must configure all IP interfaces. If you are not sure, configure them as management interfaces.<br/> | You must configure all IP interfaces. If you are not sure, configure them as management interfaces.<br/> | ||
| − | [[Image:2_Recovery_before_bonding_A.png| | + | [[Image:2_Recovery_before_bonding_A.png|800px]] <br/> <br/> |
| − | + | Note: Select the "+" sign to get further information about an interface<br/> | |
| − | 9- To add an Ethernet Bonding, click '''Add Bonding'''. | + | [[Image:TSBC_SW_choose_LAN_interface_role_2.png|600px]] <br/> <br/> |
| + | |||
| + | Note: If 1+1 (control networks ctrl0/ctrl1) or multiple vlan interfaces are needed, make sure all of them are assigned to the appropriate MAC address taken from the Platform (VMware Instance settings or other) <br/> | ||
| + | [[Image:Initial_screen_Match_MAC_1.png|600px]][[File:Network_adapters_MAC_Address_primary_1.png|800px]]<br/></br> | ||
| + | |||
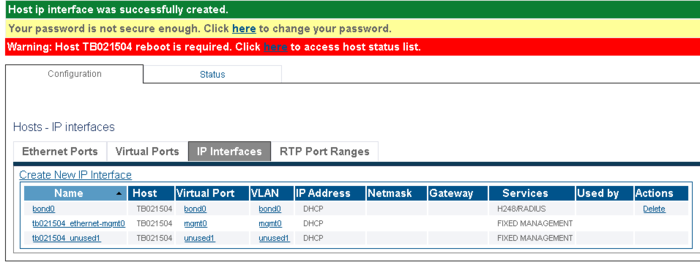
| + | |||
| + | 9- To add an Ethernet Bonding, click '''Add Bonding'''.<br/> | ||
[[Image:2_Recovery_before_bonding_ClickAddBondingA.png|750px]] <br/> <br/> | [[Image:2_Recovery_before_bonding_ClickAddBondingA.png|750px]] <br/> <br/> | ||
| + | 10- Enter the name for Bonding Pair, followed by the LAN/WAN1 and LAN/WAN 2. | ||
| + | *When you are done, click '''Continue'''.<br/> | ||
[[Image:3_Recovery_after_bonding_A.png|700px]] <br/> <br/> | [[Image:3_Recovery_after_bonding_A.png|700px]] <br/> <br/> | ||
| + | |||
| + | 11- A '''Confirmation''' window is displayed. | ||
| + | *If you are satisfied with the configuration, click '''Confirm'''. <br/> | ||
[[Image:4_Recovery_confirm_bonding_A.png|700px]] <br/> <br/> | [[Image:4_Recovery_confirm_bonding_A.png|700px]] <br/> <br/> | ||
| + | |||
| + | 12- A warning message is displayed alerting you to the possible interruption of the IP interfaces when the change is applied. | ||
| + | *Click '''OK'''. <br/> | ||
[[Image:5_Recovery_Warning_end_confirm_bonding_A.png|700px]] <br/> <br/> | [[Image:5_Recovery_Warning_end_confirm_bonding_A.png|700px]] <br/> <br/> | ||
| + | |||
| + | 13- The ProSBC '''Welcome''' page is displayed.</br> | ||
[[Image:6_Following_bonding_configuration_warning_reboot_is_required_A.png|700px]] <br/> <br/> | [[Image:6_Following_bonding_configuration_warning_reboot_is_required_A.png|700px]] <br/> <br/> | ||
| − | |||
| + | [[Image:7_Need_to_configure_VLAN_port_and_ip_interface_to_use_created_bonding_After_A.png|700px]] <br/> <br/> | ||
| − | Select the "+" sign to get further information about an interface<br/> | + | Note: Select the "+" sign to get further information about an interface<br/> |
[[Image:TSBC_SW_choose_LAN_interface_role_2.png|600px]] <br/> <br/> | [[Image:TSBC_SW_choose_LAN_interface_role_2.png|600px]] <br/> <br/> | ||
| − | If 1+1 (control networks ctrl0/ctrl1) or multiple vlan interfaces are needed, make sure all of them are assigned to the appropriate MAC address taken from the Platform (VMware Instance settings or other) | + | If 1+1 (control networks ctrl0/ctrl1) or multiple vlan interfaces are needed, make sure all of them are assigned to the appropriate MAC address taken from the Platform (VMware Instance settings or other) |
| − | <br/>[[Image:Initial_screen_Match_MAC_1.png|600px]][[File:Network_adapters_MAC_Address_primary_1.png|800px]]<br/> | + | <br/>[[Image:Initial_screen_Match_MAC_1.png|600px]][[File:Network_adapters_MAC_Address_primary_1.png|800px]]<br/> |
10- Once completed, you will be asked get the license seed of this unit to allow for license installation. Please go here for instructions: [[Toolpack:Retreiving_a_License_TSBC_A|Retrieving a License for SBC Units]]<br/> | 10- Once completed, you will be asked get the license seed of this unit to allow for license installation. Please go here for instructions: [[Toolpack:Retreiving_a_License_TSBC_A|Retrieving a License for SBC Units]]<br/> | ||
Revision as of 13:30, 27 March 2020
Applies to version(s): v3.0, v3.1
The initial configuration of the SBC is done by accessing a configuration wizard in a web browser (Chrome, Firefox or other). Before you begin, you must have the following information on hand:
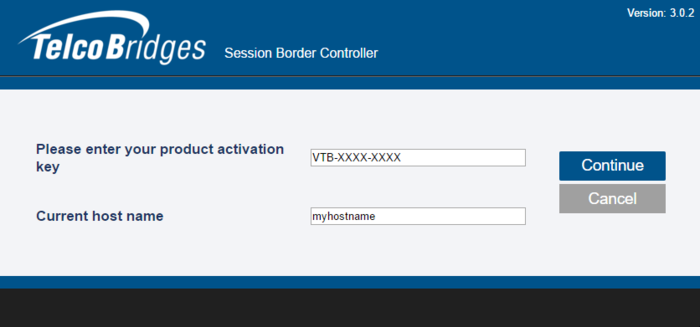
- Product key: In the following VTB-XXX-XXXX format. If you do not have this key, please go to our ProSBC Download site .
- Hostname of the unit. It is important to set the host name correctly and to not modify it later, otherwise you will need a new license.
- Will the system be used as a standalone unit or in a Primary/Secondary configuration?
- Does the system require external transcoding? For example, G.711 to G.729a transcoding.
- The role of each of the network interfaces
Once you have this information, proceed as indicated below:
Initial configuration of the SBC
1- Open a web browser to the IP of your server, on port 12358. For example, if your server address is 192.168.178.30, the URL would be:
http://192.168.178.30:12358
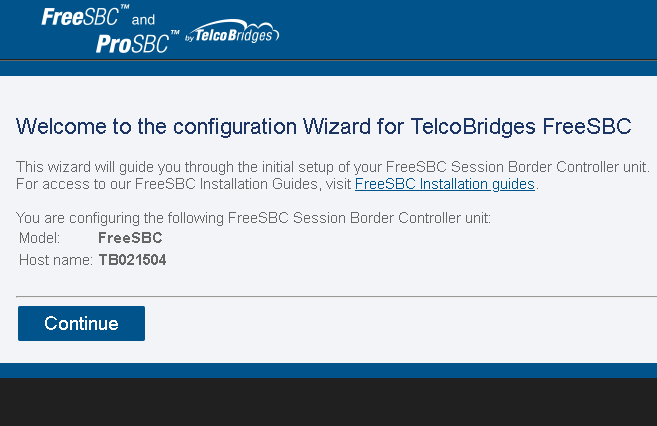
2- An SBC Configuration Wizard is displayed.
- Click Continue
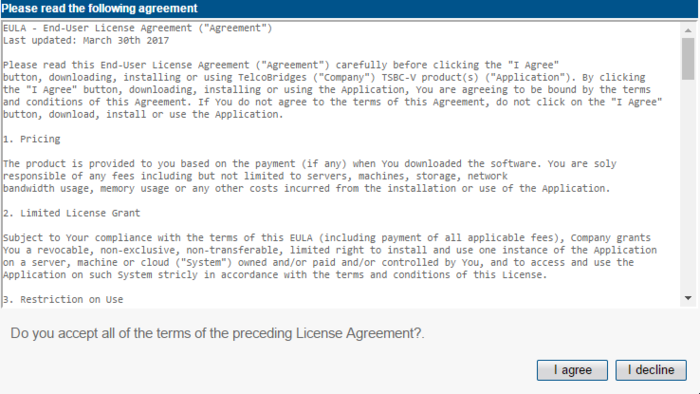
3- Accept the EULA agreement
4- Enter your activation key and hostname
** No need to enter the host name for AWS.
5- Enter your SSH and WEB root password
** No need to enter the SSH password for AWS.
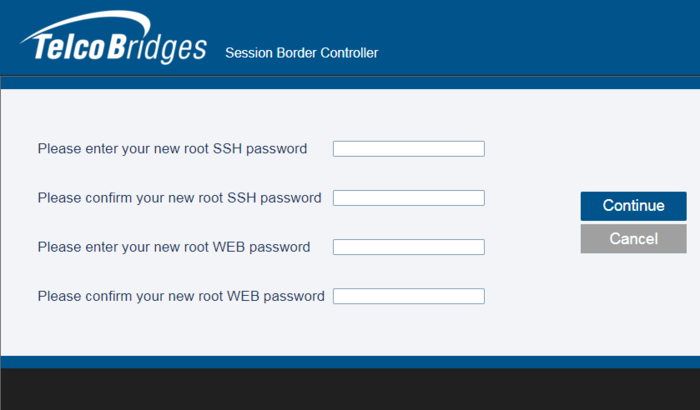
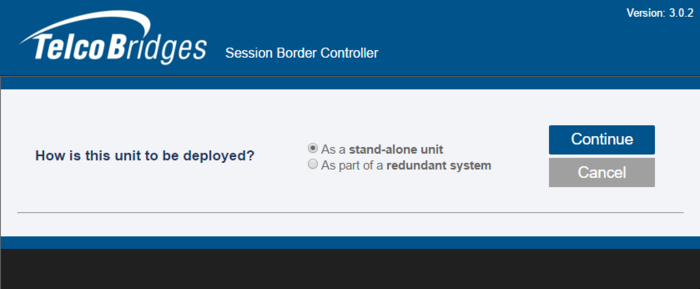
6- Select the configuration of your SBC. Either standalone, or in a Primary/Secondary configuration
** Not applicable for AWS.
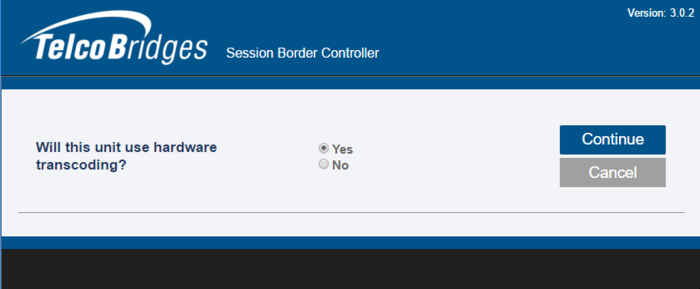
7- If the system requires external transcoding, select it here. As an example, if the system needs G.711 to G.729a transcoding, then select yes.
** Not applicable for AWS.
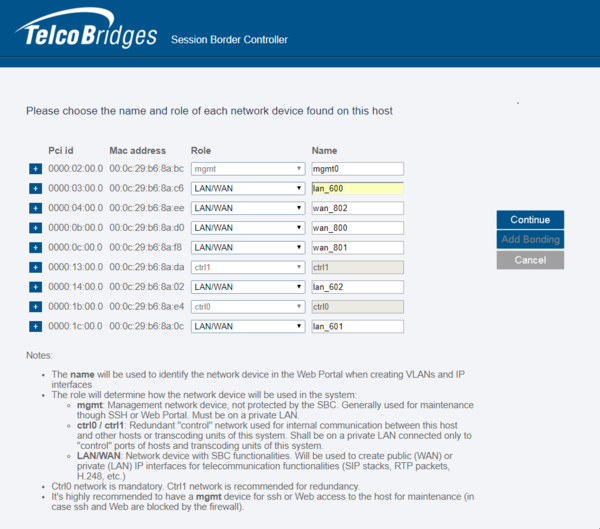
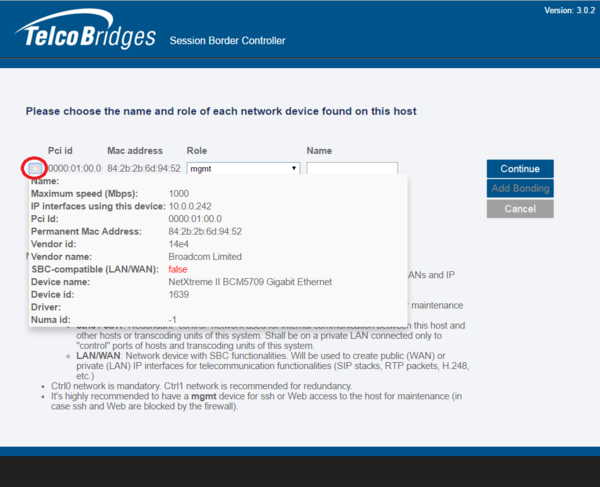
8- In this window, you define the role of the network adapters in the system. The following is a short description of each type:
- mgmt: Used for management of the system (suggested name: mgmt0)
- ctrl0: Used for communication with the external transcoding devices (suggested name: ctrl0)
- ctrl1: Same as ctrl0. Adds redundancy (suggested name: ctrl1)
- LAN/WAN: SIP/RTP access to private network (suggested name: LAN0) or public network (suggested name: WAN0).
You must configure all IP interfaces. If you are not sure, configure them as management interfaces.

Note: Select the "+" sign to get further information about an interface
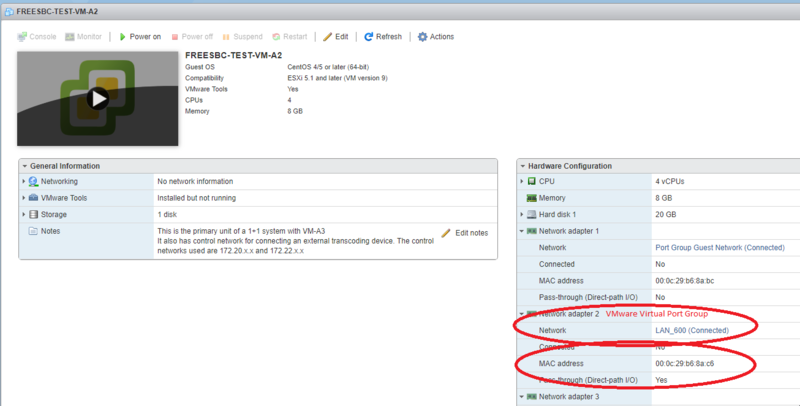
Note: If 1+1 (control networks ctrl0/ctrl1) or multiple vlan interfaces are needed, make sure all of them are assigned to the appropriate MAC address taken from the Platform (VMware Instance settings or other)


</br>
9- To add an Ethernet Bonding, click Add Bonding.
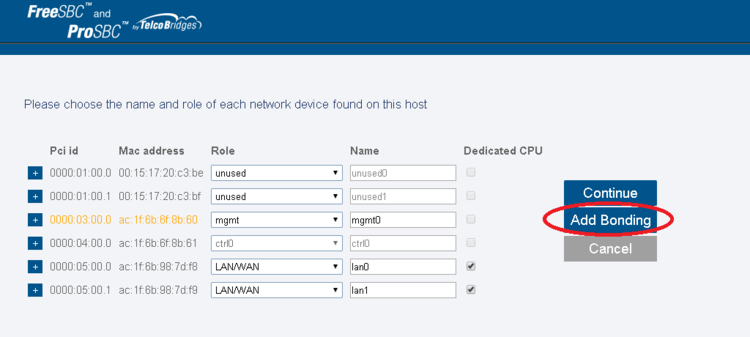
10- Enter the name for Bonding Pair, followed by the LAN/WAN1 and LAN/WAN 2.
- When you are done, click Continue.
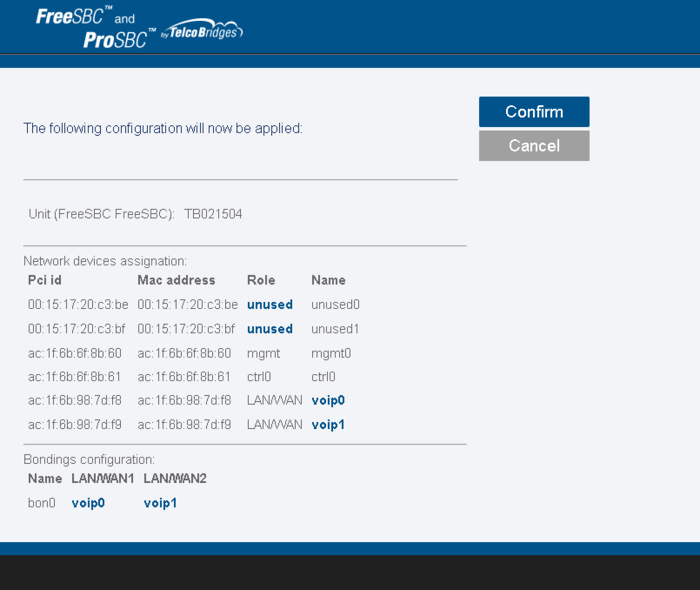
11- A Confirmation window is displayed.
- If you are satisfied with the configuration, click Confirm.
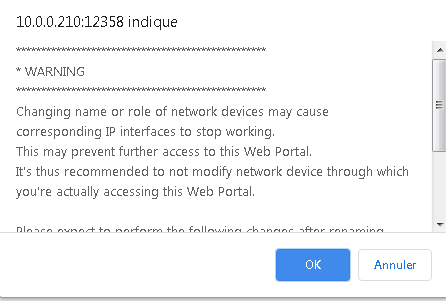
12- A warning message is displayed alerting you to the possible interruption of the IP interfaces when the change is applied.
- Click OK.
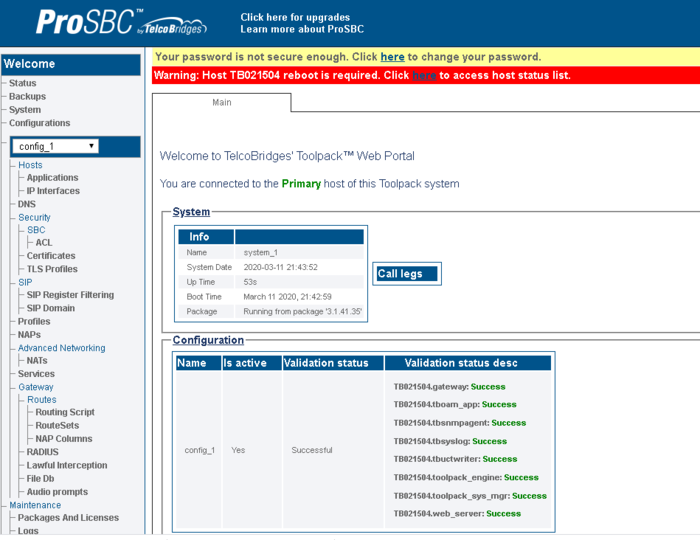
13- The ProSBC Welcome page is displayed.</br>
Note: Select the "+" sign to get further information about an interface

If 1+1 (control networks ctrl0/ctrl1) or multiple vlan interfaces are needed, make sure all of them are assigned to the appropriate MAC address taken from the Platform (VMware Instance settings or other)
10- Once completed, you will be asked get the license seed of this unit to allow for license installation. Please go here for instructions: Retrieving a License for SBC Units
To get help, please contact TelcoBridges TB Support.
