FreeSBC:FreePBX Trunk Configuration:FreePBX Trunk Configuration
(→FreePBX SIP Trunk Configuration) |
|||
| Line 7: | Line 7: | ||
=FreePBX SIP Trunk Configuration= | =FreePBX SIP Trunk Configuration= | ||
| − | 1 | + | 1 - After logging in as an Admin to your FreePBX GUI, navigate to “Connectivity” → “Trunks” and press the “Add Trunk” button. Select the option “Add SIP (chan_pjsip) Trunk” |
| + | [[Image:FreePBX_Trunk_1.png]] | ||
| + | |||
| + | 2 - Once done, this will bring up the Trunk Creation Screen. Under the General tab, enter a name for the trunk. For ease of management, It is recommended that this match the name of the SIP Endpoint you created in the ProSBC WebGUI for FreePBX NAP. | ||
| + | [[Image:FreePBX_Trunk_2.png]] | ||
| + | |||
| + | 3 - Once done, navigate to the “pjsip Settings" → "General” tab. Here you will need to enter your endpoint information. If you're using an IP endpoint, | ||
| + | |||
| + | * Select None for Authentication | ||
| + | * SIP Server: Enter the Domain of your SIP Trunk (ProSBC FQDN or IP address) | ||
| + | * SIP Server Port: Set this to 5060 | ||
| + | [[Image:FreePBX_Trunk_3.png]] | ||
| + | |||
| + | 4 - Once done, select the “PJSIP Settings” → “Codecs” Tab. Ensure correct codec are selected. | ||
| + | [[Image:FreePBX_Trunk_4.png]] | ||
| + | |||
| + | =FreePBX Route Configuration= | ||
| + | |||
| + | 1 - To create an inbound route, navigate to “Connectivity” → “Inbound Routes” and click on "Add Inbound Route" | ||
| + | [[Image:FreePBX_In_Route_1.png]] | ||
| + | |||
| + | 2 - Then set your options: | ||
| + | |||
| + | * Description: add a description of the route. | ||
| + | * DID Number: fill in the DID number that you will have from your ITSP | ||
| + | * Set Destination: choose Extensions from the first drop down and then select the extension you created from the second drop down | ||
| + | [[Image:FreePBX_In_Route_2.png]] | ||
| + | |||
| + | Once done, “Submit” the configuration. | ||
| + | |||
| + | 3 - To create an outbound route, navigate to “Connectivity” → “Outbound Routes” and click on "Add Outbound Route" | ||
| + | [[Image:FreePBX_Out_Route_1.png]] | ||
| + | |||
| + | 4 - Under the “Route Settings” tab, leave everything as the default except the following: | ||
| + | * Route Name: Add a friendly name for the route you are creating. | ||
| + | * Trunk Sequence for Matched Routes: Use the drop down button to select the SIP Trunk you just created. | ||
| + | [[Image:FreePBX_Out_Route_2.png]] | ||
| + | |||
| + | 5 - Once done, select the “Dial Patterns” tab. You can manually define the dial patterns or use Dial Pattern wizard. | ||
| + | [[Image:FreePBX_Out_Route_3.png]] | ||
| + | |||
| + | 6 - Once done, “Submit” the configuration and press the “Apply Config” button. The route is ready to be used and your FreePBX is now configured to with ProSBC. | ||
Revision as of 05:58, 30 March 2020
Introduction
This document provides instructions on how to configure FreePBX Server with the ProSBC a s SIP trunk. Please visit the following link for more details about Configuring SIP Trunks in FreePBX Server
FreePBX SIP Trunk Configuration
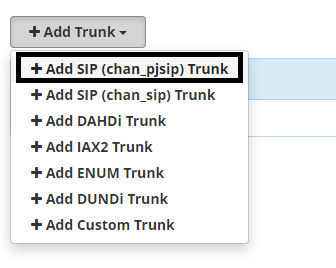
1 - After logging in as an Admin to your FreePBX GUI, navigate to “Connectivity” → “Trunks” and press the “Add Trunk” button. Select the option “Add SIP (chan_pjsip) Trunk”
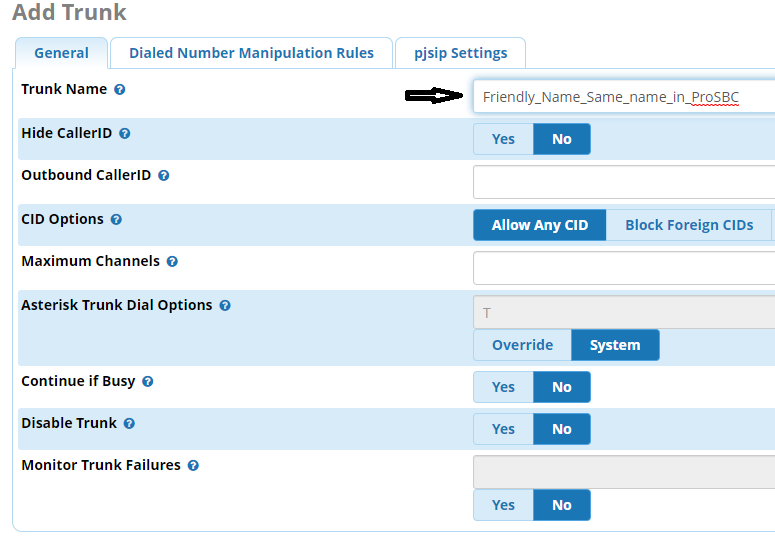
2 - Once done, this will bring up the Trunk Creation Screen. Under the General tab, enter a name for the trunk. For ease of management, It is recommended that this match the name of the SIP Endpoint you created in the ProSBC WebGUI for FreePBX NAP.
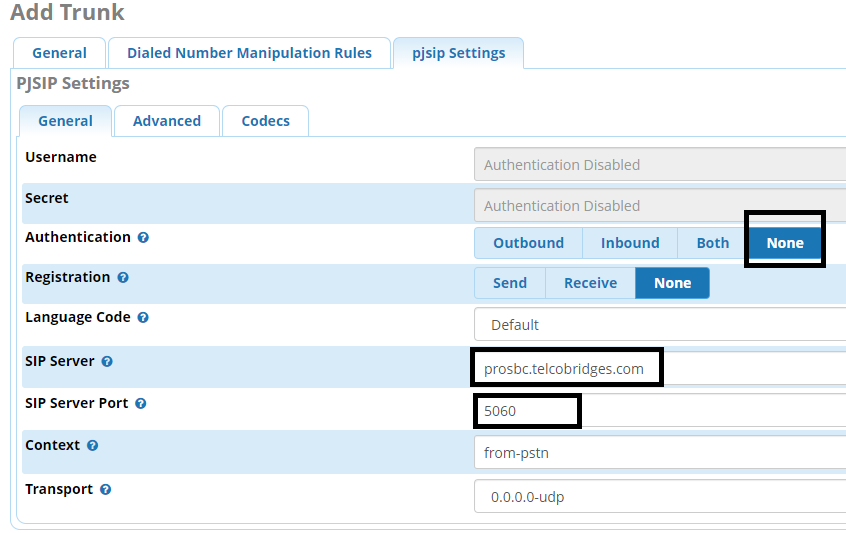
3 - Once done, navigate to the “pjsip Settings" → "General” tab. Here you will need to enter your endpoint information. If you're using an IP endpoint,
* Select None for Authentication
* SIP Server: Enter the Domain of your SIP Trunk (ProSBC FQDN or IP address)
* SIP Server Port: Set this to 5060
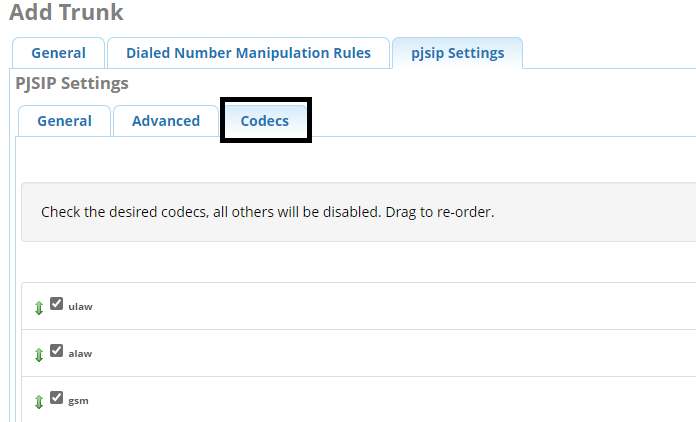
4 - Once done, select the “PJSIP Settings” → “Codecs” Tab. Ensure correct codec are selected.
FreePBX Route Configuration
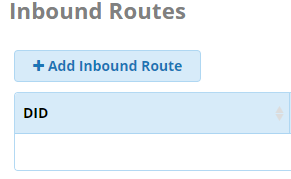
1 - To create an inbound route, navigate to “Connectivity” → “Inbound Routes” and click on "Add Inbound Route"
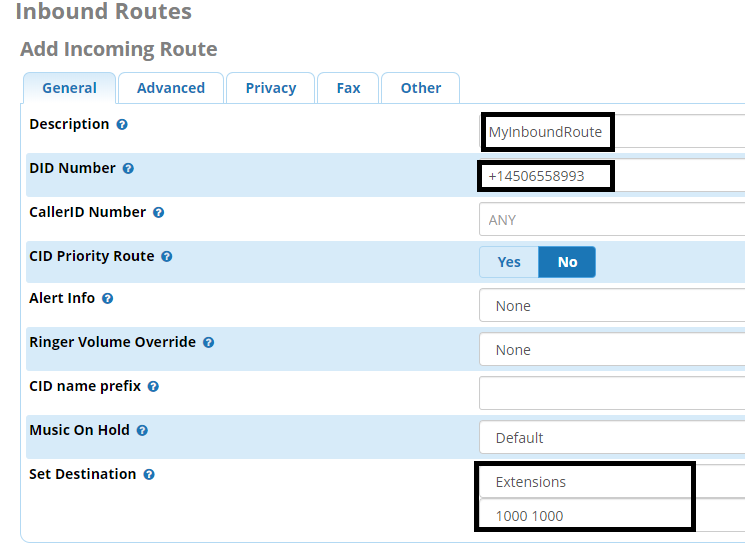
2 - Then set your options:
* Description: add a description of the route.
* DID Number:  fill in the DID number that you will have from your ITSP
* Set Destination: choose Extensions from the first drop down and then select the extension you created from the second drop down
Once done, “Submit” the configuration.
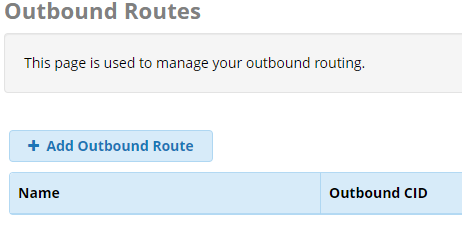
3 - To create an outbound route, navigate to “Connectivity” → “Outbound Routes” and click on "Add Outbound Route"
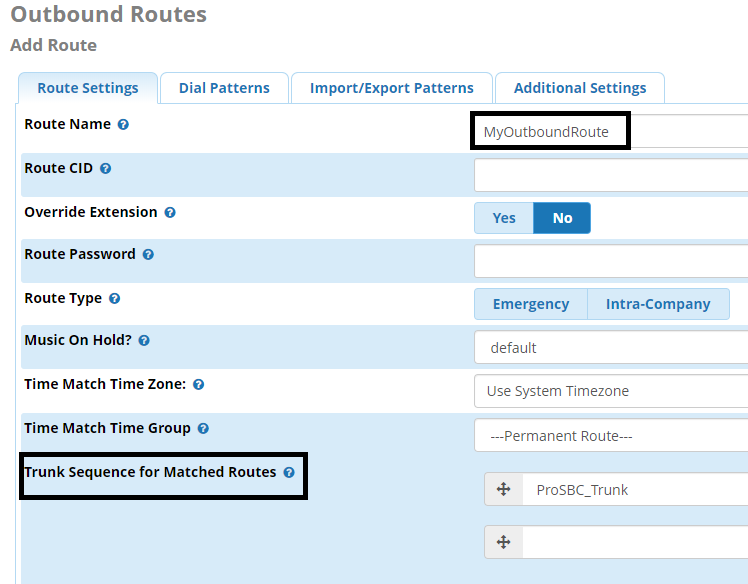
4 - Under the “Route Settings” tab, leave everything as the default except the following:
* Route Name: Add a friendly name for the route you are creating.
* Trunk Sequence for Matched Routes: Use the drop down button to select the SIP Trunk you just created.
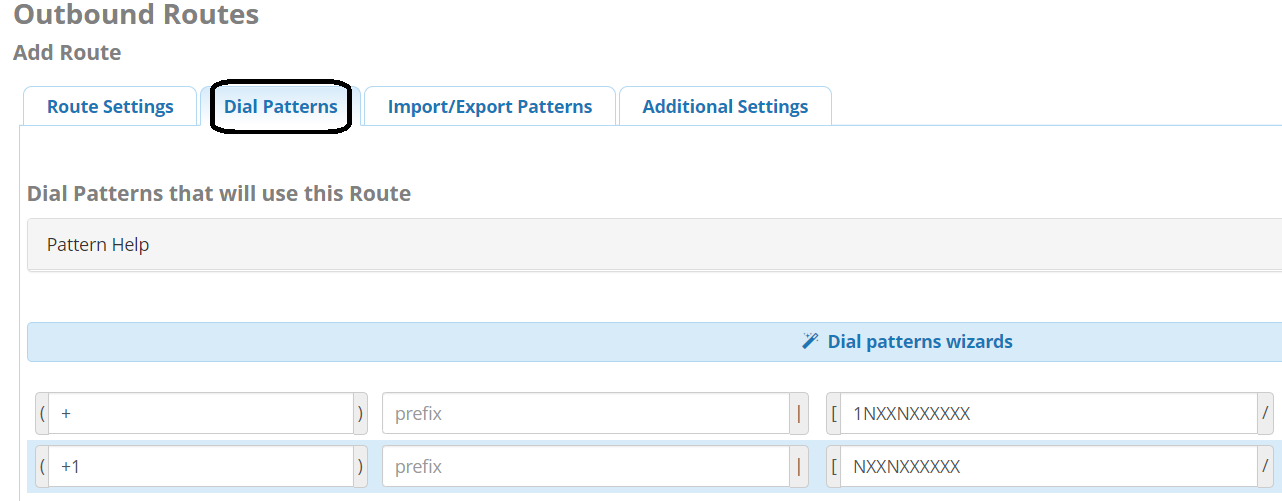
5 - Once done, select the “Dial Patterns” tab. You can manually define the dial patterns or use Dial Pattern wizard.
6 - Once done, “Submit” the configuration and press the “Apply Config” button. The route is ready to be used and your FreePBX is now configured to with ProSBC.
