FreeSBC:Cloud:AWS Additional Interface A
From TBwiki
(Difference between revisions)
| Line 2: | Line 2: | ||
This page is intended to give assistance to people to add an additional interface to an existing AWS ProSBC Instance. | This page is intended to give assistance to people to add an additional interface to an existing AWS ProSBC Instance. | ||
| − | + | == '''Adding a new interface to AWS''' == | |
* After logging in your Amazon account, click on “EC2” in the main AWS console: | * After logging in your Amazon account, click on “EC2” in the main AWS console: | ||
[[File:ConsoleEC2.png| 600px]] | [[File:ConsoleEC2.png| 600px]] | ||
Revision as of 04:49, 18 September 2020
This page is intended to give assistance to people to add an additional interface to an existing AWS ProSBC Instance.
Adding a new interface to AWS
- After logging in your Amazon account, click on “EC2” in the main AWS console:
- Select the instance you want to add additional network interface and note the Availability Zone (AZ) and security group name.
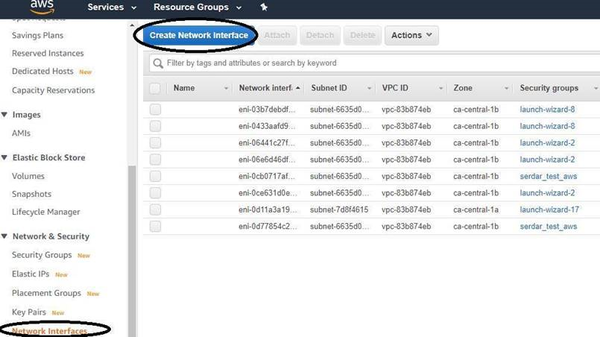
- Go to Network&Security Select Network Interfaces and Click to Create Network Interface Button
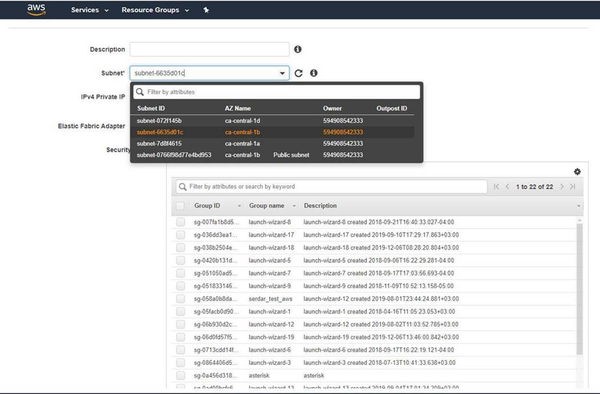
- Give a name, select the subnet and security groups. The subnet must be in the same AZ and the security group can be the same with the existing PROSBC security group.
- The next step is to assign this interface to our instance
- Stop the instance
- Select the Instance Actions -> Networking -> Attach Network Device
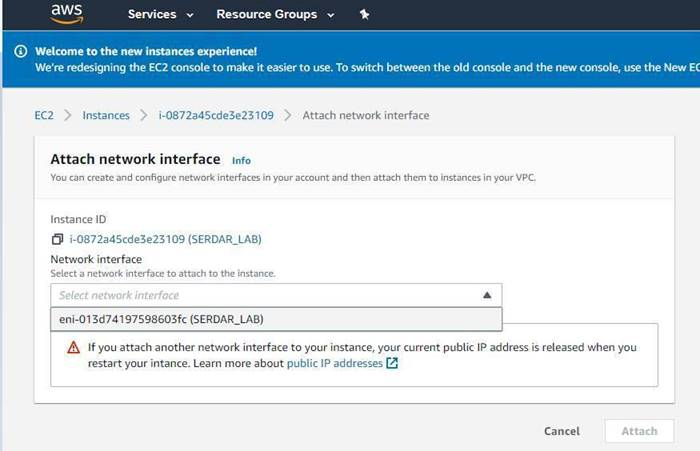
- Select the newly created interface from the drop-down menu and Click to Attach Button


