Toolpack:Creating an MTP2 Configuration A
From TBwiki
(Difference between revisions)
| Line 15: | Line 15: | ||
[[Image:Toolpack_v2.5_Creating_MTP2.png]] | [[Image:Toolpack_v2.5_Creating_MTP2.png]] | ||
| − | 3- Verify that the '''Mtp2Cfg was successfully updated''' message appears, and that the '''Enabled''' box is checked | + | 3- Verify that the '''"Mtp2Cfg was successfully updated"''' message appears, and that the '''Enabled''' box is checked |
[[Image:Toolpack_v2.5_MTP2_Created.png]] | [[Image:Toolpack_v2.5_MTP2_Created.png]] | ||
Revision as of 14:39, 14 July 2010
Message Transfer Part Level 2 (MTP2) provides the data link layer functionality within the OSI mode and is a service provider to the MTP3 link layer.
To create an MTP2 configuration:
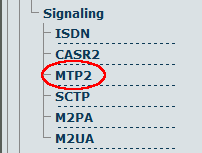
1- Click MTP2 in the navigation panel:
2- Create the new MTP2 configuration:
- Enter a name for the configuration
- Click Save
3- Verify that the "Mtp2Cfg was successfully updated" message appears, and that the Enabled box is checked

