Toolpack:Creating an IP Tunnel A
From TBwiki
(Difference between revisions)
(→To configure an IP tunnel) |
(Added parameter links and updated step 2) |
||
| Line 24: | Line 24: | ||
*Select a virtual port | *Select a virtual port | ||
*Click '''Create''' | *Click '''Create''' | ||
| − | |||
[[Image:CreateIP_Tunnel_1.png]] | [[Image:CreateIP_Tunnel_1.png]] | ||
| + | |||
The new IP tunnel is displayed in the '''IP Tunnel''' list. | The new IP tunnel is displayed in the '''IP Tunnel''' list. | ||
| − | |||
[[Image:CreateIP_Tunnel_2.png]] | [[Image:CreateIP_Tunnel_2.png]] | ||
<br> | <br> | ||
| + | |||
| + | == List of Parameters == | ||
| + | |||
| + | *[[Parameter: Name|Name]] | ||
| + | *[[Parameter: Type|Type]] | ||
| + | *[[Parameter: Username|Username]] | ||
| + | *[[Parameter: Password|Password]] | ||
| + | *[[Parameter: Virtual port|Virtual port]] | ||
| + | |||
| + | '''Advanced Parameters''' | ||
| + | *[[Parameter: LCP polling interval|LCP polling interval]] | ||
| + | *[[Parameter: LCP maximum polling failure|LCP maximum polling failure]] | ||
| + | *[[Parameter: Overwrite global default gateway|NaOverwrite global default gateway]] | ||
Revision as of 13:09, 22 July 2015
Applies to version(s): v2.8.
One or more IP tunnels can be defined to manage the IP traffic betweeen two networks.
To configure an IP tunnel
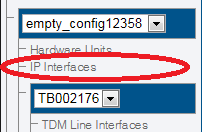
1. Select IP Interfaces from the navigation panel:
2. Click Create New Tunnel:
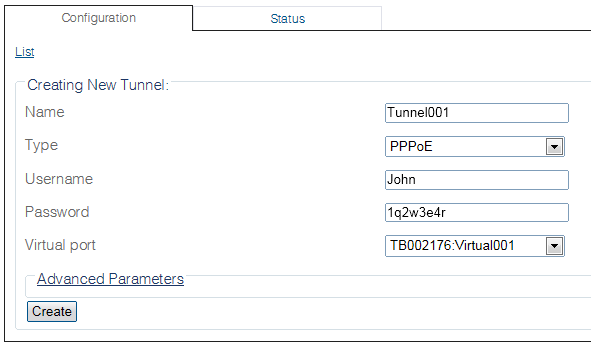
3. Configure the range of ports:
- Enter a name for the IP tunnel
- Select a protocol for the IP tunnel
- Provide a user name and password
- Select a virtual port
- Click Create
The new IP tunnel is displayed in the IP Tunnel list.
List of Parameters
Advanced Parameters


