Toolpack:Creating an MTP3 Configuration D
From TBwiki
(Difference between revisions)
(New 2.8 artic;e) |
(→Applies to version(s): v2.8: Revised step 2 and changed its screenshot.) |
||
| Line 15: | Line 15: | ||
* Make sure the '''Enabled''' and '''SSf Validation''' boxes are checked | * Make sure the '''Enabled''' and '''SSf Validation''' boxes are checked | ||
* Select '''SP''' as the '''signaling point type''' | * Select '''SP''' as the '''signaling point type''' | ||
| − | |||
* Click '''Create''' | * Click '''Create''' | ||
Revision as of 08:50, 2 September 2015
Applies to version(s): v2.8
Once you have set up the MTP2 layer of your SS7 system, you must create an MTP3 configuration. MTP3 provides message routing between signaling points in an SS7 network.
To create an MTP3 configuration:
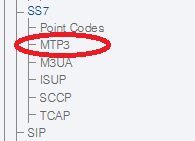
1- Select MTP3 from the navigation panel
2- Configure the new MTP3 service:
- Enter a name for the MTP3 configuration
- Make sure the Enabled and SSf Validation boxes are checked
- Select SP as the signaling point type
- Click Create
3- Verify that the "Mtp3Cfg was successfully created" message appears
List of Parameters
- Name
- Enabled
- SSf Validation
- Signaling Point Type
- T15 Timer
- T16 Timer
- T18 Timer
- T19 Timer
- T21 Timer
- T26 Timer
Advanced Parameters

