Toolpack:Creating an SNMPv1/SNMPv2 Community C
From TBwiki
(Difference between revisions)
| Line 31: | Line 31: | ||
5-Verify that the '''SNMP community was successfully created''' message is displayed and that the new community in '''SNMPv1 SNMPv2 Communities''' list. | 5-Verify that the '''SNMP community was successfully created''' message is displayed and that the new community in '''SNMPv1 SNMPv2 Communities''' list. | ||
| − | [[Image:Snmp_CommunityV1V2_2.png]] | + | [[Image:Snmp_CommunityV1V2_2.png]] |
<br/><br/> | <br/><br/> | ||
| Line 48: | Line 48: | ||
</pre> | </pre> | ||
</div> | </div> | ||
| + | |||
==List of Parameters== | ==List of Parameters== | ||
Revision as of 10:40, 19 October 2015
Applies to version(s): v2.9.
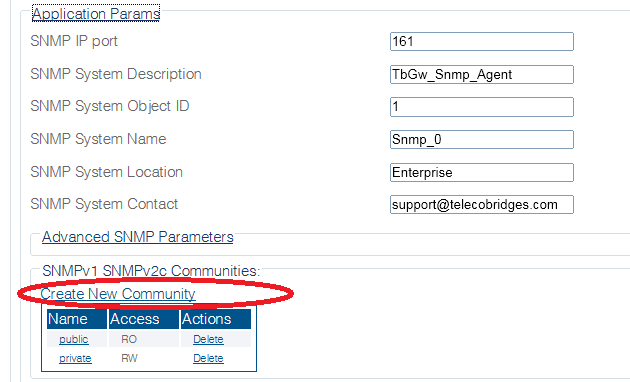
New communities can be created for SNMP versions 1 or 2, By default, the standard communities public (read-only access), and private (read-write access) have been created.
To create a new SNMPv1/SNMPv2 community:
1-Click Services in the navigation panel.
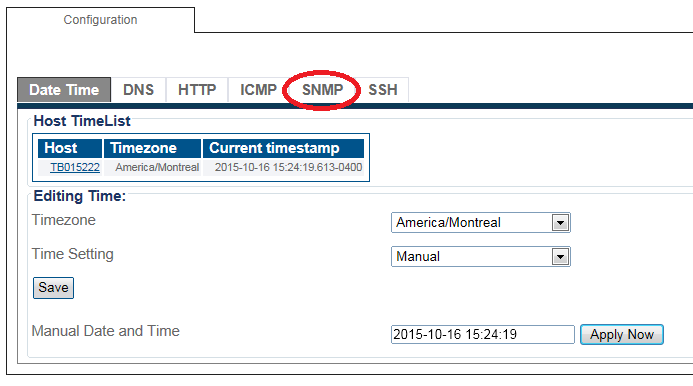
2-Select the SNMP tab.
3-Click Create new community
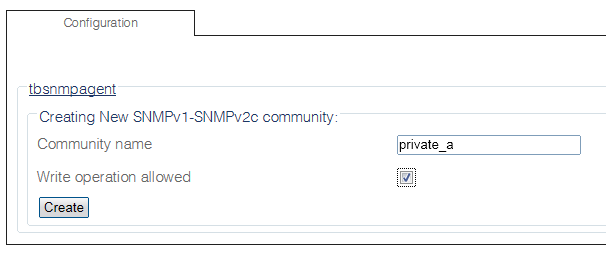
4-In the community creation window:
- Enter a unique name for the community
- Select or clear the Write operation allowed check box to allow or disallow a write privilege for the current community
- Click Create
5-Verify that the SNMP community was successfully created message is displayed and that the new community in SNMPv1 SNMPv2 Communities list.
Path
Parameters (text)
Parameters (json)
List of Parameters


