FreeSBC:SIP Trunking:Example A
From TBwiki
(Difference between revisions)
| Line 5: | Line 5: | ||
==Prerequisites== | ==Prerequisites== | ||
[[FreeSBC|FreeSbc]] devices must be installed as described in their respective [[Product_Installation|installation guides]]. | [[FreeSBC|FreeSbc]] devices must be installed as described in their respective [[Product_Installation|installation guides]]. | ||
| + | |||
| + | =IP Network Configuration= | ||
| + | |||
| + | ==Virtual Port Configuration== | ||
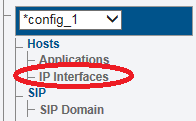
| + | 1. Select '''IP Interfaces''' from the navigation panel | ||
| + | [[Image:Create Voip Interface_Tsbc_0.png]] <br><br> | ||
| + | <br><br> | ||
| + | |||
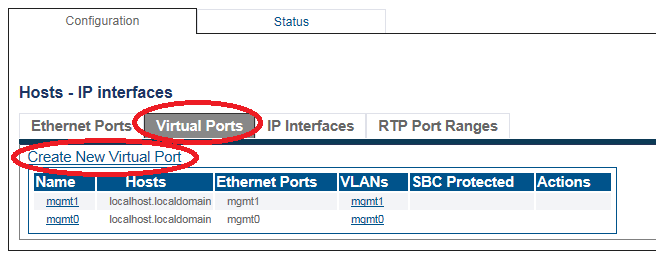
| + | 2. Click the '''Virtual Ports''' tab. | ||
| + | *Click '''Create New Virtual Port''' | ||
| + | |||
| + | [[Image:Create Voip Interface_Tsbc_1.png]]<br><br> | ||
| + | |||
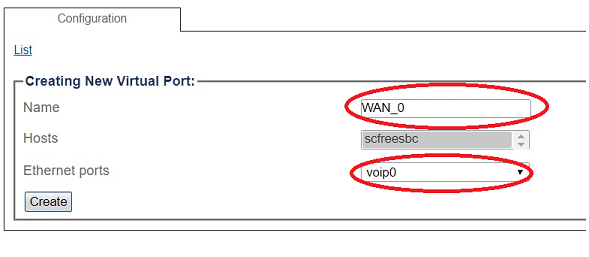
| + | 3. Configure the virtual port. | ||
| + | |||
| + | *Enter a name for the virtual port | ||
| + | *Select the host(s) to which the virtual port is assigned | ||
| + | *Select a physical port to which the virtual port is assigned | ||
| + | |||
| + | *Click '''Create''' | ||
| + | |||
| + | [[Image:SIP_Trunking_VP_WAN.png]]<br><br> | ||
Revision as of 04:56, 22 January 2018
Introduction
The SIP Trunking Example Configuration provides you with a step by step SIP trunking Configuration of FreeSbc systems, using the Web Portal configuration tool. Complete general installation configuration steps, before you begin configuring your specific scenario.
Prerequisites
FreeSbc devices must be installed as described in their respective installation guides.
IP Network Configuration
Virtual Port Configuration
1. Select IP Interfaces from the navigation panel

2. Click the Virtual Ports tab.
- Click Create New Virtual Port
3. Configure the virtual port.
- Enter a name for the virtual port
- Select the host(s) to which the virtual port is assigned
- Select a physical port to which the virtual port is assigned
- Click Create

