FreeSBC:Skype for Business Configuration:Example A
(→Configuring FreeSBC for Skype for Business Server 2015) |
(→SBC Turorial Guide V3.1) |
||
| Line 139: | Line 139: | ||
=SBC Use Cases= | =SBC Use Cases= | ||
[[Toolpack:Tsbc Use Cases A|SBC Use Cases]] | [[Toolpack:Tsbc Use Cases A|SBC Use Cases]] | ||
| − | |||
| − | |||
| − | |||
| − | |||
| − | |||
| − | |||
Revision as of 01:05, 11 February 2020
Contents |
Applies to version: v3.1
Introduction
The Skype for Business Example Configuration provides you with a step by step Skype for Business Configuration using TCP with ProSBC systems, using the Web Portal configuration tool. Complete general installation configuration steps, before you begin configuring your specific scenario. Used Protocols: SIP/UDP for ITSP SIP Trunk, SIP/TCP for S4B Front End Server
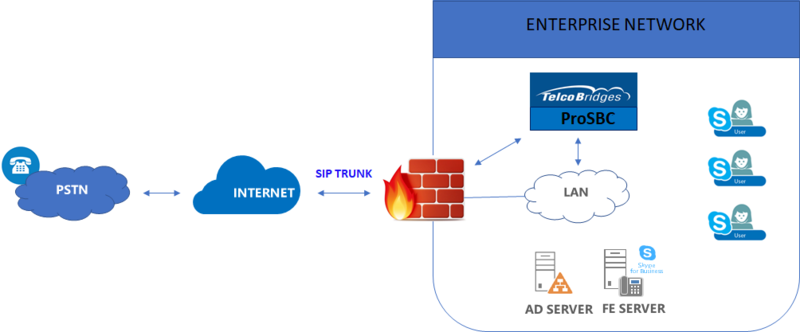
Skype for Business Example Environment
Configuring Skype for Business Server 2015
This procedure describes how to configure FreeSBC as an IP /PSTN Gateway in Skype for Business.
Adding FreeSBC in to S4B Topology
1. On the server where Topology Builder is installed, start the Skype for Business Server 2015 Topology Builder (Windows Start menu > search for Skype for Business Server Topology Builder), as shown below:

2. Run Topology Builder. The Following is displayed,
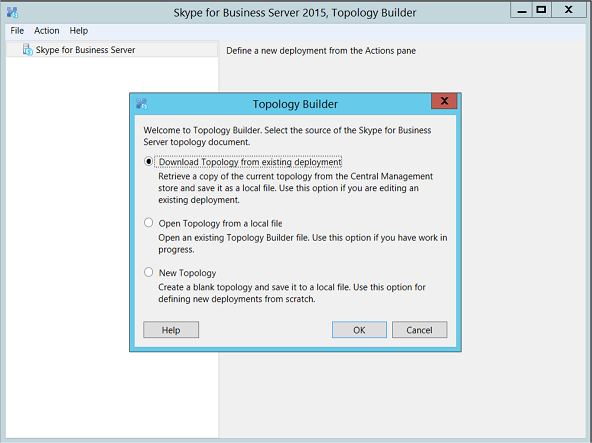
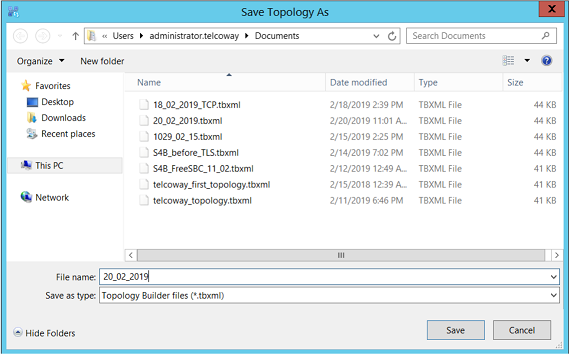
3. Select the Download Topology from existing deployment option, and then click OK; you are prompted to save the downloaded topology. Enter a name for the topology file and then click Save.
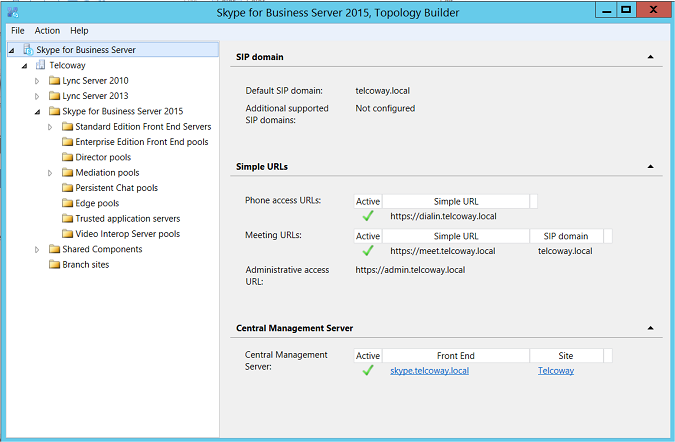
The Topology Builder screen with the downloaded topology is displayed:
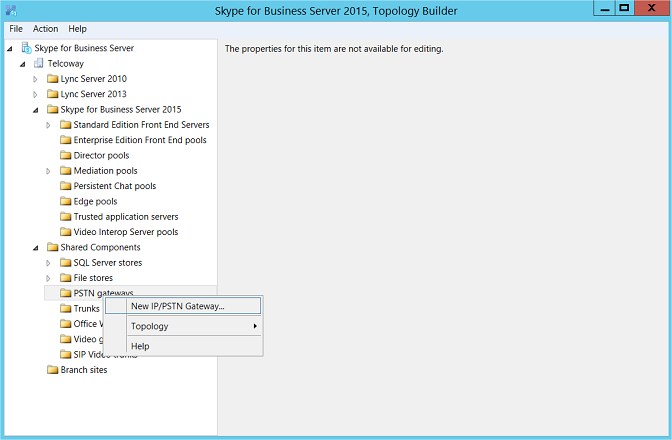
4. Under the Shared Components node, right-click to PSTN gateways node, and then from the menu, choose New IP/PSTN Gateway
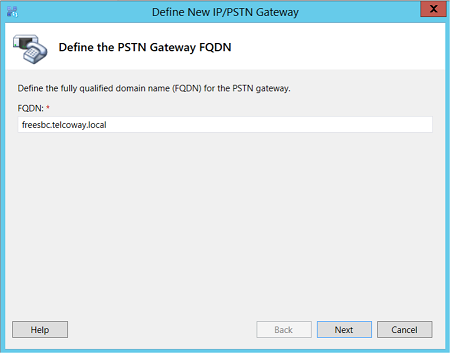
5. Enter the Fully Qualified Domain Name (FQDN) of the FreeSBC (e.g., freesbc.telcoway.local). Click Next
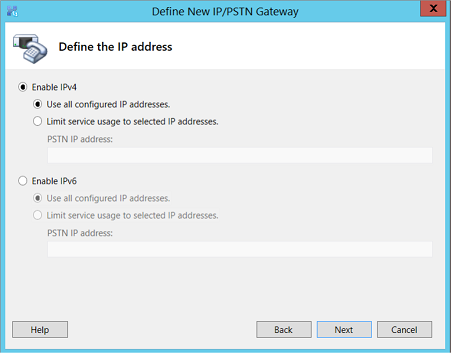
6. Define the listening mode of the Ip address of your new PSTN Gateway, click Next.
7. Define a root trunk for the PSTN gateway. A trunk is a logical connection between the Mediation Server and a gateway uniquely identified by the following combination: Mediation Server FQDN, Mediation Server listening port (TLS or TCP), gateway IP and FQDN, and gateway listening port.
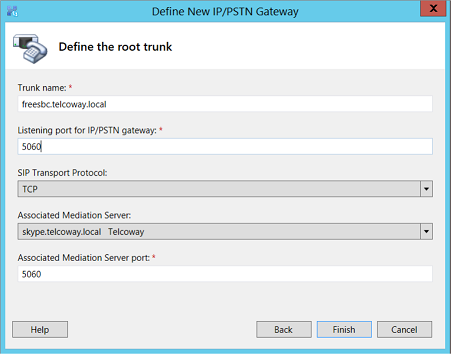
- In the 'Listening Port for IP/PSTN Gateway' field, enter the listening port that the FreeSBC will use for SIP messages from the Mediation Server that will be associated with the root trunk of the PSTN gateway (e.g., 5060). This parameter is later configured in the SIP Transport Server.
- In the 'SIP Transport Protocol' field, select the transport type (TCP) that the trunk uses. This parameter is later configured in the SIP Transport Server.
- In the 'Associated Mediation Server' field, select the Mediation Server pool to associate with the root trunk of this PSTN gateway.
- In the 'Associated Mediation Server Port' field, enter the listening port that the Mediation Server will use for SIP messages from the FreeSBC. This parameter is later configured in the S4B NAP settings.
- Click Finish.
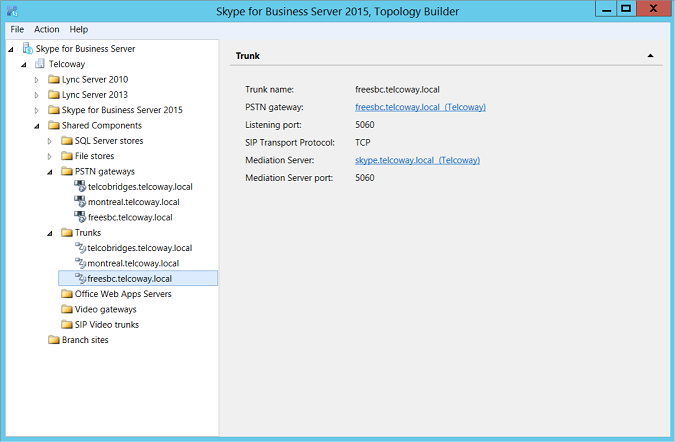
8. The FreeSBC added as a PSTN Gateway, and a trunk is created as shown below:
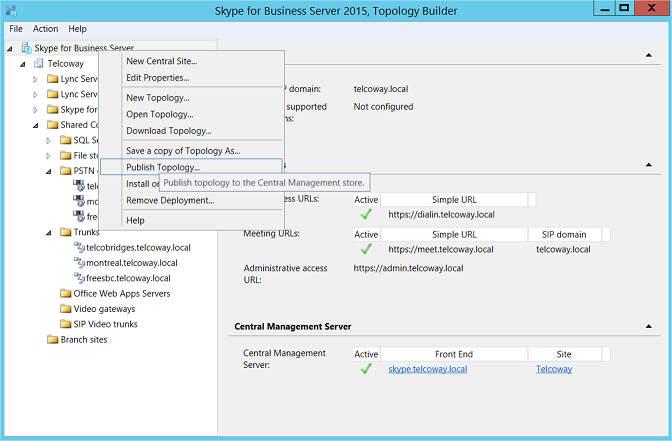
9. Publish the Topology; In the main tree, select the root node Skype for Business Server, and then from the Action menu, choose Publish Topology, as shown below:
In the new window click Next; the Topology Builder starts to publish your topology, as shown below:
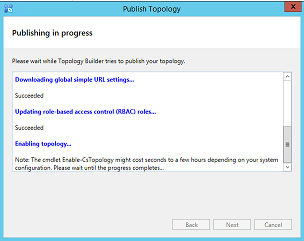
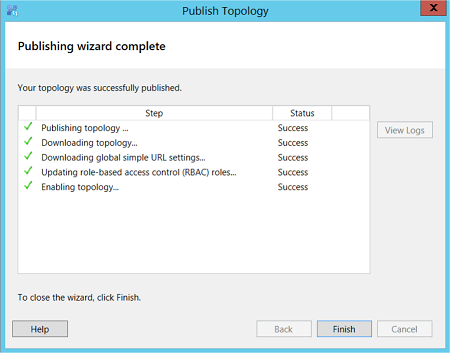
10. Wait until the publishing topology process completes successfully, and click Finish as shown below:
Configuring the "Route" on Skype for Business Server 2015
The procedure below describes how to configure a "Route" on the Skype for Business Server 2015 and to associate it with the FreeSBC PSTN Gateway.
1. Start the Microsoft Skype for Business Server 2015 Control Panel (Start > search for Microsoft Skype for Business Server Control Panel), as shown below:

2. Enter your login credentials:
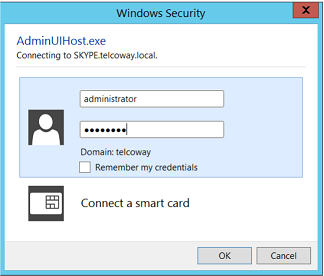
3. In the left navigation pane, select Voice Routing
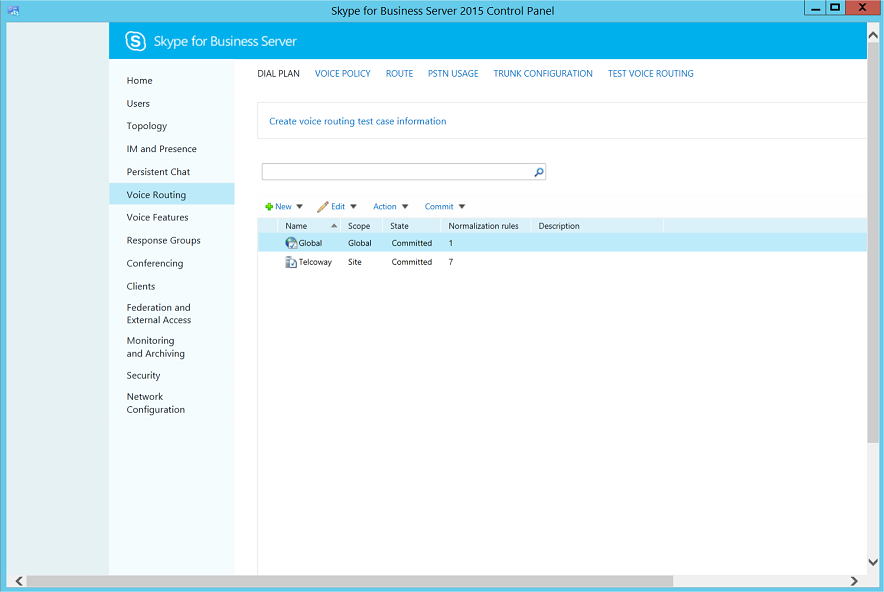
4. In the Voice Routing page, select the Route tab.
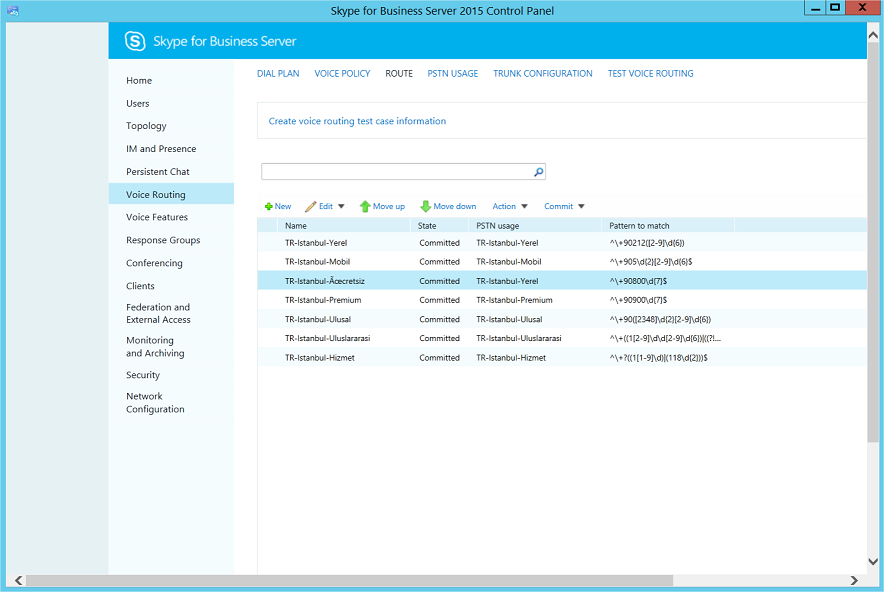
5. You can edit an existing route or add a new route.
A - Editing an existing route
- Click one of the existing route
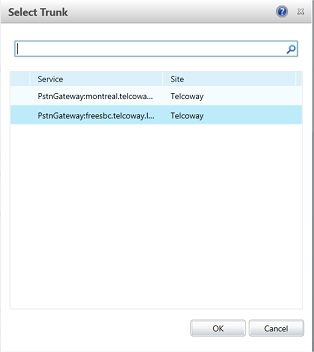
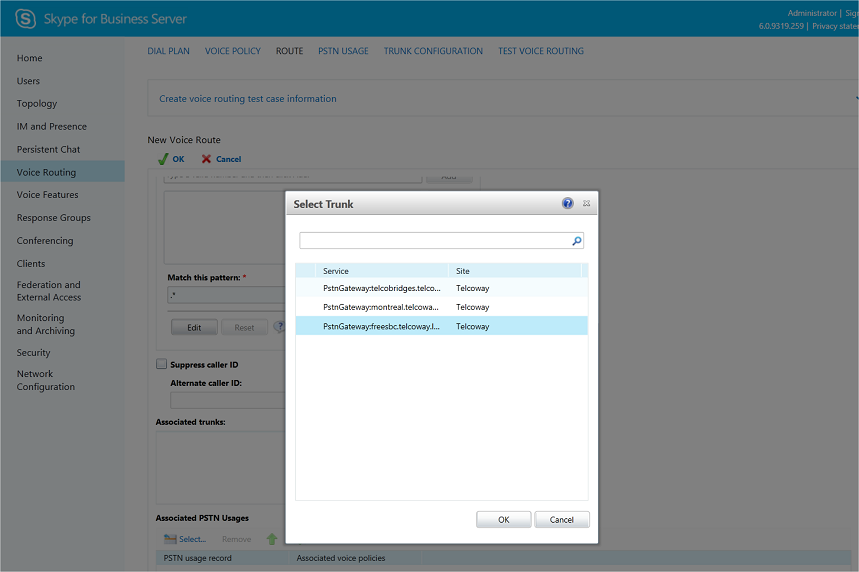
- Go to Associated trunks, and then click Add
- Select newly added trunk from the list (freesbc.telcoway.local) and then click OK
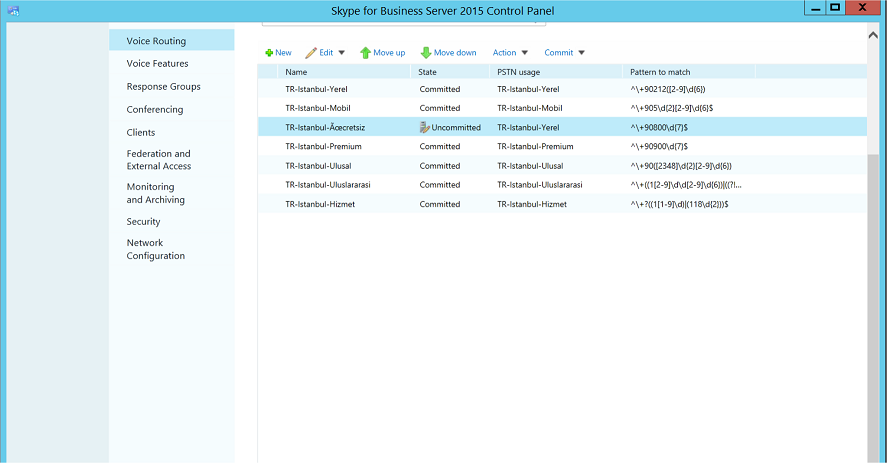
- Click OK (located on the top of the New Voice Route page); the Edited Voice Route (Uncommitted) is displayed:
- From the Commit drop-down list, choose to Commit all,
B - Adding a new route
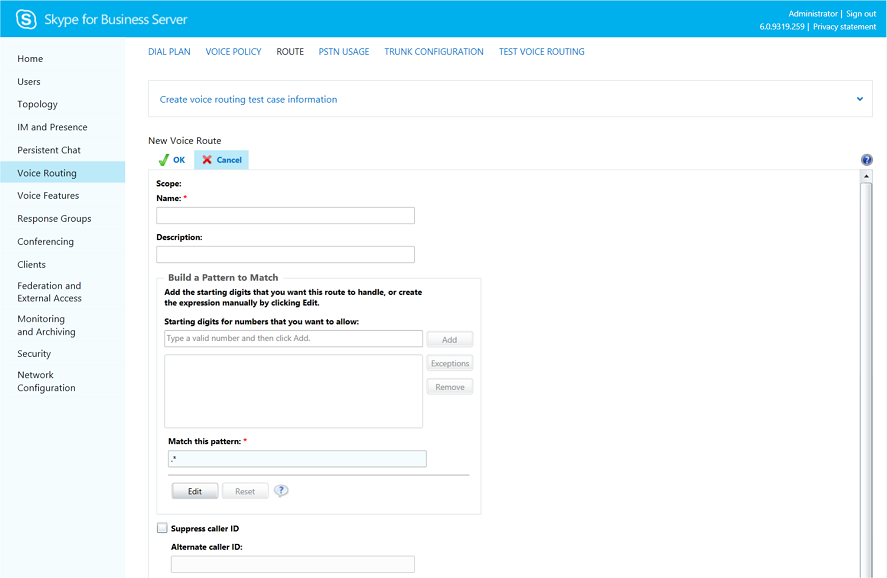
- Click New; the New Voice Route page appears:
- In the ‘Name’ field enter a name for this route.
- In the 'Starting digits for numbers that you want to allow' field, enter the starting digits you want this route to handle (e.g., * to match all numbers), and then click Add
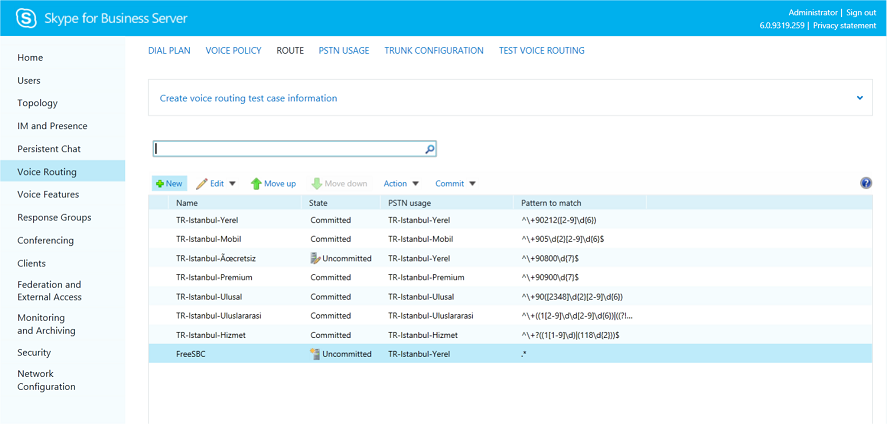
- Click OK (located on the top of the New Voice Route page); the New Voice Route (Uncommitted) is displayed:
- From the Commit drop-down list, choose to Commit all.
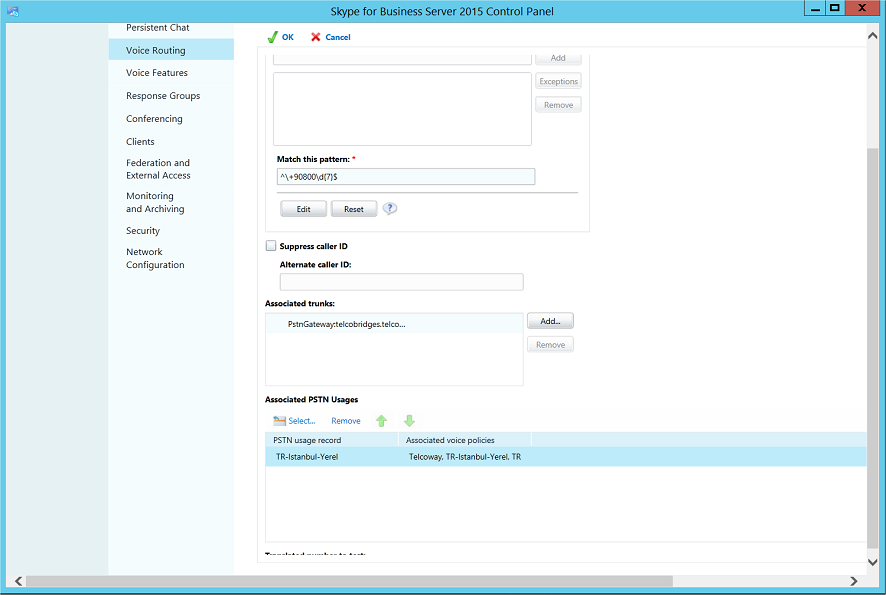
6. Associate the route with the FreeSBC Trunk that you created:
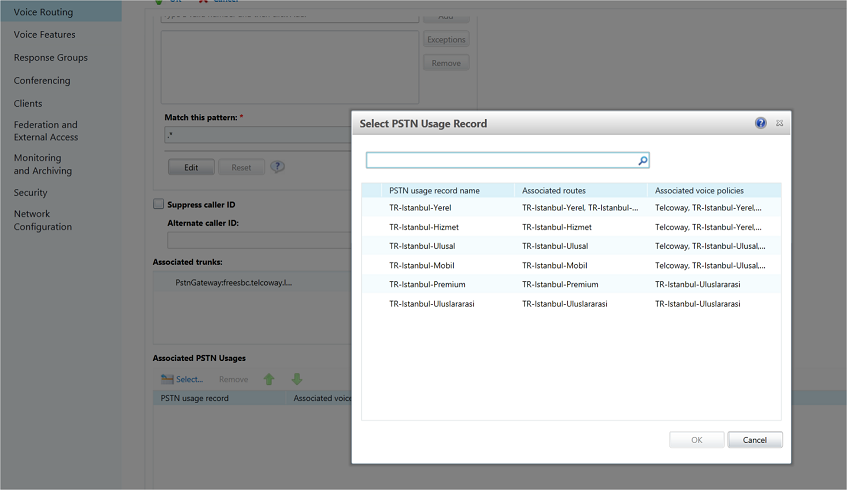
7. Associate a PSTN Usage to this route: Under the 'Associated PSTN Usages' group, click Select and then add the associated PSTN Usage
Configuring ProSBC for Skype for Business Server 2015
This procedure describes how to configure Skype For Business in ProSBC to route calls to external ITSP.
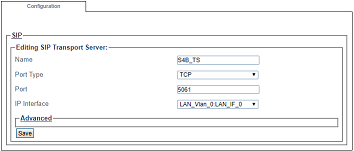
1. On the ProSBC, need to add a new SIP Transport Server for TCP Connection
Go to SIP -> Click to Configured SIP -> Transport Servers -> Create New Transport Server
- Give a Name for this transport server
- Set Port Type to TCP
- Set the listening transport server Port. It must be the same as configured on Skype For Business IP/PSTN Gateway (In this documentation section 7)
- Set the IP Interface for transport server listening on.
- Click to Save button
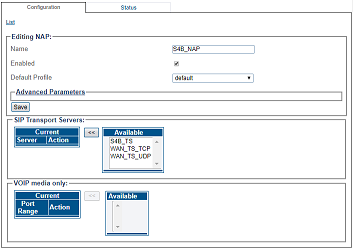
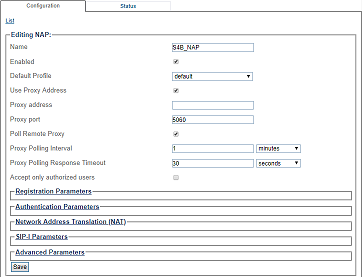
2. Add a NAP for Skype for Business Server
Go to NAPs -> Create New NAP
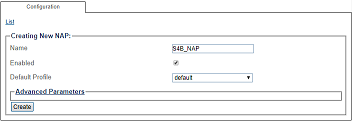
- Give a Name for this NAP
- Click to Create button
- Select SIP Transport Server for this NAP. It must be the same SIP Transport Server we created for Skype for Business before (Section 1)
- Move the selected SIP Transport Server to Current section using << button
- Set Skype for Business Mediation Server IP address in the Proxy Address
- Set Skype for Business Mediation Server Port in the Proxy Port
- Select the correct Port range for this NAP
- Move the selected Port range to Current section using << button.
- Click to Save button
3. Add routes for Skype for Business Server
You need to add 2 routes for Skype for Business Server. One for Incoming traffic from Skype for Business Server and other for outgoing traffic to Skype for Business Server.
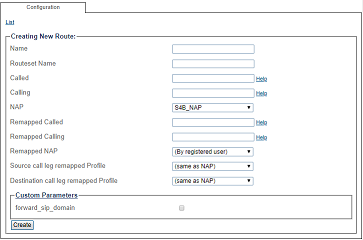
1. For Incoming traffic from Skype for Business Server
Go to Routes -> Create New Static Route
- Give a Name for this route
- Select incoming NAP. Select the NAP we created before for Skype for Business
- Select outgoing NAP from Remapped NAP
- Click to Create button
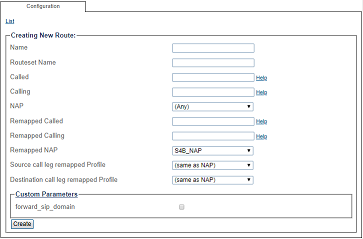
2. For Incoming traffic to Skype for Business Server
Go to Routes -> Create New Static Route
- Give a Name for this route
- Select incoming NAP.
- Select outgoing NAP from Remapped NAP. Select the NAP we created before for Skype for Business
- Click to Create button
Activating the Configuration
Changes made to the configuration of the FreeSBC units are stored in the OAM&P Configuration and Logging database. In order for changes to be used by the system, they must first be activated. This is done at the system level and accessed from the Navigation panel.
Check the following link for activating the configuration;
Toolpack:Activating_the_Configuration_D
