Toolpack v2.4:Create an ISUP User Part
From TBwiki
(Difference between revisions)
(→To create an ISUP user part:) |
(→To create an ISUP user part:) |
||
| Line 8: | Line 8: | ||
*Enter a name for the user part | *Enter a name for the user part | ||
*Select a protocol variant: | *Select a protocol variant: | ||
| − | ** | + | **ANSI88 |
| − | ** | + | **ANSI92 |
| − | ** | + | **ANSI96 |
| − | ** | + | **TELCORDIA |
**[[ITU]] | **[[ITU]] | ||
| − | ** | + | **ITU97 |
| − | ** | + | **SINGAPORE |
| − | ** | + | **Q767 |
| − | ** | + | **NTT |
| − | ** | + | **CHINA |
**[[ETSI]] | **[[ETSI]] | ||
| − | ** | + | **ETSIV3 |
| − | ** | + | **UK |
*Select an MTP3 sub service field (the same that was previously set for MTP3) | *Select an MTP3 sub service field (the same that was previously set for MTP3) | ||
*Select an address indicator type ("Not Present", Subscriber Number, National Number, or International Number) | *Select an address indicator type ("Not Present", Subscriber Number, National Number, or International Number) | ||
Latest revision as of 10:02, 16 January 2010
To create an ISUP user part:
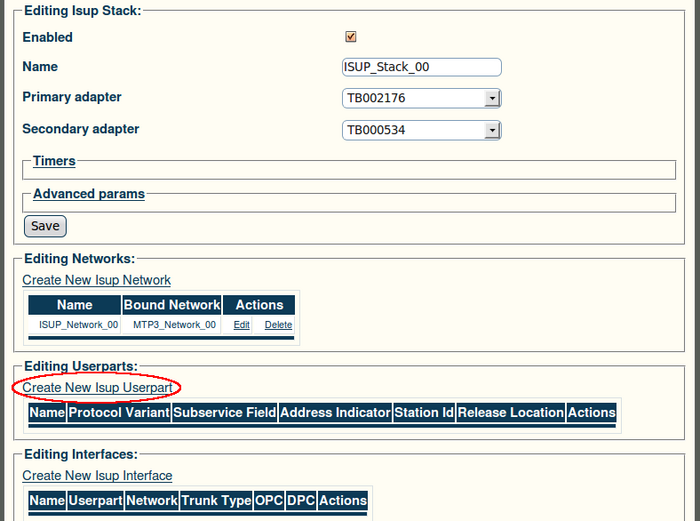
1. Click "Create New Isup Userpart" in the ISUP stack configuration window:
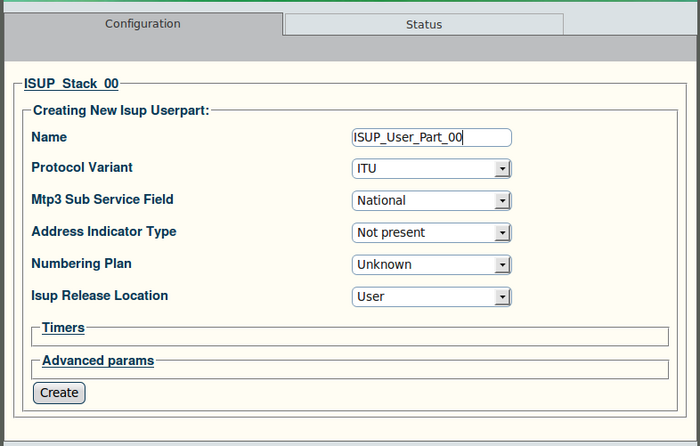
2. Configure the new ISUP user part:
- Enter a name for the user part
- Select a protocol variant:
- Select an MTP3 sub service field (the same that was previously set for MTP3)
- Select an address indicator type ("Not Present", Subscriber Number, National Number, or International Number)
- Select a Numbering Plan:
- Unknown
- ISDN
- Telephony
- Data
- Telex
- National
- Private
- or, Reserved
- Select an ISUP Release Location:
- User
- Private Network LU
- Public Network LU
- Transit Network
- Private Network RU
- Public Network RU
- Local Interface
- International Network
- Network beyond internetworking point
- or, No info
- Click "Create" to finalize the configuration
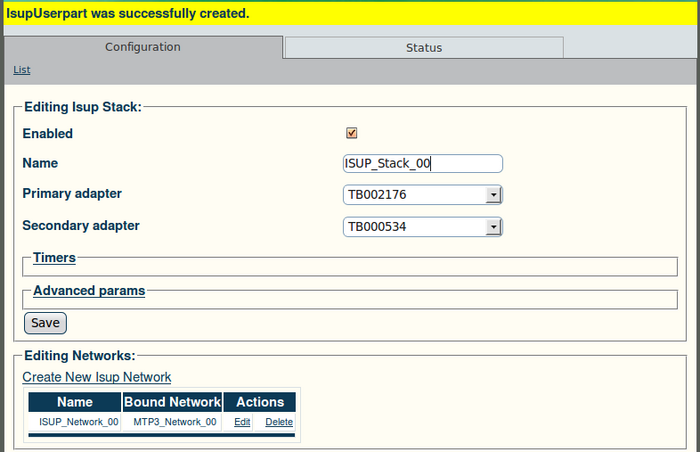
3. Verify that the "IsupUserpart was successfully created message appears:


