Toolpack:Creating an M3UA User Part A
From TBwiki
(Difference between revisions)
(Created page with 'To create an M3UA user part: 1- Click '''Create New M3ua Userpart''' in the M3UA network configuration window Image:Toolpack_v2.5_Create_M3UA_Userpart.png 2- Configure t…') |
|||
| Line 1: | Line 1: | ||
| + | Now that you have created an M3UA network, you must create a new M3UA user part. | ||
| + | |||
To create an M3UA user part: | To create an M3UA user part: | ||
| + | |||
1- Click '''Create New M3ua Userpart''' in the M3UA network configuration window | 1- Click '''Create New M3ua Userpart''' in the M3UA network configuration window | ||
| Line 15: | Line 18: | ||
[[Image:Toolpack_v2.5_Creating_M3UA_Userpart.png]] | [[Image:Toolpack_v2.5_Creating_M3UA_Userpart.png]] | ||
| − | 3- Verify that the '''M3ua Userpart was successfully created''' message appears | + | 3- Verify that the '''"M3ua Userpart was successfully created"''' message appears |
[[Image:Toolpack_v2.5_M3UA_Userpart_Created.png]] | [[Image:Toolpack_v2.5_M3UA_Userpart_Created.png]] | ||
Revision as of 12:23, 15 July 2010
Now that you have created an M3UA network, you must create a new M3UA user part.
To create an M3UA user part:
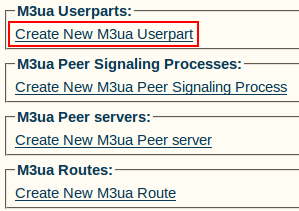
1- Click Create New M3ua Userpart in the M3UA network configuration window
2- Configure the new M3UA user part:
- Enter a name for the user part
- IMPORTANT:
- For a system set up on a Signaling Gateway: Select an MTP3 network
- For a system set up on IPSP or ASP: The aforementioned field is not visible.
- Click Create
3- Verify that the "M3ua Userpart was successfully created" message appears

