Toolpack:Creating the M2PA Configuration A
From TBwiki
(Difference between revisions)
| Line 15: | Line 15: | ||
* Verify that the '''Enabled''' box is '''checked''' | * Verify that the '''Enabled''' box is '''checked''' | ||
* Enter a '''name''' for the M2PA configuration | * Enter a '''name''' for the M2PA configuration | ||
| − | |||
* Click '''Create''' | * Click '''Create''' | ||
| Line 23: | Line 22: | ||
[[Image:Toolpack_v2.5_M2PA_Created.png]] | [[Image:Toolpack_v2.5_M2PA_Created.png]] | ||
| + | |||
| + | |||
| + | ==List of Parameters== | ||
| + | |||
| + | * [[Parameter: Enabled|Enabled]] | ||
| + | * [[Parameter: Name|Name]] | ||
Revision as of 15:11, 6 August 2010
For the configuration of your SIGTRAN M2PA system, you will first need to create a new M2PA configuration. In this system, the SS7 MTP2 layer is replaced by the SIGTRAN M2PA layer which extends MTP2 signaling functionality into the IP network.
Note: M2PA replaces the MTP2 layer entirely; however, it still requires the MTP3 layer.
To create an M2PA configuration:
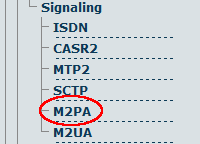
1- Click M2PA in the navigation panel
2- Configure the new M2PA service
- Verify that the Enabled box is checked
- Enter a name for the M2PA configuration
- Click Create
3- Verify that the "M2pa Cfg was successfully created" message appears

