Toolpack:Configuring tbSnmpAgent A
From TBwiki
(Difference between revisions)
| Line 3: | Line 3: | ||
*Under the '''Applications''' heading, in the Web Portal navigation panel, click the '''Configurations''' tab. | *Under the '''Applications''' heading, in the Web Portal navigation panel, click the '''Configurations''' tab. | ||
[[File:Snmp_cfg_click_configurations.gif]] | [[File:Snmp_cfg_click_configurations.gif]] | ||
| + | <br/><br/> | ||
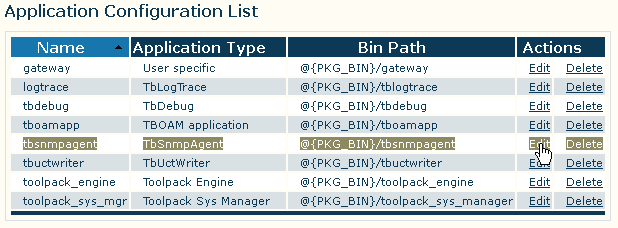
| + | *In the '''Application Configuration List''', find the entry for '''tbsnmpagent''' and click the link labeled '''edit''', next to that entry. | ||
| + | [[File:Snmp_cfg_click_edit.gif]] | ||
<br/><br/> | <br/><br/> | ||
Revision as of 08:27, 17 June 2011
Once you are logged into the Web Portal and have successfully activated the tbSnmpAgent application, follow these steps to configure the application to suit your needs:
- Under the Applications heading, in the Web Portal navigation panel, click the Configurations tab.
- In the Application Configuration List, find the entry for tbsnmpagent and click the link labeled edit, next to that entry.

