Toolpack:Creating an SNMPv1/SNMPv2 Community A
From TBwiki
(Difference between revisions)
| Line 6: | Line 6: | ||
*In the community creation window: | *In the community creation window: | ||
**Enter a unique '''name''' for the community | **Enter a unique '''name''' for the community | ||
| − | **Click the check box to allow or disallow the ''' | + | **Click the check box to allow or disallow the '''write privilege''' for the current community |
**Click '''Create''' | **Click '''Create''' | ||
[[File:Snmp_cfg_creating_new_community.gif|border]] | [[File:Snmp_cfg_creating_new_community.gif|border]] | ||
Revision as of 10:22, 17 June 2011
To create a new SNMPv1/SNMPv2 community, carry out the following steps:
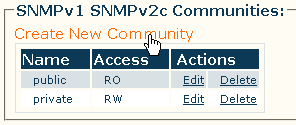
- Click Create new community under the SNMPv1 SNMPv2 Communities heading
- In the community creation window:
- Enter a unique name for the community
- Click the check box to allow or disallow the write privilege for the current community
- Click Create
- Verify that the "SNMP community was successfully created" message appears at the top of the following screen
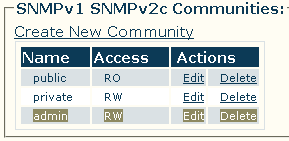
- The new community should now appear under the SNMPv1 SNMPv2 Communities heading


