FreeSBC:Cloud:OpenStack Installation A
Contents |
Requirements
Minimal Cloud requirements:
- 4 VCPU
- 20G hard drive
- 8G RAM
- Virtio NIC interface
For better performance (see optimization section)
- SR-IOV or MacVTap compatible NICs
- Pinned CPU
Getting the Image
Please contact our sales team at sales@telcobridges.com to get a copy of the latest TBSC-SW Image.
Installation on OpenStack cloud
Minimal Flavor
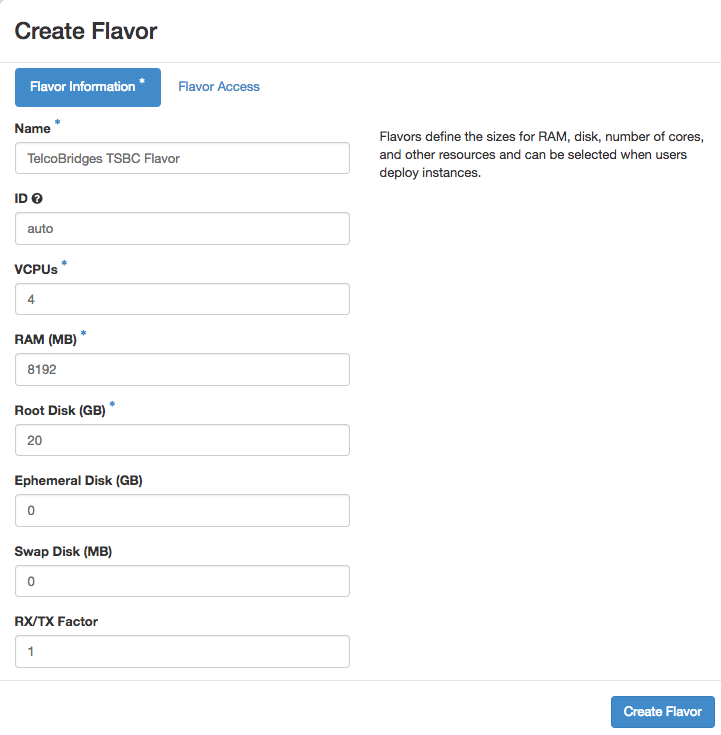
In OpenStack, a flavor defines the compute, memory, and storage capacity of a virtual server, also known as an instance. If you do not already have a flavor that meets the listed minimal requirements, you will have to create a new one.
Creating a Flavor
- Log in to the Dashboard and select the admin project from the drop-down list.
- In the Admin tab, open the System tab and click the Flavors category.
- Click Create Flavor.
- In the Create Flavor window, enter or select the parameters for the flavor in the Flavor Information tab.

- In the Flavor Access tab, you can control access to the flavor by moving projects from the All Projects column to the Selected Projects column.
Only projects in the Selected Projects column can use the flavor. If there are no projects in the right column, all projects can use the flavor. - Click Create Flavor.
References
https://docs.openstack.org/admin-guide/dashboard-manage-flavors.html https://docs.openstack.org/admin-guide/compute-flavors.html
TBD
Changing the root password
- Use the console to login into the server
- user: root
- password: root
- Change the password to something stronger than root:
# passwd
New password: ........
Retype new password: ........
passwd: all authentication tokens updated successfully.
Assigning IP address
- Assign a IP address to the Ethernet interface having network connectivity. Example if the NIC's name would be eth0:
 # ip link set eth0 up
 # ip addresss add 192.168.178.30/24 dev eth0
Accessing the TSBC-SW web portal
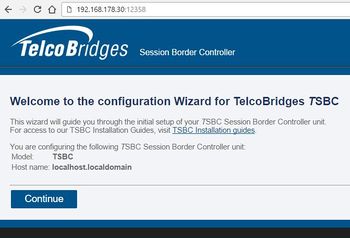
- Open a web browser to the IP of your server, on port 12358. Example if your server address is 192.168.178.30, the URL would be:
http://192.168.178.30:12358 - You should get to the TSBC Configuration Wizard

From here, you can go to Web Portal Initial Configuration Guide to continue the installation, and/or optimize your server to get the maximum out of your server.
Web Portal Initial Configuration
Click on the following link to pursue installation from the web portal: TSBC-SW:WebPortal:Initial Configuration
Optimizations
Click on the following link for baremetal server optimizations: TSBC-SW:Baremetal:Optimizations