TMG7800-Ctrl:Baremetal:Installation A
Contents |
Requirements
Minimal server requirements:
- 64 bits server
- Optical disk drive
- One management Ethernet
- Console access through serial port or keyboard/monitor ports
- BIOS setup for maximum performance (i.e. no dynamic CPU throttling)
See list of supported Network Interface Cards (NICs) here: List of supported NICs
Getting the ISO
Please contact our sales team to get a copy of the latest TMG7800-CTRL-SW ISO and the product activation key (VTB-XXXX-XXXX).
Prepare an ISO burned onto a bootable USB flash drive or a DVD
Use a software application to burn the ISO onto a USB flash drive. On Windows, [|Rufus ] is known to work with the TMG7800-CTRL-SW ISO. But generally any similar application should work. Make sure to set the volume label to "CENTOS 7 X8" and to format the drive in the FAT32 file system format.
Installing the hardware
- Identify which Ethernet networks you need and connect them to your server.
- Refer to "TMG7800 Installation Guide" for your hardware setup.
Installing the ISO
The installation process will reformat the server's disks and install all the necessary software.
Physical installation steps
- Get an access to the console of the server. Usually, this is achieved by connecting a keyboard and screen to the server.
- Plug in your USB flash drive and boot from that drive.
- Alternatively, insert the DVD in the optical drive of your server and boot from the DVD drive.
- You should get the to the "Virtual Appliance Installer" menu on your display:
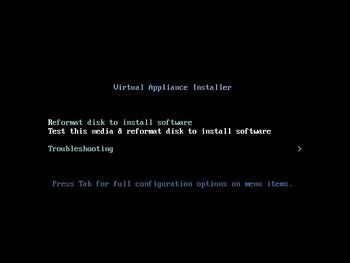
- Hit 'R' key, then 'ENTER' key to start the installation
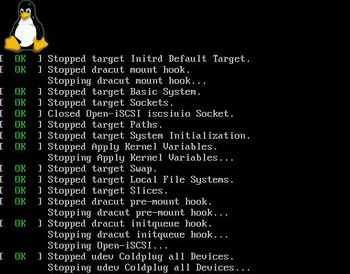
- Wait for the installation process to complete. When installation is complete, the server will reboot itself.
- Important: Make sure to remove the DVD from the drive while the server is rebooting. If you get back to "Virtual Appliance Installer", just eject the CD or remove the USB flash drive and reboot again.
- It may take a couple of minutes for the system to be brought up after the first reboot. Until the WebPortal is accessible, you must not reboot the newly created machine to allow the installation to complete properly.


Changing the root password
- Use the console to login into the server
- user: root
- password: root
- Change the password to something stronger than root:
# passwd
New password: ........
Retype new password: ........
passwd: all authentication tokens updated successfully.
Assigning IP address
By default, all detect network interfaces will have DHCP enabled. Thus, the server might already have an IP address assigned if the network has a DHCP server running. In such case, you can display and use it to access the web portal configuration panel.
- Retrieve an IP address assigned by DHCP
# ifconfig
If there is no IP assigned, you will need to configure one manually.
- Assign a IP address to the Ethernet interface having network connectivity. Example if the NIC's name would be eth0:
 # ip link set eth0 up
 # ip addresss add 192.168.178.30/24 dev eth0
Accessing the TMG7800-CTRL-SW web portal
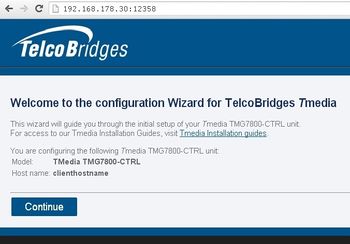
- Open a web browser to the IP of your server, on port 12358. Example if your server address is 192.168.178.30, the URL would be:
http://192.168.178.30:12358 - You should get to the TMG7800-CTRL Configuration Wizard

From here, you can go to Web Portal Initial Configuration Guide to continue the installation.
Web Portal Initial Configuration
Click on the following link to pursue installation from the web portal: TMG7800-CTRL-SW:WebPortal:Initial Configuration