Configure NFAS
Applies to version(s): v2.8.
ISDN-PRI signaling can be configured for your system. To do so, you must create a new ISDN stack.
Integrated Systems Digital Network (ISDN) is a circuit-switched telephone system that integrated voice and data on the same lines.Tmedia and Tdev systems can be configured to provide an ISDN signaling stack on the trunks of one or more units to meet system configuration requirements.
To create a new ISDN stack:
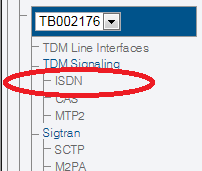
1- Click ISDN in the navigation menu, under the Signaling header
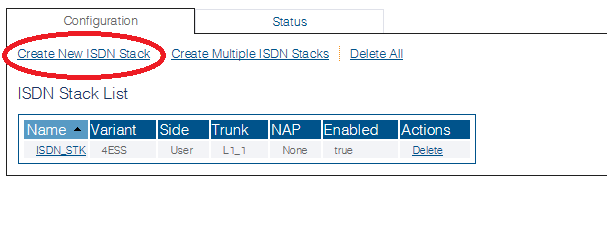
2- Click Create New ISDN Stack
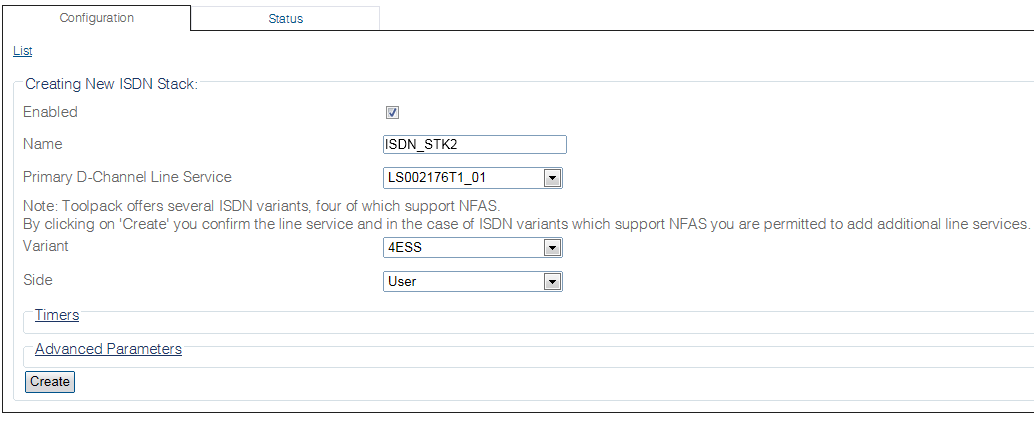
3- Create the new stack:
Note: TelcoBridges offers several ISDN variants, four of which support NFAS. By clicking on 'Create' you confirm the line service and in the case of ISDN variants which support NFAS you are permitted to add additional line services.
- Verify that the box labeled Enabled is checked
- Enter a name for the new ISDN stack
- Select a variant to associate with the stack
- Determine whether the stack will operate on the user side, or the network side
- Select a primary D-channel line service
- Click Create
4- Verify that the "ISDN stack was successfully created" message appears
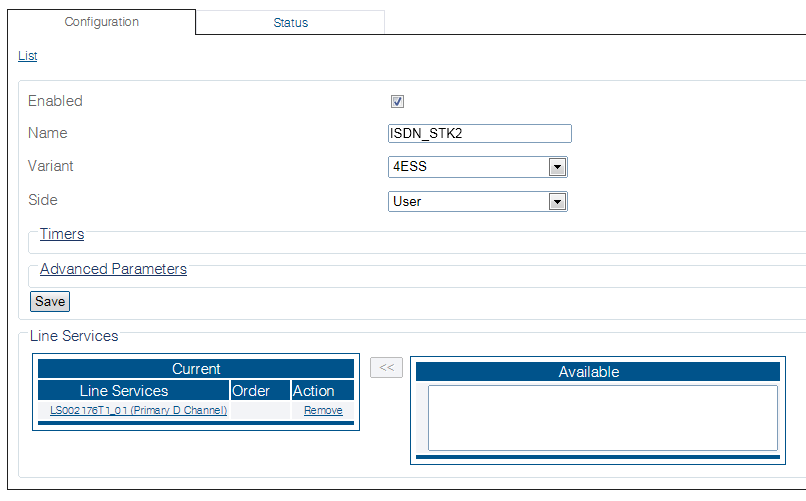
5- Create a backup line:
- Click on the Available line on the righthand side of the screen, and select the arrow to add it to the Current-Line Services. Up to 20 line services can be added in one NFAS group.
- Select the line service that will be used as a D-channel backup by this ISDN stack instance.
- Click Save
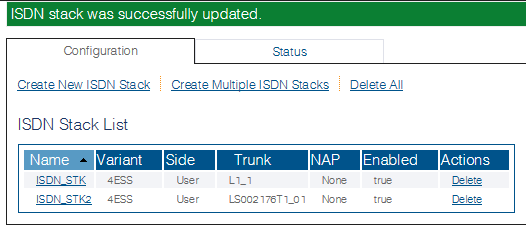
6- Verify that the "ISDN stack was successfully updated" message appears, and that the new trunk line is listed in the ISDN Stack List
List of Parameters
Advanced Parameters
