FusionPBX SIP Trunk Creation
Introduction
This document provides instructions on how to add a SIP Trunk to FusionPBX Server to work with the ProSBC. Please visit the following link for more details about Creating a SIP Trunk in FusionPBX Server
FusionPBX SIP Trunk Configuration
1. Log in into the administration portal via the IP address of the machine that is running FusionPBX.
2. Select the Account tab at the top left and then from the drop-down menu click Gateways.
3. You will now be viewing the Gateways configuration page where you can add, edit or delete gateways.
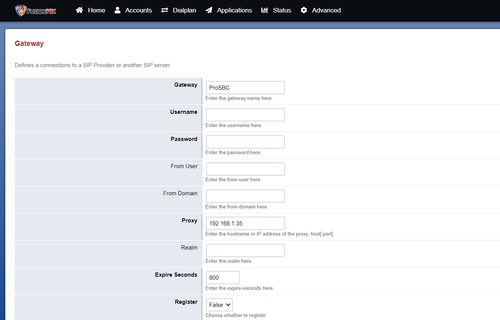
4. Press on the + ADD button on the right side of the screen to add a new gateway. You will be required to fill in the following fields in order to create a new gateway:
- Gateway: Number to dial to reach this user
- Proxy: ProSBC IP address or FQDN
- Register: Set to false. When you set it to false, you will need to specify all of the carrier IP’s in the Advanced > Access Controls.
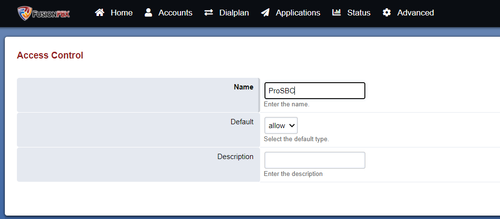
5. When you set Register to false, you will need to specify all of the carrier IP’s in the Advanced > Access Controls. Press on + ADD button. In new window set Name ProSBC and Save it.
6. Press on + ADD button in new window to add ProSBC IP/FQDN address
7. You will be required to fill in the following fields in order to create a new ACL:
- CIDR: If adding a single IP address to the CIDR field make sure to add /32 on the end of the IP address.
- Description: Set as ProSBC
8. Once the configuration is finished, click on the Save button and once the page is refreshed you will see a notice saying Update completed on the top center of the page.


