Sippy SIP Trunk Creation
Introduction
This document provides instructions on how to add a SIP Trunk to Sippy Server to work with the ProSBC. Please visit the following link for more details about Creating a SIP Trunk in Sippy Server
Sippy SIP Trunk Configuration
1. Login into the administration portal via the IP address of the machine that is running Sippy.
2. Select the Vendors -> My Vendors -> Vendors.
3. Click to Add button under the Add Vendor section
4. You will be required to fill in the following fields in order to create a new vendor
- Vendor Name: Give a name to this vendor. We used Telcobridges.
5. You can fill in other pieces of information too and click on Save&Close button 6. Find the newly created vendor in the Vendors list and click on Open Connections link
7. Click to Add button under the Add Connection section
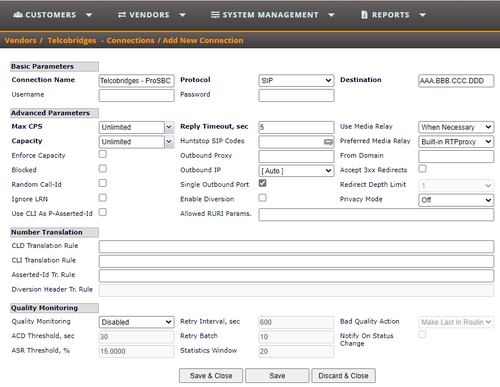
8. You will be required to fill in the following fields in order to create a new connection
- Connection Name Give a name to this connection. We used Telcobridges - ProSBC
- Protocol Select the protocol for this connection. ProSBC only use SIP protocol
- Destination Destination of this connection. It can be IP address or FQDN of the ProSBC
- You can also fill other parts as your requirements and click on Save&Close button
9. To route the calls to ProSBC, you need to add a Destination Sets and assign a route. To add a Destination Set please go to Vendors -> Routing -> Destination Sets
10. Click to Add button under the Add Destination Set section
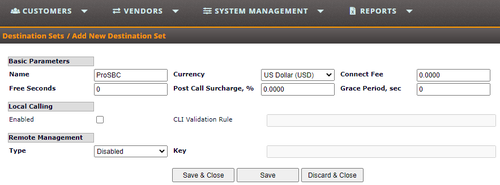
11. You will be required to fill in the following fields in order to create new destinations sets
- Name Give a name to this destination set.
- You can also fill other parts as your requirements and click on Save&Close button
12. Find the newly created destination set in the Vendors list and click on Open Routes link 13. Click to Add button under the Add Route section
14. You will be required to fill in the following fields in order to create a new route
500px
- 'Prefix Enter the prefix for this route. You can add multiple routes to send multiple prefixes from the same Route.
15. You need to assign the Routing Group for Vendor and the Destination set. To do that, go to Vendors -> Routing -> Routing Groups
16.Click to Add button under the Add Routing Group section
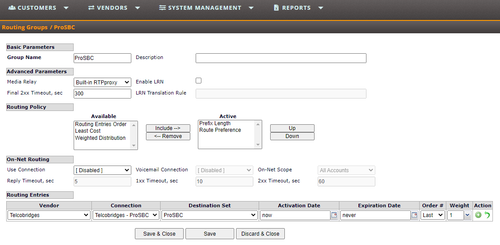
17. You will be required to fill in the following fields in order to create a new routing group
- ' Group Name Give a name to this group
- From the Routing Entries drop-down menus select the newly created vendor from Vendor and select newly created destination set from Destination Set
Until now, you configured a connection in Sippy to send calls outside from ProSBC. To receive calls from ProSBC to Sippy you need to the following
1. You need to create a new account. To create a new account go to Customers -> My Customers -> Accounts
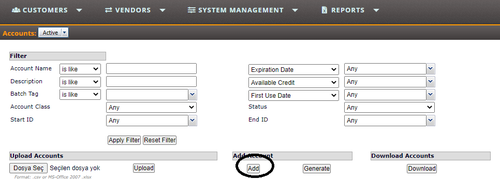
2. Click to Add button under the Add Account section
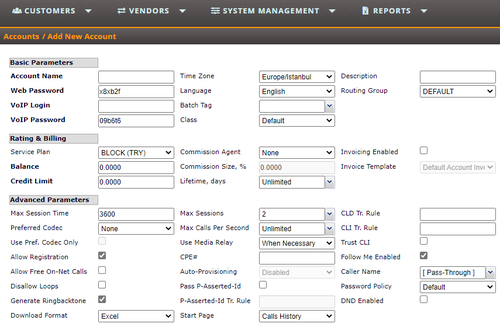
3. You will be required to fill in the following fields in order to create a new account
- Account Name Give a name to this account
- VoIP Login It is the same as the account name.
- VoIP Password If you are going to use registration to this trunk, you need to set a password.
- You can also fill other parts as your requirements and click on Save&Close button
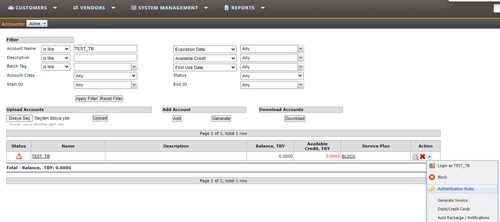
4. Find the newly created account in the Account list. You can use Filter section to search.
5. Use the Action menu to enter Authentication Rules for the new account
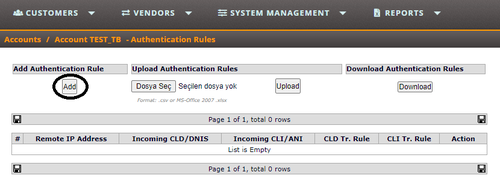
6. Click to Add button under the Add Authentication Rule section
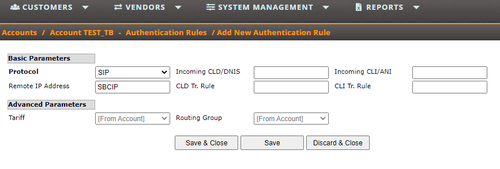
7. You will be required to fill in the following fields in order to create an Authentication Rule
- Protocol Select the protocol for this connection. ProSBC only use SIP protocol
- Remote IP Address IP address of ProSBC. The Sippy will accept the calls if received from this IP address
- You can also fill other parts as your requirements and click on Save&Close button
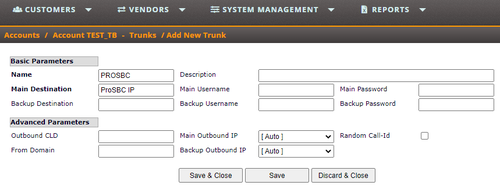
8.The next step is to create an incoming trunk. Use the Action menu to enter Trunk for the new trunk configuration
9. Click to Add New button under the Add Trunk section
10. You will be required to fill in the following fields in order to create a Trunk
- Name Give a name to this trunk
- Main Destination Enter ProSBC IP address in this section
- You can also fill other parts as your requirements and click on Save&Close button
11. The last step is to modify the incoming routing. To modify the routing, use the Action menu to enter Incoming Routing
12. Use Action symbol to modify this routing
13. Select the trunk for this route
- Select the newly created trunk from Trunk drop-down menu


