Toolpack v2.4:Create a NAP
A Network Access Point (NAP) represents the entry point to another network or destination peer.
To create a network access point (NAP):
1. Click "NAP" in the navigation panel:
2. Click "Create New NAP" in the NAP information panel:
3. Configure the new NAP:
- Enter a name for the NAP
- Click "Create" to finalize the configuration
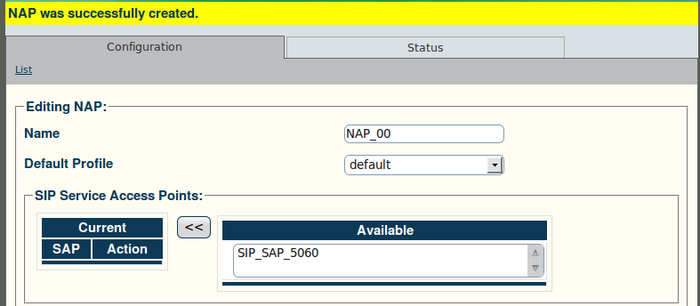
4. Verify that the "NAP was successfully created" message appears:
Associate a SIP, ISDN, or ISUP with the NAP
5. Associate a SIP access point with the NAP:
- Select an access point
- Click the "<<" button to add the access point to the list
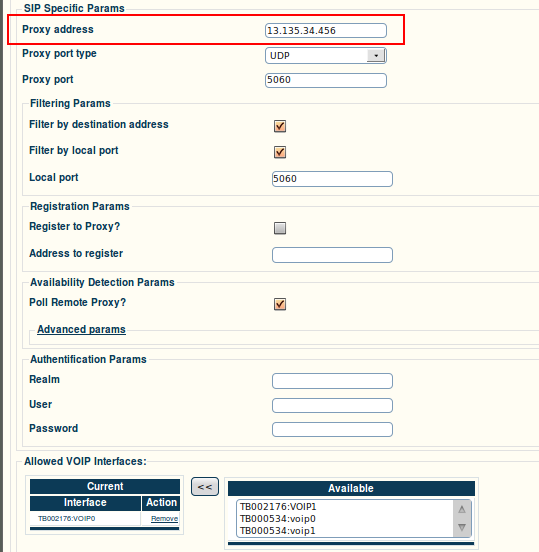
The following screen is displayed:
- Enter a proxy address
- Click "Save" to finalise the configuration
Verify that the "NAP was successfully updated" message appears:
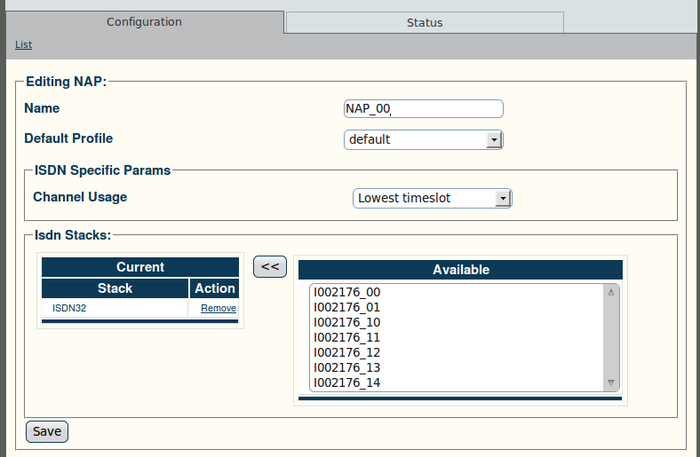
6. Alternately, an ISDN stack can be associated with the NAP:
- Select a stack
- Click the "<<" button to add the stack to the list
The following screen is displayed:
- Click "Save" to finalise the configuration
Verify that the "NAP was successfully updated" message appears:
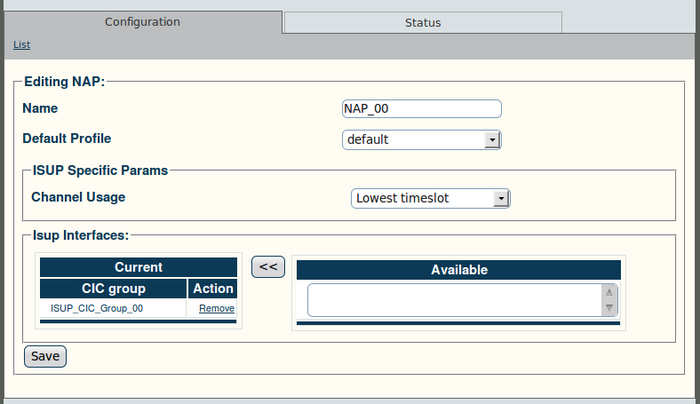
7. Alternately, an ISUP interface can be associated with the NAP:
- Select an interface
- Click the "<<" button to add the interface to the list
The following screen is displayed:
- Click "Save" to finalise the configuration
Verify that the "NAP was successfully update" message appears:


