Toolpack v2.4:Create an M3UA User Part
From TBwiki
(Difference between revisions)
(Created page with '==To create an M3UA user part:== '''1. Click "Create New M3ua Userpart" in the M3UA network configuration window:''' 700px …') |
(Talk about the MTP3 network field in SG config only) |
||
| (2 intermediate revisions by one user not shown) | |||
| Line 1: | Line 1: | ||
| − | ==To create an M3UA user part:== | + | == To create an M3UA user part: == |
| − | '''1. Click "Create New M3ua Userpart" in the M3UA network configuration window:''' | + | '''1. Click "Create New M3ua Userpart" in the M3UA network configuration window:''' |
| − | [[Image: | + | [[Image:Web Portal v2.4 Create M3UA User Part.png|700px]] |
| − | '''2. | + | '''2. Configure the new M3UA user part:''' |
| + | |||
| + | *Enter a name for the user part | ||
| + | *SG: Select a MTP3 network, IPSP and ASP: This field is not visible.<br> | ||
| + | *Click "Create" to finalize the configuration | ||
| + | |||
| + | [[Image:Web Portal v2.4 Creating M3UA User Part.png|700px]] | ||
| + | |||
| + | '''3. Verify that the "M3ua Userpart was successfully created" message appears:''' | ||
| + | |||
| + | [[Image:Web Portal v2.4 M3UA User Part Created.png|700px]] | ||
Latest revision as of 10:43, 9 February 2010
To create an M3UA user part:
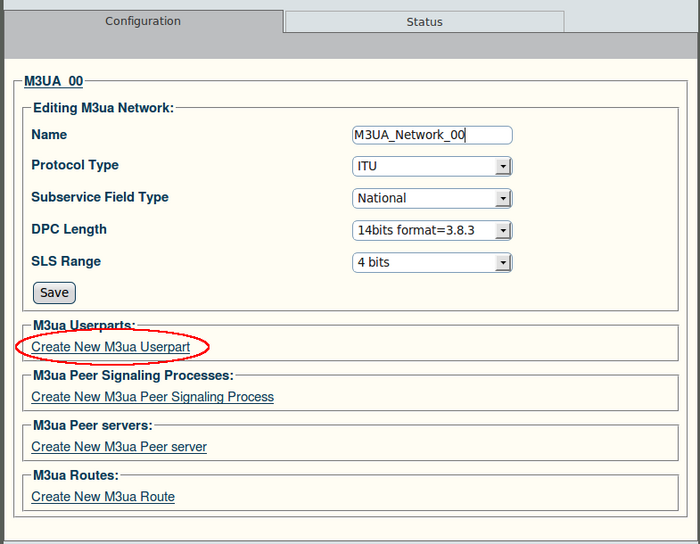
1. Click "Create New M3ua Userpart" in the M3UA network configuration window:
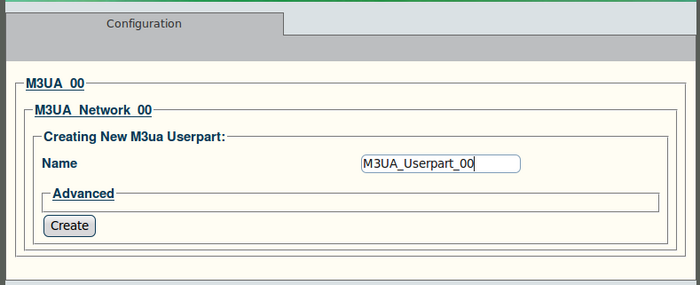
2. Configure the new M3UA user part:
- Enter a name for the user part
- SG: Select a MTP3 network, IPSP and ASP: This field is not visible.
- Click "Create" to finalize the configuration
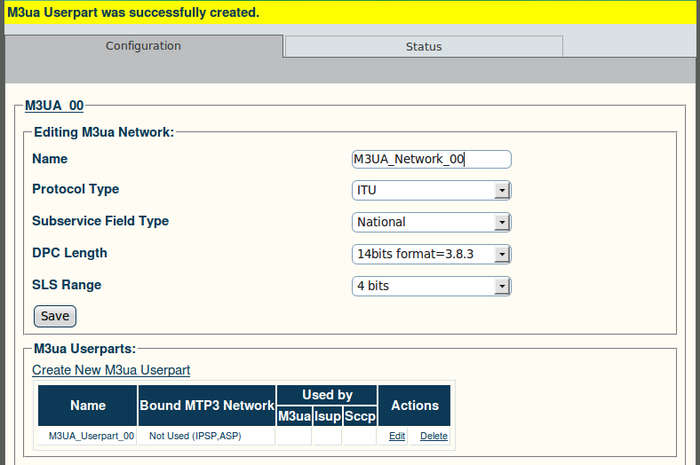
3. Verify that the "M3ua Userpart was successfully created" message appears:


