Toolpack:Creating an IP Tunnel B
From TBwiki
(Difference between revisions)
(→List of Parameters: added advanced parameters and their definitions) |
(Added PPPoE to make it searchable) |
||
| Line 6: | Line 6: | ||
| − | == To configure an IP tunnel == | + | == To configure an IP tunnel (PPPoE) == |
1. Select '''IP Interfaces''' from the navigation panel: | 1. Select '''IP Interfaces''' from the navigation panel: | ||
Revision as of 14:49, 5 August 2016
Applies to version(s): v2.9.
One or more IP tunnels can be defined to manage the IP traffic betweeen two networks.
To configure an IP tunnel (PPPoE)
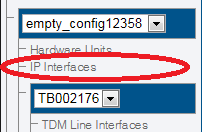
1. Select IP Interfaces from the navigation panel:
2. Click the Tunnels tab:
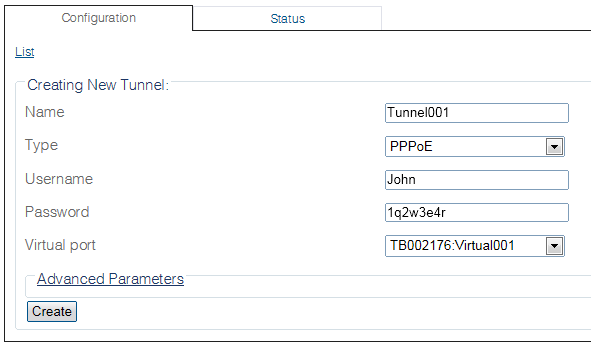
- Click Create New Tunnel
3. Configure the range of ports:
- Enter a name for the IP tunnel
- Select a protocol for the IP tunnel
- Provide a user name and password
- Select a virtual port
- Click Create
4. Verify that the Tunnel was successfully created message is displayed.
Path
/configurations/@[configuration_name]/hardware_units/@[hardware_name]/tunnels/@[tunnel_name]
Parameters (text)
/configurations/@[configuration_name]/hardware_units/@[hardware_name]/tunnels/@[tunnel_name]
name                = "@[tunnel_name]"
password            = "@[password]"
type                = "PPPoE"
unique_name         = ".31"
username            = "@[user_name]"
virtual_port        = ""

/configurations/@[configuration_name]/hardware_units/@[hardware_name]/tunnels/@[tunnel_name]/advanced_parameters
lcp_interval              = "4 seconds"
lcp_max_failure           = 5
mss_clamping              = 1452
mtu                       = 1492
overwrite_default_gateway = false
Parameters (json)
{
  "advanced_parameters" : {
    "lcp_interval" : "4 seconds",
    "lcp_max_failure" : 5,
    "mss_clamping" : 1452,
    "mtu" : 1492,
    "overwrite_default_gateway" : false
  },
  "name" : "@[tunnel_name]",
  "password" : "@[password]",
  "type" : "PPPoE",
  "unique_name" : ".31",
  "username" : "@[user_name]",
  "virtual_port" : ""
}
List of Parameters
Advanced Parameters


