Toolpack v2.4:Adding an Adapter
| Line 23: | Line 23: | ||
| − | '''3. Enter the | + | '''3. Enter a name for the hardware device.''' |
| + | *Enter the serial number of the new hardware device (filling in the Serial Number field will cause auto-completion of the field to occur). | ||
| + | *Select "TMP" or "TMS" from the Adapter Type field. | ||
| + | *Select "Enabled" from the Target State field. | ||
| + | *Click "Create" to store your settings. | ||
| − | |||
| + | [[Image:Web_Portal_v2.4_Creating_New_Hardware.png|700px]] | ||
| − | |||
| − | + | The "List Hardware" window is displayed. | |
| − | + | ||
| − | + | ||
| − | + | '''4. Verify that the newly added hardware device appears in the "List Hardware" window.''' | |
| − | + | [[Image:Web_Portal_v2.4_New_Hardware_Created.png|700px]] | |
| − | + | ||
| − | + | ||
| − | + | ||
| − | + | ||
| − | + | ||
| − | [[Image:Web_Portal_v2. | + | |
| Line 51: | Line 46: | ||
| − | [[Image:Web_Portal_v2. | + | [[Image:Web_Portal_v2.4_New_Hardware_Failed.png|700px]] |
Latest revision as of 10:57, 6 December 2009
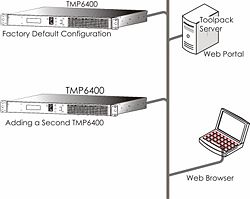
When you receive a new system, at least one hardware configuration will have been set in the Toolpack application server, by default. To add other hardware devices, you must use the Tmedia Web Portal.
To add one or more additional hardware devices to the Toolpack system configuration, their serial numbers must be registered with the Toolpack application server.
To add a hardware device
1. Select Hardware from the navigation panel.
2. Click Create New Hardware from the information panel, to add a new hardware device.
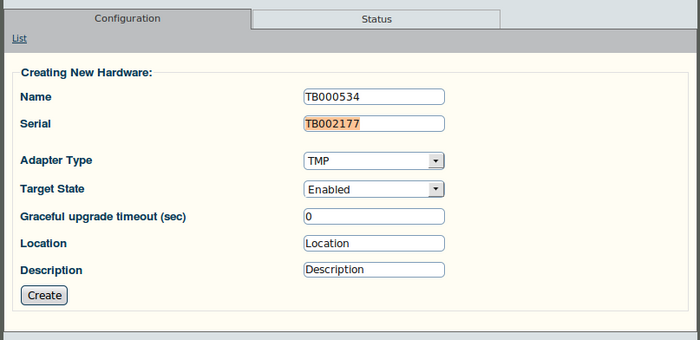
The Create New Hardware window is displayed.
3. Enter a name for the hardware device.
- Enter the serial number of the new hardware device (filling in the Serial Number field will cause auto-completion of the field to occur).
- Select "TMP" or "TMS" from the Adapter Type field.
- Select "Enabled" from the Target State field.
- Click "Create" to store your settings.
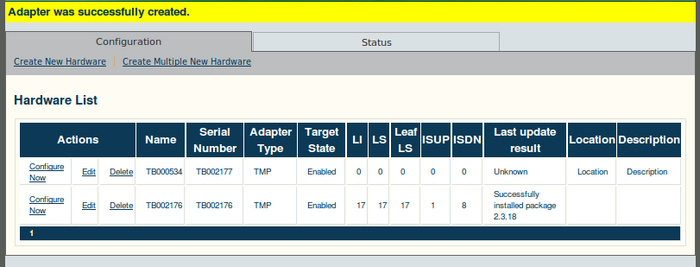
The "List Hardware" window is displayed.
4. Verify that the newly added hardware device appears in the "List Hardware" window.
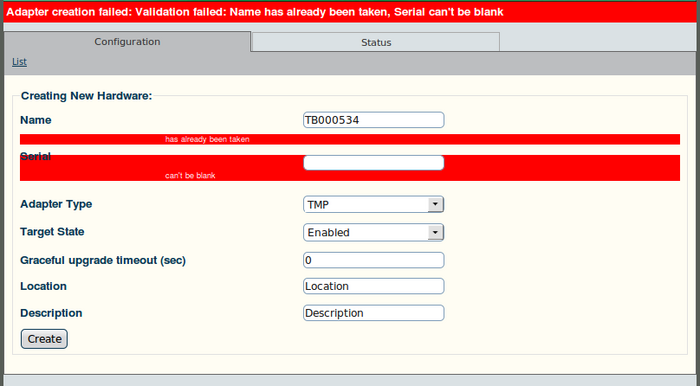
Should you omit necessary information, the Web Portal will display an error message as shown in the figure below.


