Toolpack:Configuring tbSnmpAgent A
From TBwiki
Revision as of 12:38, 21 June 2011 by Jasmin Letendre (Talk | contribs)
Once you are logged into the Web Portal and have successfully activated the tbSnmpAgent application, follow these steps to configure the application to suit your needs:
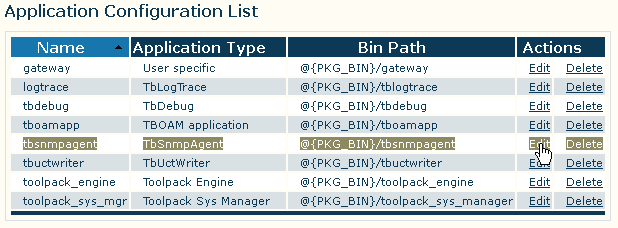
- Under the Applications heading, in the Web Portal navigation panel, click the Configurations tab.
- In the Application Configuration List, find the entry for tbsnmpagent and click the link labeled edit, next to that entry.
The tbSnmpAgent Application Configuration window is divided into several sections, which may be of interest to customers
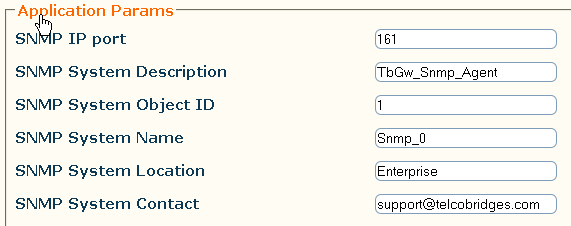
- Under the Application Params heading, the following general application parameters can be configured:
- SNMP IP Port: the port to use for making SNMP requests (standard default value is 161)
- SNMP System Description: the textual description that will appear when polling the sysDescr variable of the SNMPv2-MIB
- SNMP System Object ID: the value appended to TelcoBridges' value (.1.3.6.1.4.1.21776.3) for the SNMPv2-MIB variable sysObjectId
- SNMP System Name: the textual description that will appear when polling the sysName variable of the SNMPv2-MIB
- SNMP System Location: the textual description that will appear when polling the sysLocation variable of the SNMPv2-MIB
- SNMP System Contact: the textual description that will appear when polling the sysContact variable of the SNMPv2-MIB

- Under the Advanced Params heading, the following general application parameter can be configured:
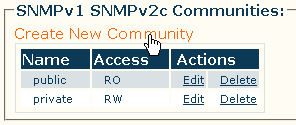
- Under the SNMPv1 SNMPv2c Communities heading, new communities can be created for SNMP versions 1 or 2:
- By default, the standard communities public (read-only access), and private (read-write access) have been created
- Click Create new community to create a new community for SNMPv1, or SNMPv2

- Under the SNMPv3 Users heading, new users can be created for SNMP version 3:
- By default, no SNMPv3 users are created
- Click Create new SNMPv3 user to create a new user definition for SNMPv3

- Under the SNMP Trap Destinations heading, destination addresses for SNMP traps can be defined:
- By default, no SNMP trap destinations are defined
- Click Create New SNMP Trap Destination to create a new destination for sending SNMP traps to

- Under the Log Params heading, logging parameters for the application can be set. The directory and format that logs are stored in can be selected.
- Under the Advance Params heading, operational time delays ca be modified.


