Creating an ISUP Network
| This article applies to: | Product | Version |
| Tmedia | 2.9, 2.10, 3.0, 3.2 |
After you create an ISUP stack, you must create a ISUP network.
The ISUP network communicates with the ISUP protocol layer about the collection of SS7 nodes that are accessible through MTP3 or M3UA. Based on your system configuration, you must create one or more ISUP networks. Repeat this procedure for as many networks as you require.
NOTE: An ISUP network can be used by multiple ISUP interfaces even if they are members of different ISUP userpart; for example, to support multiple switch variants for a single SS7 network.
To create an ISUP network:
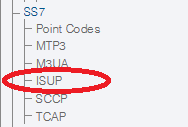
1- Click ISUP in the navigation panel.
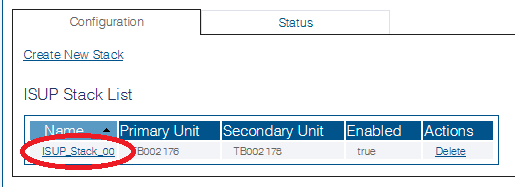
2- Select the ISUP stack
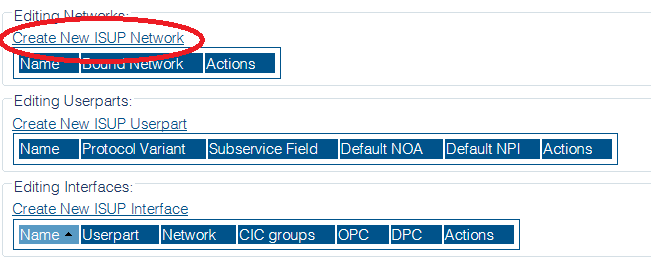
3- Click "Create New ISUP Network" in the ISUP stack configuration window
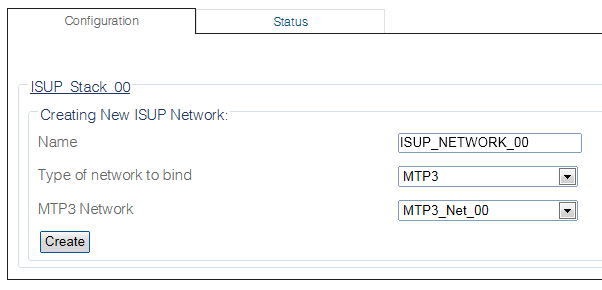
4- Configure the new ISUP network:
- Enter a name for the network
- Select MTP3 or M3UA as the type of network to bind
- Select a MTP3 network or a M3UA network
- Click Create
5- Verify that the "IsupNetwork was successfully created" message is displayed.
Path
/configurations/@[configuration_name]/isup_stacks/@[isup_stack]/isup_networks/@[isup_network]
Parameters (text)
/configurations/@[configuration_name]/isup_stacks/@[isup_stack]/isup_networks/@[isup_network]
bound_m3ua_userpart = ""
bound_mtp3_network  = "@[mtp3_network]"
bound_type          = "MTP3"
name                = "@[isup_network]"
Parameters (json)
{
  "bound_m3ua_userpart" : "",
  "bound_mtp3_network" : "@[mtp3_network]",
  "bound_type" : "MTP3",
  "name" : "@[isup_network]"
}
List of Parameters
- Name
- Type of Network to Bind
- Depending on the type chosen:


