Toolpack Installation v2.2:Windows XP
Prerequisites
The prerequisites in this section include the requirements for a basic development host computer on which Toolpack will run. In addition to this, the required support applications and services that must be present on the host machine before installing the Tmedia Toolpack are listed in this section, along with the various locations from which the support software may be retrieved.
Base Development Package
The minimum requirements of the computer running Toolpack are listed below:
- Intel or AMD-based system, operating at 2Ghz or more with 1GB of memory
- Windows 2000 Professional/Server with Service Pack 3 or later, or Windows XP with Service Pack 2 or later. The Toolpack software packages have not been tested with other versions of Windows.
- WinZip, WinRar, 7Zip, or an equivalent extraction software
- HyperTerminal or equivalent serial access application
- One 1Gbps Ethernet adapter (two for network redundancy). TelcoBridges recommends 1Gbps for all installations.
Note: It is mandatory to disable the anti-virus software’s on-access scan in the MySQL database directory (generally C:\Program Files\MySQL\MySQL Server 5.0\data), as this will prevent database backup operations from completing properly after a Toolpack System Update.
Note: The Windows firewall may prevent Toolpack from working properly. We recommend disabling the firewall, or enabling all UDP and TCP ports on the local network.
Toolpack System
The software listed below is required by the host machines:
- LibIConv 1.9.2 or later (It is a dependency of LibXml2). Located at:
- LibXml2 2.6.30 or later. Located at:
- Zlib 1.2.3 or later. Located at:
- MSVC8 Redistributable: If you plan on using TBToolPack-x.y.zz-msvc8-Setup.exe, then you need to install the following:
Toolpack Stream Server
The Tmedia Toolpack Stream Server requires WinPCAP 4.0 or later. It can be downloaded from the following location:
Toolpack System Database
The Toolpack system database is used by the main host and requires MySQL database server version 5.0 or later. It can be downloaded from the following location:
Toolpack System Web Portal
The Toolpack System Web Portal is required in order to host the Toolpack Web Portal. It requires the following software:
- Ruby 1.8.6 or later. Located at:
- Mongrel web server
Installing the Prerequisite Software
The following software is required in order to run Toolpack:
LiblConv, LiblXml2, and zlib
- Download the packages from the location listed in the Toolpack sytem section and
copy the DLL file to C:\Windows\System32, or elsewhere in the PATH environment variable.
WinPCAP 4.0
- Download from the location listed in the Toolpack stream server section.
- Use the default installation parameters.
MySQL Database Server
- Download from the location listed in the Toolpack sytem database section.
- Choose "complete installation"
- Run the MySQL Server Instance Configuration Wizard. (You should be prompted to do so after
selecting complete installation.)
- Choose "standard configuration"
- Install the application as a Windows service and check, "Launch Automatically".
- Choose "Include Bin Directory in Windows PATH".
- Enter a User Name and Password, and note them down on paper as you will need them later in
the installation process.
- Enable access from remote machines if you plan to run Tmedia Toolpack on more than one host
machine.
Ruby
- Download from the location listed in the Toolpack sytem web portal section.
- Use the default installation parameters.
Mongrel
Install Mongrel using the following commands:
- gem install mongrel --include-dependencies
Update the Windows Firewall
Make sure that the firewall enables the following services and ports. Failure to open these ports will render socket communication between the distributed software elements unavailable:
- Service: http (80/tcp)
- Service: https (443/tcp)
- Port: All ports (tcp/udp) enabled for local networks
Note: Make certain that all of the installed DLLs for the applications are accessible through the
PATH environment variable. These DLLS must be available through the paths:
- libxml2.dll, iconv.dll, zlib1.dll, and libmysql.dll
Toolpack Software Installation
Note: The instructions listed in this section require that all prerequisite procedures be followed as listed in the Prerequisites section.
Note: The instructions listed in this section assume the installation of package version
2.2.0. When installing another version (e.g. 2.3.4), replace the following references:
- All references to “2.2.0” replaced by “2.3.4”
- All references to “2_2_0” replaced by “2_3_4”
- All references to “2_2” replaced by “2_3”
Installing Toolpack
Follow the instructions listed below in order to install Toolpack:
- Download the Toolpack installer, named "TBToolPack-2.2.0-Setup.exe", and double-click on it.
- Follow on-screen instructions.You will be asked to provide an IP address, user name and password for the database to use with this Toolpack system. You will also be asked to provide a license (or a zip file that contains multiple licenses) for the TMP6400 boards, which will be used with this installation.
- You may optionally change some parameters in the following file:
- C:\TelcoBridges\toolpack\setup\2.2\toolpack.ini
- TBX_GW_PORT: The default value is 12358. However, you need to change it to another unique value if you are installing another Toolpack System on the same local subnet. Otherwise, applications from the two systems will detect each other and interact in an unpredictable manner. Do not change this value after the Toolpack system has been launched!
- TBX_GW_ADDRESS_0: Uses the local IP address of the host, which is on the same subnet as the first Ethernet interface for the TMP6400 boards. This is recommended if the host has more than one IP address.
- TBX_GW_ADDRESS_1: Uses the local IP address of the host which is on same subnet as the second Ethernet interface for the TMP6400 boards. This is recommended if the host has more than one IP address. Otherwise, use “NONE”.
- TBDB_UID and TBDB_PWD: Can be changed to match the user name and password you defined earlier for the MySQL database.
- C:\TelcoBridges\toolpack\setup\2.2\toolpack.ini
- Select the default parameters that will be used in creating the initial configuration in the database. It will be possible to modify these parameters later, once the Toolpack System is running. To set these parameters, edit the following file:
- C:\TelcoBridges\toolpack\setup\2.2\toolpack.yml
Install Licenses
This section presents how to manually install the license files required for each TMP6400 board installed, in case they were not provided to the installer during Toolpack installation. Follow these instructions in order to get the appropriate license files:
- Identify the serial number of the TMP6400 boards that will be used by this Toolpack system.
- Contact the TelcoBridges support department and ask for licenses for the appropriate package (2.2.0), and for the appropriate TMP6400 boards.
- Copy all licenses provided by TelcoBridges into the following directory:
- C:\TelcoBridges\toolpack\setup\2.2\licenses
Starting and Stopping Toolpack
This section presents how to start and stop the Toolpack service, which in turn will launch or shutdown all applications required by the Toolpack System.
Manually starting or stopping Toolpack:
- Make sure that the Windows integrated firewall has been properly configured (or completely disabled) for the Toolpack applications to access to the local network on any UDP or TCP port.
- To launch Toolpack, double-click on the following application:
- C:\TelcoBridges\toolpack\service\tbtoolpack_service.exe
- To stop Toolpack, close the tbtoolpack_service.exe window.
Starting Toolpack as a Windows service:
Open a DOS shell and run:
- tbtoolpack start
Note that this service will not automatically restart when Windows is rebooted. You can enable
automatic start of Toolpack at system start-up by editing the Toolpack service configuration in:
- Start->Program->Administrative Tools->Services

Stopping the Toolpack Windows service:
Open a DOS shell and run:
- tbtoolpack stop
Note: It can take from a few seconds to few minutes before the system is fully running. During that period, the Web Portal may not be available. It may take longer the first time the system is started, as a default configuration needs to be created in the database.
Using the Toolpack Web Portal to View System Status
In order to view Toolpack system status and verify that it’s properly running, you will need to connect to the Toolpack Web Portal:
- Using a web browser, type:
- http://127.0.0.1:12358/
- Replace port 12358 by the actual value of TBX_GW_PORT value set earlier.
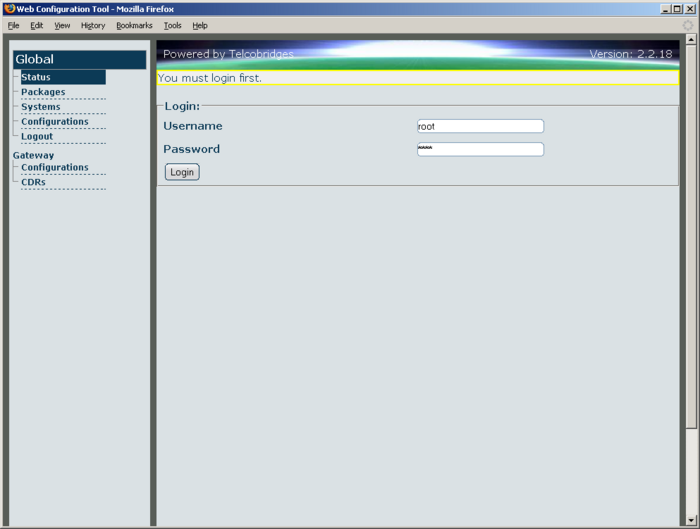
- Enter your user name and password. You will be presented with the global status page of the Toolpack system. On this page, you can switch from one tab to the other, in order to view the status of various components of the system.


Using the Toolpack Web Portal to Configure the Tmedia System
Configuring the Toolpack system is done through the Web Portal. Connect to the Web Portal as explained above, then visit the different links to the left of the page in order to configure the various components of the system.
For further information on how to use the Toolpack Web Portal to configure your system, refer to the appropriate Web Portal Tutorial Guide.
Configure Streamserver for File Playback and Recording
By default, the Streamserver application is not launched within the Toolpack System. It’s installed in "maintenance mode" because it requires some manual configuration that depend on the host's hardware capacities. The StreamServer is necessary on installations that are required to play back files and record audio on active calls (to implement features such as ring back tone, IVR, voice mail, etc). This section explains how to configure and start the Streamserver application:
- Navigate to: “Applications -> Configurations” (always visible on the left of the screen).
- Click “Edit” on the Streamserver application.
- Adjust parameters. It is important to configure these parameters with care according to the host capacities and to the system playback and recording requirements. Pay particular attention to “RAM limit” and “Database chunk size” parameters, which are highly dependent on the hardware configuration. For information on how to configure the Streamserver application, please refer to the TBStreamServer Hardware Guide.
- Click “Save”.
- Navigate to: “Applications -> Instances” (always visible on the left of the screen).
- Switch to “Status” tab.
- Click on the Stream server application name.
- Change the “Oam Target State” to “Run”.
- Click “Apply states”.
The Streamserver application should now be running and connected to other applications. It is now possible, from the Gateway application or other custom-built applications, to play back and record files. In order to play, audio files must be stored on the server. When playback or recording commands are issued, a file path is provided. That file path can be absolute, or relative. When relative, the following is the default directory:
- C:\TelcoBridges\toolpack\setup\2.2\apps\tbstreamserver
It is now up to the user to store appropriate files on the server in a chosen directory.
Files should be in WAV format, with the following characteristics:
- Encoding:
- aLaw / uLaw
- PCM 8 bits / 16 bits
- ADPCM (G721 32Kbps, G723 24Kbps or G726 16Kbps, Dialogic VOX)
- Channels:
- Mono / Stereo
- Sample rate:
- 8Khz, 11.025Khz, 16Khz, 22.05Khz, 44.1Khz or 48Khz
Note: The following file extensions are also supported:
.alaw, .ulaw, .pcm, .pcm8, .g721, .g723, .g726, .vox, .vox6
Connect to Applications Shell and View Various Statuses
The tbx_cli_tools_remote.exe tool enables you to remotely connect to Telcobridges applications running in service mode. This will allow you access to their text-based interfaces and to verify log files as well as application status:
- Open a shell prompt and type the following commands (replace port 12358 by the actual value of TBX_GW_PORT value set earlier):
- cd c:\TelcoBridges\toolpack\pkg\2.2.0\bin\release\i586-win32
- tbx_cli_tools_remote.exe -gw 12358
- Select the application to remotely control from the displayed list. You should see the following applications:
- tboam_app: This is the main Toolpack application that launches and monitors all other applications in the system. It’s command-line interface presents multiple pages that show information about loading configurations, validation status, the status of launched applications, and system update status.
- web_server: This application is a wrapper that launches the actual web server. Very little information is displayed in this window (the actual web server’s log is not displayed here).
- toolpack_sys_manager: This application is responsible for applying active configurations onto the TMP6400 boards, and activating toolpack_engine to enable call control.
- toolpack_engine: This application is responsible for allocating all resources (signaling and data path) required to establish calls.
- gateway: This application implements actual call flow and routing. It controls the engine, telling it when to accept calls, answer calls, play or record files, enable tone detection, etc. This gateway application provides basic routing from incoming calls to outgoing calls. However, it can be replaced by other call control applications, in order to implement different call flows.
Toolpack Redundant Host Installation
Note: The instructions listed in this section assume the installation of the package version 2.2.0. When installing another version (e.g. 2.3.4), replace the following references:
- All references to “2.2.0” replaced by “2.3.4”
- All references to “2_2_0” replaced by “2_3_4”
- All references to “2_2” replaced by “2_3”
Installing Toolpack
Note: The following changes to the redundant host need only be carried out once, in order to install an initial Toolpack package. Once Toolpack is running on that host, it will automatically update itself to any other package installed and activated on the main host of this Toolpack system:
- Download the Toolpack installer, named “TBToolPack-2.2.0-Setup.exe”, and double-click on it.
- Follow on-screen instructions.You will be asked to provide an IP address, user name and password for the database which will be used with this Toolpack system. You can skip the installation of the license.
- Note: Make sure that you provide the IP address of the same MySQL server that was used on the primary Toolpack host.
- You may optionally change some parameters in the following file:
- C:\TelcoBridges\toolpack\setup\2.2\toolpack.ini
- TBX_GW_PORT: The default value is 12358. However, you need to change it to another unique value if you are installing another Toolpack System on the same local subnet, otherwise applications from both systems will detect each other and interact in an unpredictable manner. Do not change this value after the Toolpack system has been launched! Make sure that this value is the same as the one used on the primary host of the Toolpack system.
- TBX_GW_ADDRESS_0: Uses the local IP address of the host which is on same subnet as the first Ethernet interface of the TMP6400 boards. This is recommended if the host has more than one IP address.
- TBX_GW_ADDRESS_1: Uses the local IP address of the host which is on same subnet as the second Ethernet interface of the TMP6400 boards. This is recommended if the host has more than one IP address. Otherwise, use the value “NONE”.
- TBDB_UID and TBDB_PWD: Can be changed to match the user name and password defined earlier for the MySQL database.
- C:\TelcoBridges\toolpack\setup\2.2\toolpack.ini
Create the Redundant Host Configuration in the Web Portal
Before starting Toolpack on the redundant host, it is mandatory to create the configuration for that host in the Web Portal. Toolpack will refuse to start on the redundant host if it cannot find a configuration:
- Go to the main host of the Toolpack system (not the redundant host yet). Using a web browser, type:
- http://127.0.0.1:12358/
- Then, replace port 12358 by the actual value of TBX_GW_PORT set earlier.
- Enter a user name and password to login.
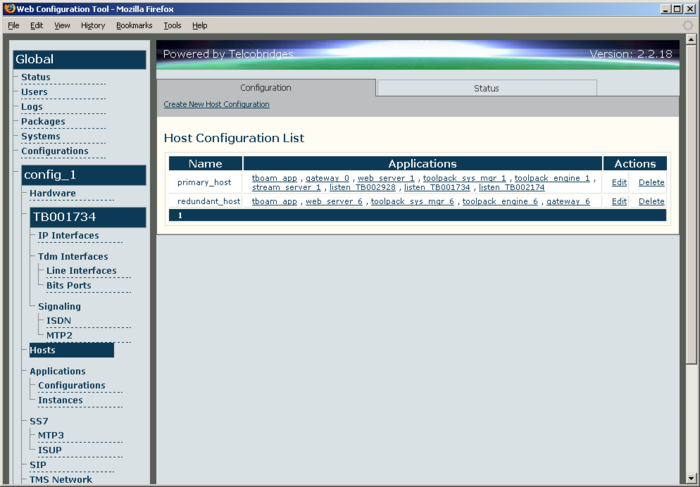
- Click on the “Hosts” link to the left of the screen.
- Click on “Create New Host Configuration”.
- Enter the required information:
- Enter the host name (this must exactly match the name of the redundant host).
- Select one or multiple functions that this host should fulfill. These should generally be "Management", "Call", and in some cases, "Streamserver".
- Click "Create".
- Click on the “Systems” section on the left of the screen.
- Click “Edit” on the current system.
- Click the “Build application list” link.
- Go back to the “Hosts” section on the left of the screen. You should see something like this:

Starting Toolpack on the Redundant Host
To start or stop Toolpack on the redundant host, follow the instructions provided earlier in the section on starting and stopping Toolpack.
Using the Toolpack Web Portal to View System Status
In order to view the status of Toolpack on the secondary host, click on the "Status" section on the left of the page, then select the "Hosts" tab. You can also see the status of individual applications on the redundant host under the "Applications" tab.

Updating the Package Version on the Redundant Host
Note: There are no changes to be made to the redundant host in order to install a new package version. Once the package is installed on the primary Toolpack host, it will automatically be replicated on any redundant host.
Connect to the Applications Shell and View Various Statuses
The "tbx_cli_tools_remote.exe" tool enables you to remotely connect to Telcobridges applications, including those running on the redundant host. This allows the reading of log files, and the viewing of more detailed application statuses on both hosts of the Toolpack system. Open a shell prompt and type the following command (replace port 12358 by the actual value of TBX_GW_PORT set earlier), in order to use the tool:
- cd c:\TelcoBridges\toolpack\pkg\2.2.0\bin\release\i586-win32
- tbx_cli_tools_remote.exe -gw 12358
Toolpack Minor Software Update
Note: The instructions listed in this section require that Toolpack be installed, as per the installation procedure described in the Toolpack Software Installation section. This procedure is used to update Toolpack to a new version from the same major branch, for example from version 2.2.3 to 2.2.5. Instructions for the updating to another major version, for example from 2.2.X to 2.3.X are described in the Toolpack Major Software Update section.
Note: This procedure can be done while the system is already running under the previous version. It will be possible, at any time, to switch back and forth between the newly installed version and the other versions already present.
The minor software update of the Toolpack application consists of the following:
- Running the installer for the new version to install.
- Instructing the running system to switch to the new package
Note: The instructions listed in this section assume the update is done to the package version 2.2.3. When installing another version (e.g. 2.3.5), replace the following references:
- All references to “2.2.3” replaced by “2.3.5”
- All references to “2_2_3” replaced by “2_3_5”
- All references to “2_2” replaced by “2_3”
Run the Toolpack Installer
Follow the following instructions, in order to run the Toolpack installer:
- Download the Toolpack installer, named “TBToolPack-2.2.0-Setup.exe”, and double-click on it.
- Follow on-screen instructions.You will be asked to provide an IP address, user name and password for the database to use with this Toolpack system. You will also be asked to provide a license (or a zip file that contains multiple licenses) for the TMP6400 boards to be used by the installation. This will install the new version in a separate directory. It does not override any previous installations.
Activate the Newly Installed Package
After being installed, a new Toolpack version is not automatically activated, and the Web Portal interface must be used to active it whenever the system is ready for an update (for example, during low-traffic periods). Once activated, the Toolpack System will automatically update itself to the new package with minimal service interruption. The automatic update will perform the following operations:
- Update the database, if appropriate, with newly added tables and parameters.
- Shut down and re-launch each application from the new package, one at the time, including the web server.
- Install the new package on each TMP6400 board
- Note: Some active and transient calls will be lost during the update. A TMP6400 board cannot handle calls when being updated. Calls need to be handled by the other TMP6400 boards of the system, if the system configuration allows that.
- Define the new package in the Web Portal: Connect to the Web Portal, then click on the link "Packages" (always visible on the left of the screen)
- Click "Create New Package"
- Set the package name to "2.2.3", the package path to "2.2.3" (or the appropriate package version), and click "Save". Activate the new package
- On the Web Portal, click the "Systems" link (always visible on the left of the screen)
- Click the "Edit" button of the current system
- Scroll down to the "Activate package" section, choose package "2.2.3" from the pop-up menu, then click "Activate".
- Click again on the section "Systems" to see the current status. The update will be complete when "2.2.3" is moved from "Target Package" to "Active Package". You will have to manually refresh your Web Browser page to see that change.
Note: The update process will take up to 5 minutes per TMP6400 board in the system.
Toolpack Major Software Update
Note: The instructions in this section refer to updating the Toolpack software from one major branch to another (from 2.2.X to 2.3.X, for example). Instructions to switch between two versions from the same major branch (from 2.2.3 to 2.2.5 for example) are found in the Minor Software Update section.
Note: This procedure must be done while the Toolpack system is NOT running.
The major software update of the Toolpack application consists of the following:
- Stopping the Toolpack system.
- Running the installer for the new version to install.
- Changing the Toolpack system working directory in the configuration file
- Starting the Toolpack system again.
Note: The instructions listed in this section assume that the system is being updated to package version 2.3.0. When installing another version (e.g. 2.4.5), replace the following references:
- All references to “2.3.0” replaced by “2.4.5”
- All references to “2_3_0” replaced by “2_4_5”
- All references to “2_3” replaced by “2_4”
Stop the Toolpack system
Stop the Toolpack system by following the procedure described in the Starting and Stopping Toolpack section of the guide.
Run the Toolpack Installer
- Download the Toolpack installer named “TBToolPack-2.3.0-Setup.exe”, and double-click on it.
- Follow the on-screen instructions. You will be asked to provide an IP address, user name and password for the database to use with this Toolpack system. You will also be asked to provide a license (or a zip file that contains multiple licenses) for the TMP6400 boards to be used with this installation.
- You must change some parameters in the following file:
- C:\TelcoBridges\toolpack\setup\2.3\toolpack.ini
- Make sure to use the same parameters in this file as the previous version’s file (C:\TelcoBridges\toolpack\setup\2.2\toolpack.ini)
- TBX_GW_PORT: The default value is 12358. However, you need to change it to another unique value if you are installing another Toolpack System on the same local subnet, otherwise applications from the two system will detect each other and interact in an unpredictable manner. Don’t change that value after the Toolpack system has been launched once. Make sure that this value is the same as the one used on the primary host of the Toolpack system.
- TBX_GW_ADDRESS_0: Uses the local IP address of the host which is on same subnet as the first Ethernet interface of the TMP6400 boards. This is recommended if the host has more than one IP address.
- TBX_GW_ADDRESS_1: Uses the local IP address of the host which is on same subnet as the second Ethernet interface of the TMP6400 boards. This is recommended if the host has more than one IP address. Otherwise, use the value “NONE”.
- TBDB_UID and TBDB_PWD: Can be changed to match the user name and password you defined earlier for the MySQL database.
- C:\TelcoBridges\toolpack\setup\2.3\toolpack.ini
Note: This will install the new version on a separate directory. It does not override any previous installations.
Change the Toolpack Working Directory
Edit the following configuration file:
- C:\TelcoBridges\toolpack\service\config.txt
Replace any reference to “2.2” for “2.3”. For instance:
- application= C:/TelcoBridges/toolpack/setup/2.2/apps/tboamapp/tboamapp_wd_cfg.ini
becomes: application= C:/TelcoBridges/toolpack/setup/2.3/apps/tboamapp/tboamapp_wd_cfg.ini
Start the Toolpack System
Start the Toolpack system by following the procedure described in the Starting and Stopping Toolpack section of the guide.
Note: Once started, the Toolpack system will update the version of any TMP6400 board in the system. This operation can take up to 5 minutes per TMP6400 board.
Roll Back to a Previous Version
To roll back to a previous version, reverse the process described above (except for running the installer):
- Stop the Toolpack system
- Revert any reference to “2.3” for “2.2” in the file C:\TelcoBridges\toolpack\service\config.txt
- Start the Toolpack system
Toolpack Software Uninstall
There is no automatic tool to uninstall the Toolpack Software. However, it’s very easy to uninstall.
Note: The instructions listed in this section assume that the package to uninstall is version 2.2.3. When uninstalling another version (e.g. 2.3.5), replace all references to “2.2.3” with “2.3.5”.
Uninstall a Minor Toolpack Software Version
To uninstall a minor Toolpack Software version (2.2.3, for example, but not the other 2.2.x), the procedure is the following:
- Make sure the package to uninstall (2.2.3) is not active, by connecting to the "systems" section of the Web Portal (the “Active package” must not be “2.2.3”). If appropriate, switch the system to another package, and wait until the switch has completed.
- Erase the appropriate folder on the server:
- C:\TelcoBridges\toolpack\pkg\2.2.3
Uninstall the Entire Toolpack Software
To uninstall the complete Toolpack Software:
- Make sure the Toolpack system is not running, by entering the following DOS command:
- tbtoolpack stop
- Erase the entire toolpack home directory:
- C:\TelcoBridges\toolpack
- If it is no longer required by other applications, also uninstall the Mysql database through the Windows control panel (“Add or Remove programs”).
Other References
Documentation concerning the configuration and operation of the Toolpack application can be accessed from the Web Portal Tutorial Guides page.